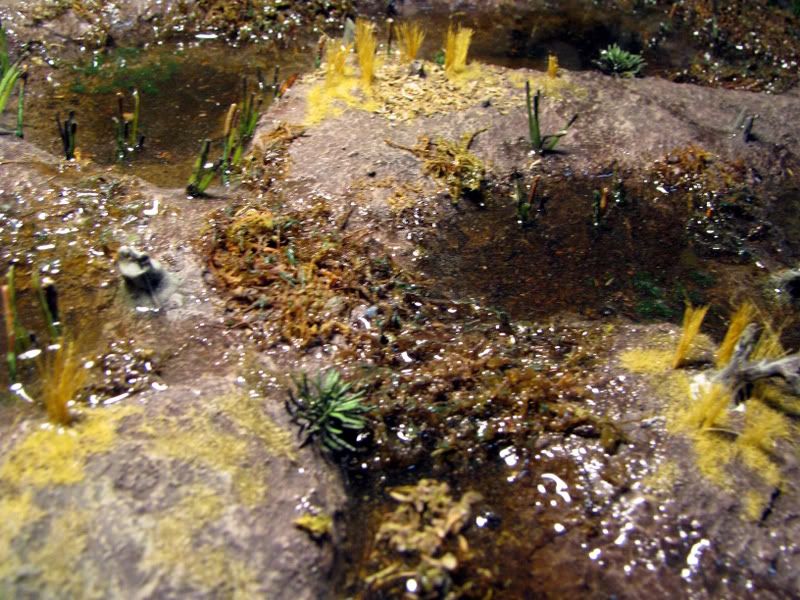
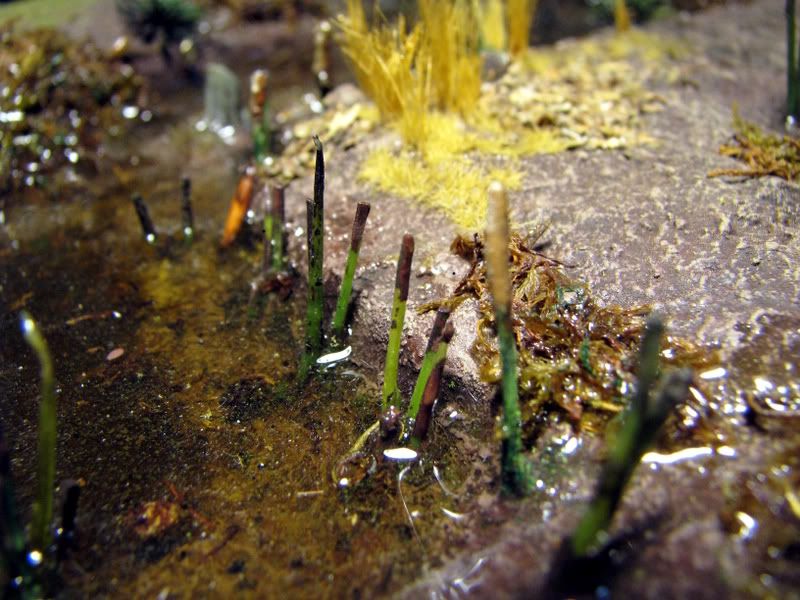
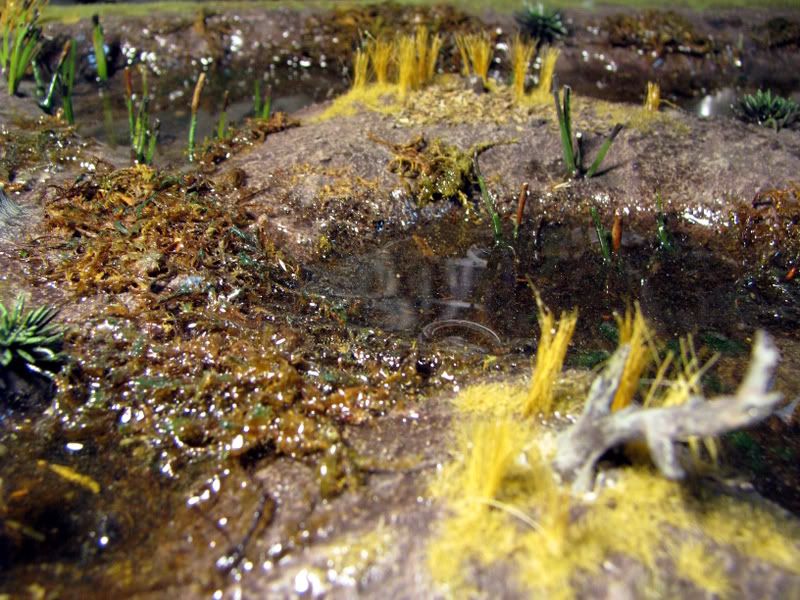
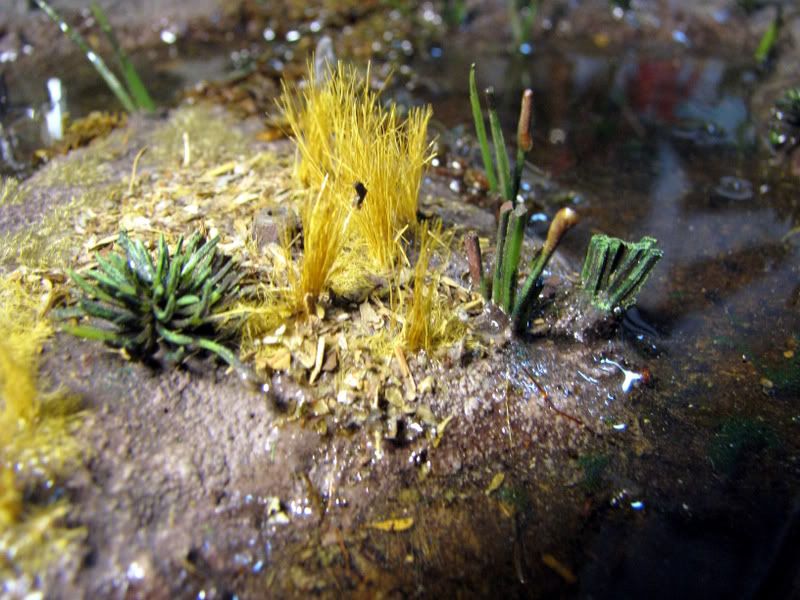
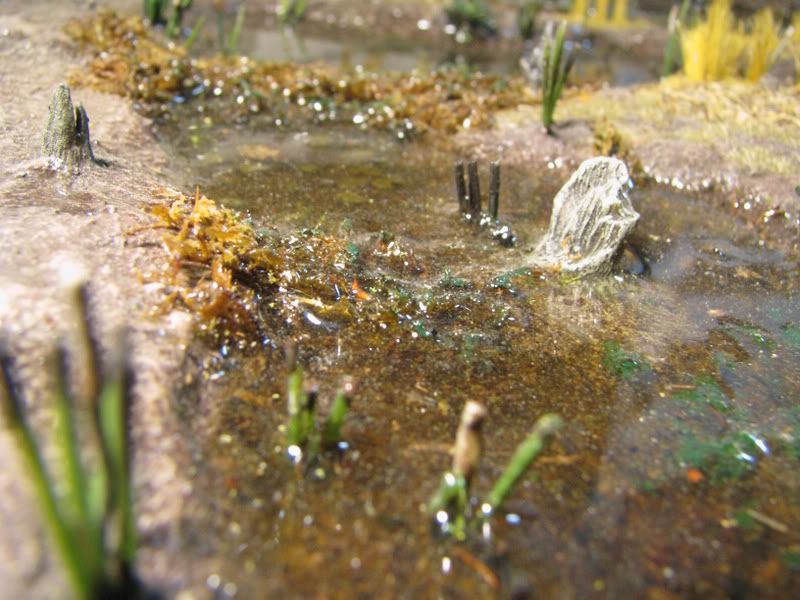
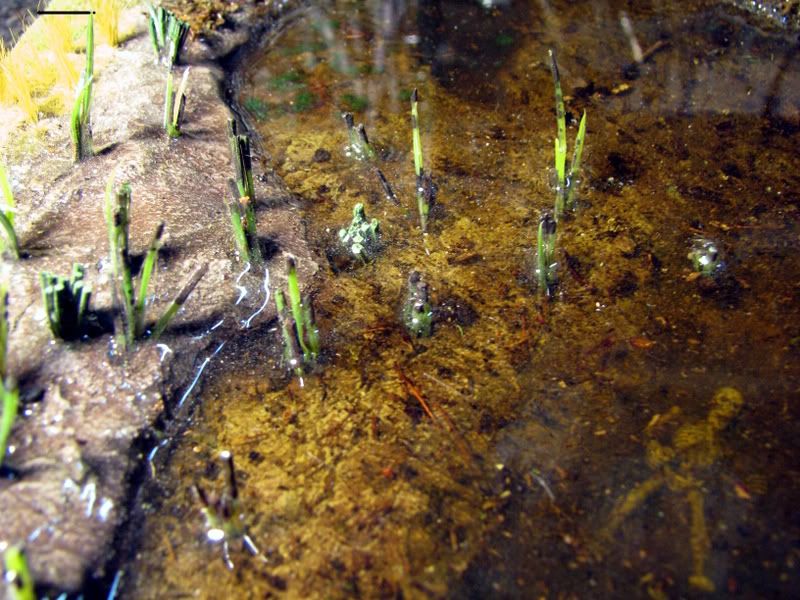
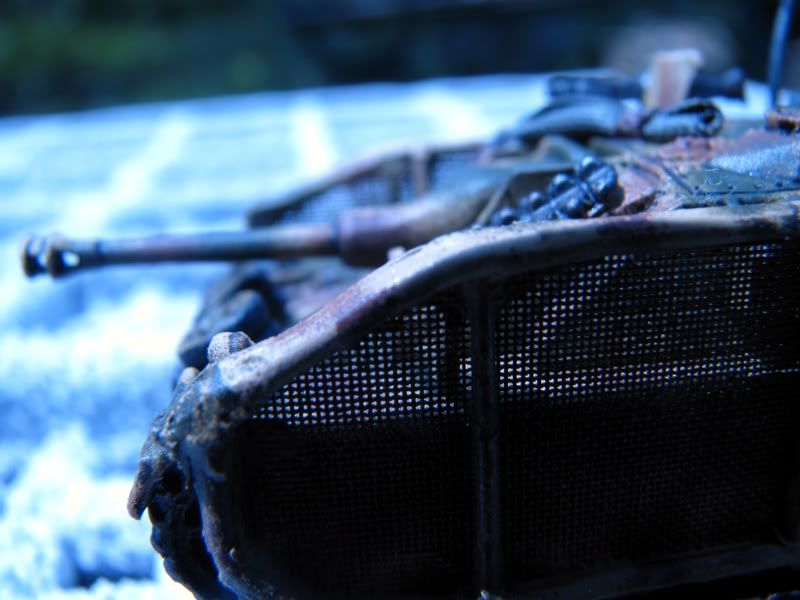
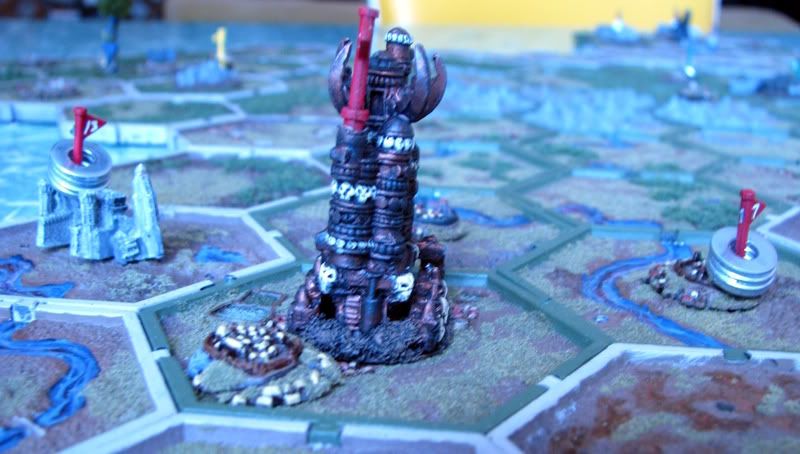
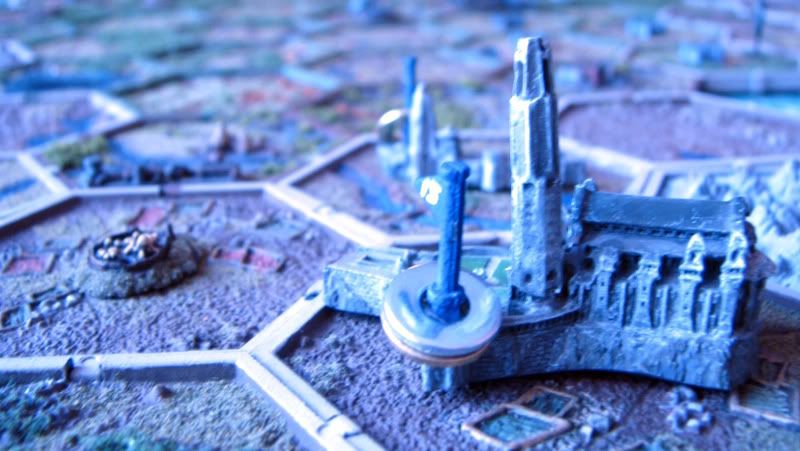
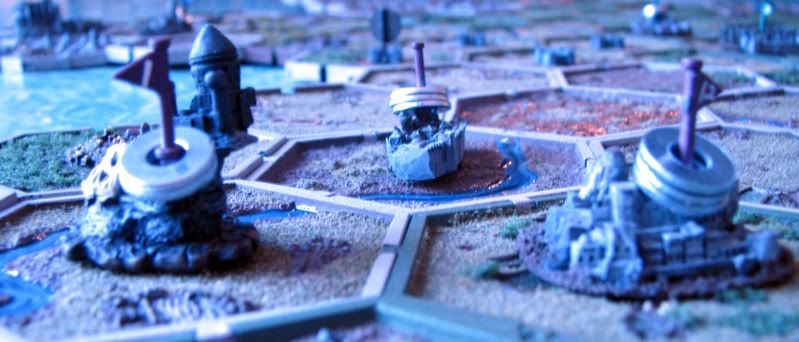
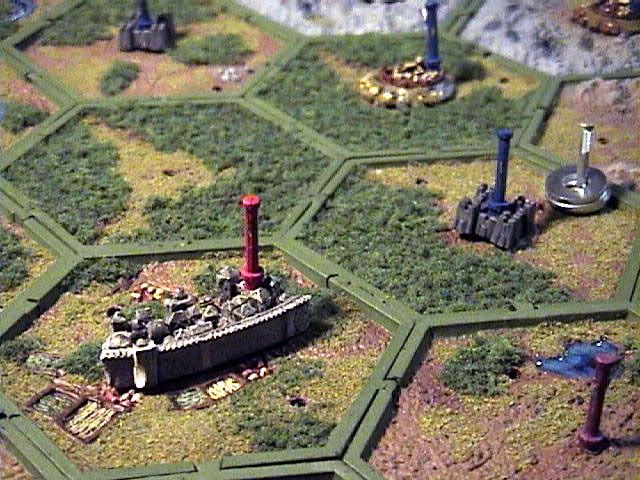
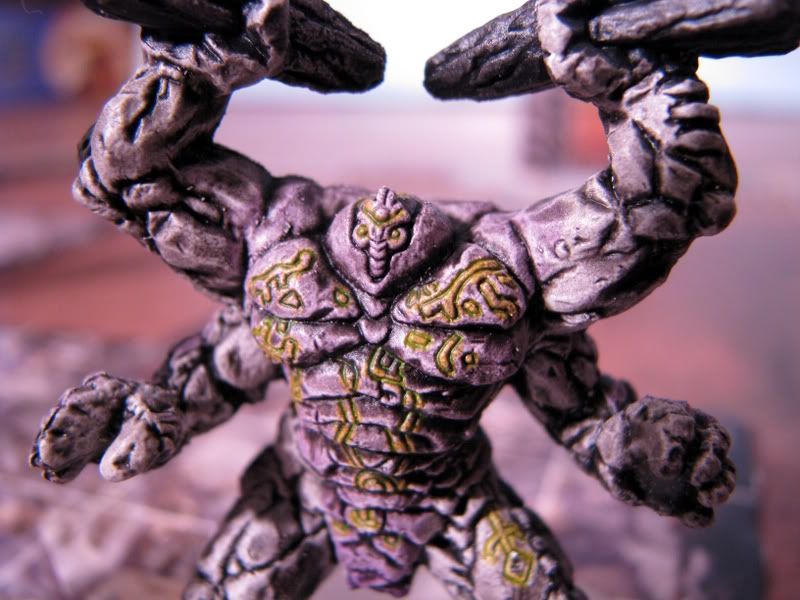
Just for fun, and to sort of fill an ancient request, here are a few extreme close-up shots of my swamp tile. As always, click to make 'em bigger (someone let me know if that doesn't work, OK?)
Wednesday, August 27, 2008
Descent & GW Washs
Uncle Ben's Instant D&D in a Box.
The Game - Descent
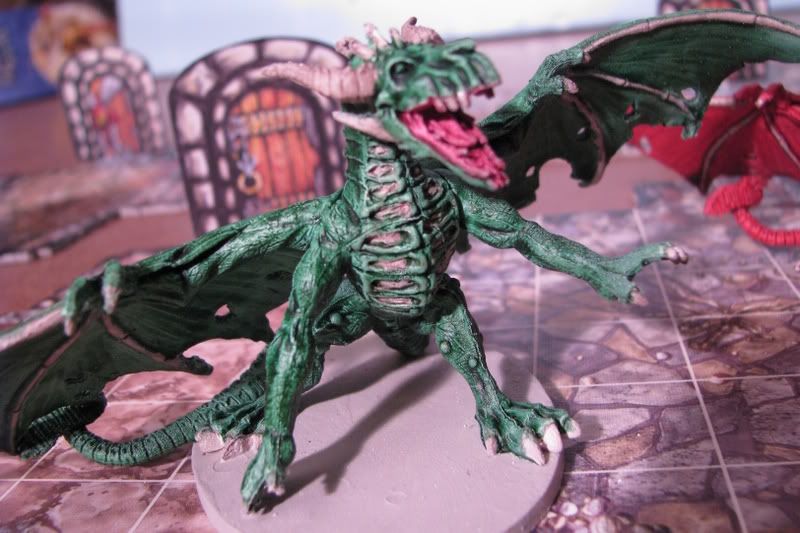
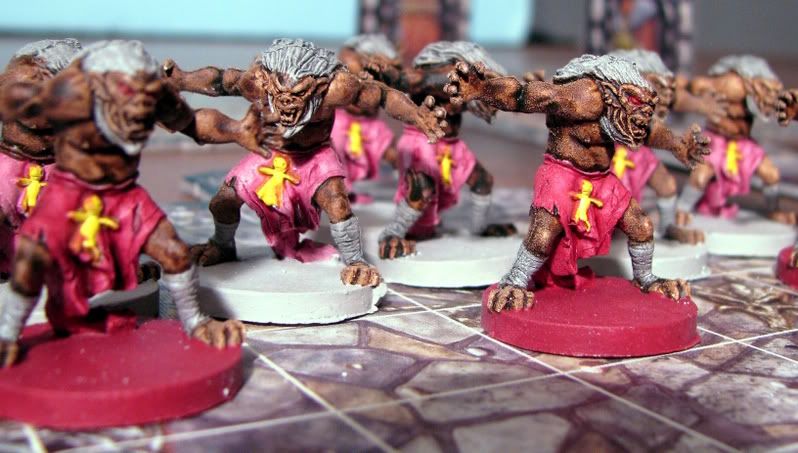
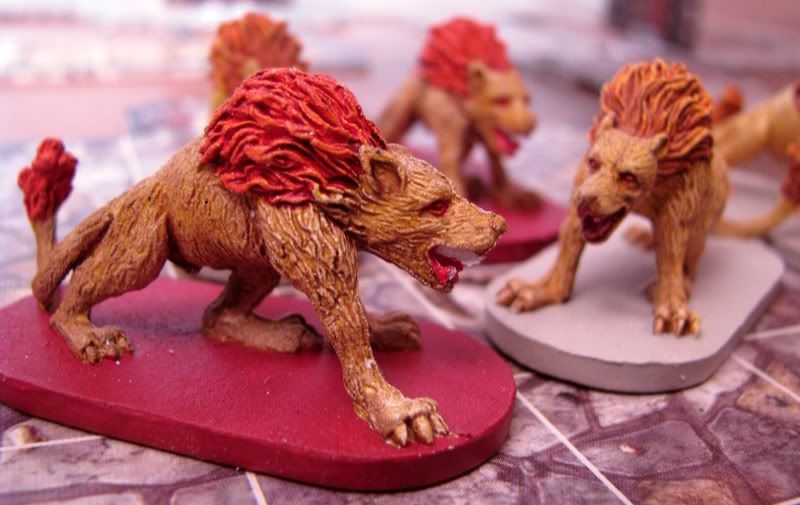
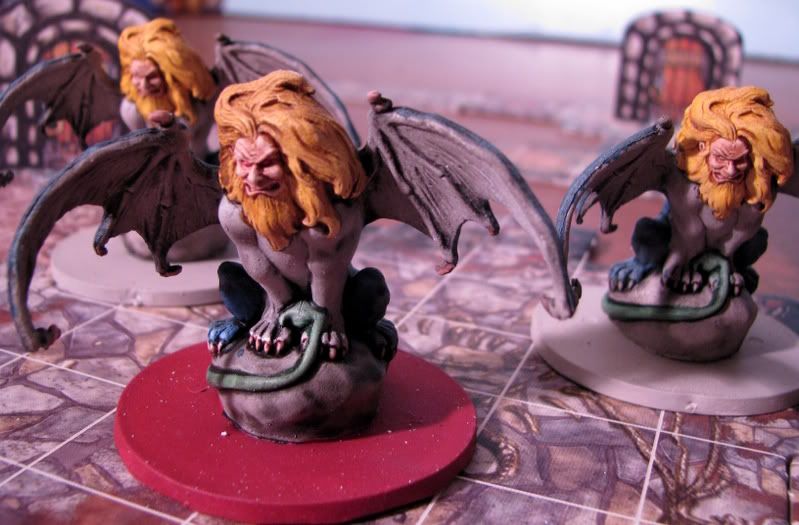
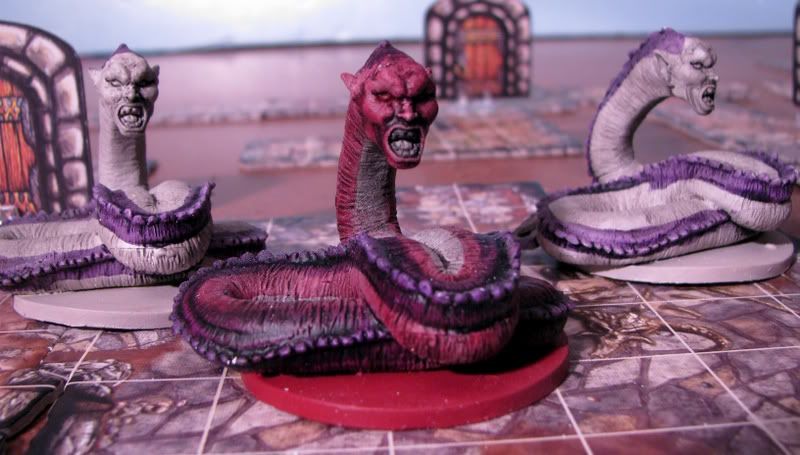
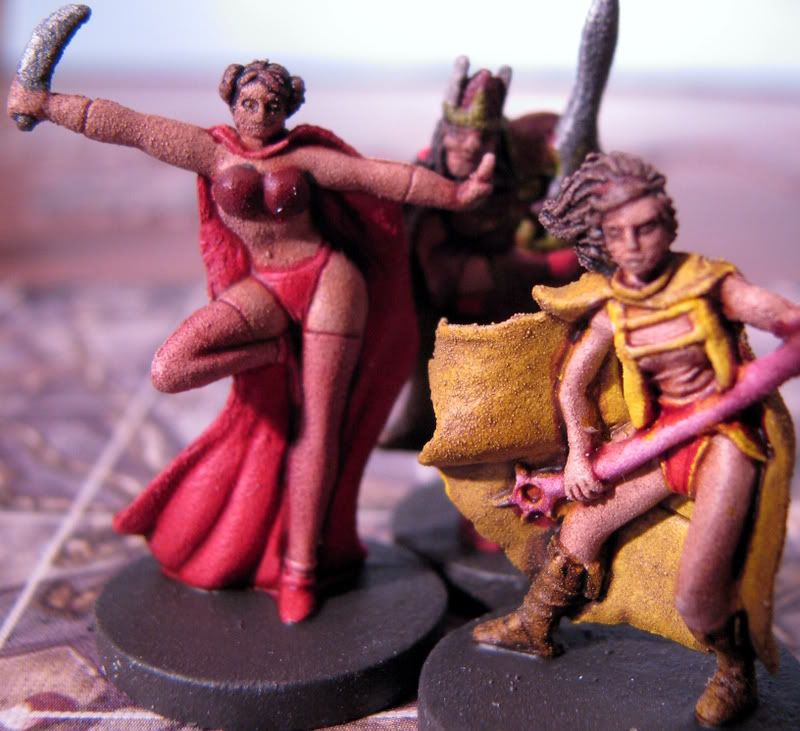
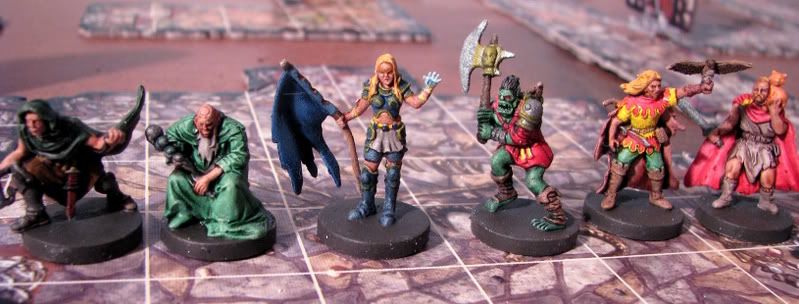
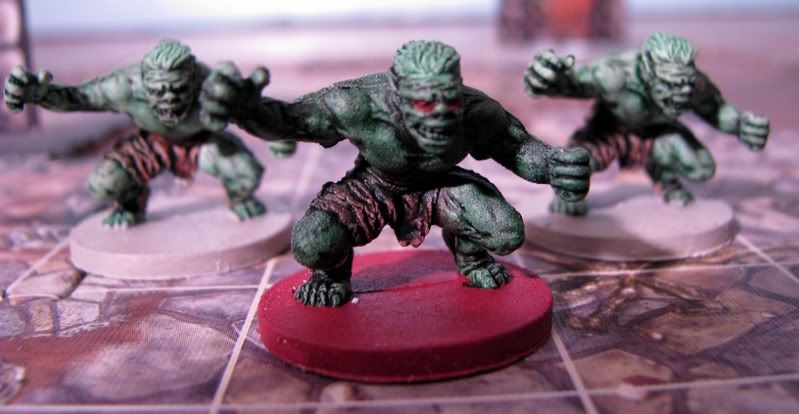
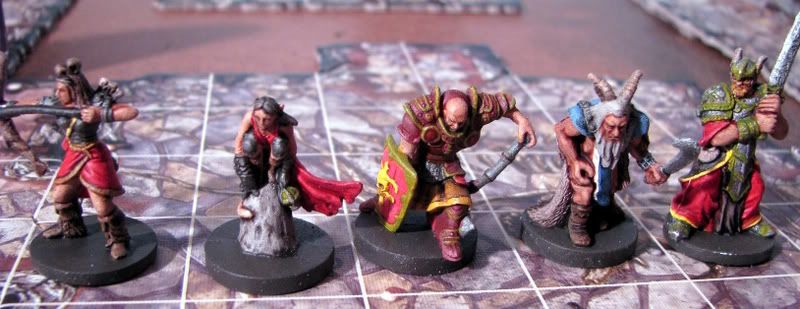
That's how I've been summing up Descent from Fantasy Flight Games. There are reviews for this game all over the place, so I'm not going to really write another one, other than to say that if you once played RPGs, and got burned out on them when everyone else got all StorryTeller and you just wanted to push minis, so you dropped RPGs for WarGames, but you've still got that old RPG itch, then Descent will scratch it, without all the overhead of actual role playing. Mostly, though, I'm here to comment on the miniatures supplied with the game and the way I speed-painted them. All I used was inks and washes, no standard paint. For instance, all the human flesh is nothing more than white primer with two coats of GW Sepia Wash.
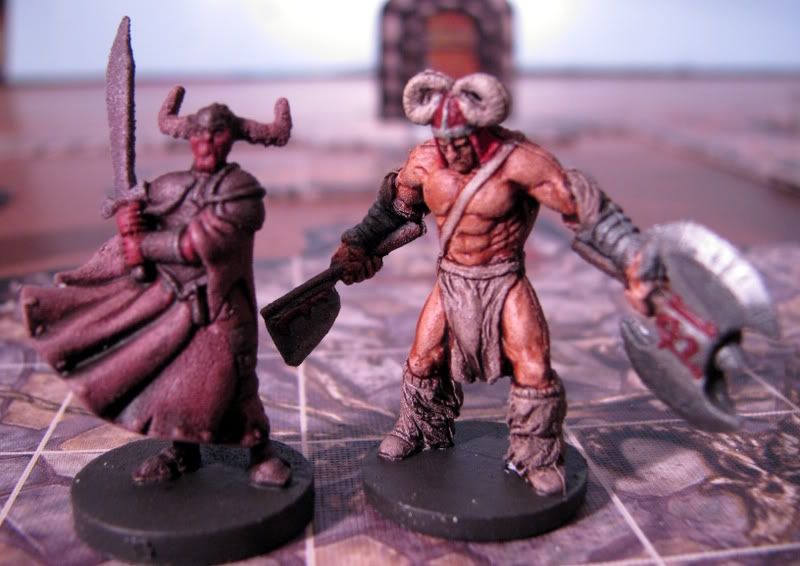
I'm also aiming to comment some on the new GW washes, a new kind of primer I tried out, a new brand of clear-coat, and a method for speed-painting game pieces like the Descent figures. See, they aren't really miniatures. I mean, ya, they are about 28mm in scale, and have pretty good detail for game tokens. But Citadel miniatures, they are not. The detail is pretty shalow, and I was afraid that a standard paint job would just obscure everything. Besides, I like the game, but I didn't want to spend much time on this project at all. Sure, I like to work in one batch of color in between the greyish greens about once a year, and this was it, but I still didn't want to spend much time on it. So I didn't -- painting up all the figures in the basic game plus the Well of Darkness expansion took me about 2 1/2 weeks worth of on-and-off evenings.
The Primer - Krylon Fusion
The Descent figures are cast in soft plastic. Its probably not the same old soft plastic of the green army men, but it is not the sort of thing that is really going to hold paints and primers very well. To solve this, I tried using something new as a primer, Krylon Fusion. According to the label, the stuff is formulated to bond with plastic. It sure seems to, the stuff is very chip-resistant. Sure, you could scrape it off on purpose, but I've had NONE of the problems with paint jumping off the models that I had last time I tried to paint on soft plastic. I call this one a win, and gave all the Descent models a good solid white base coat.
I've only tried the one version, but I think the finish you purchase is going to make a big difference. I used Satin, its as cloase as this line of paint gets to flat. I don't know for use, but I expect the gloss would just be too smoother for painting, and certainly too smoother for just inking.
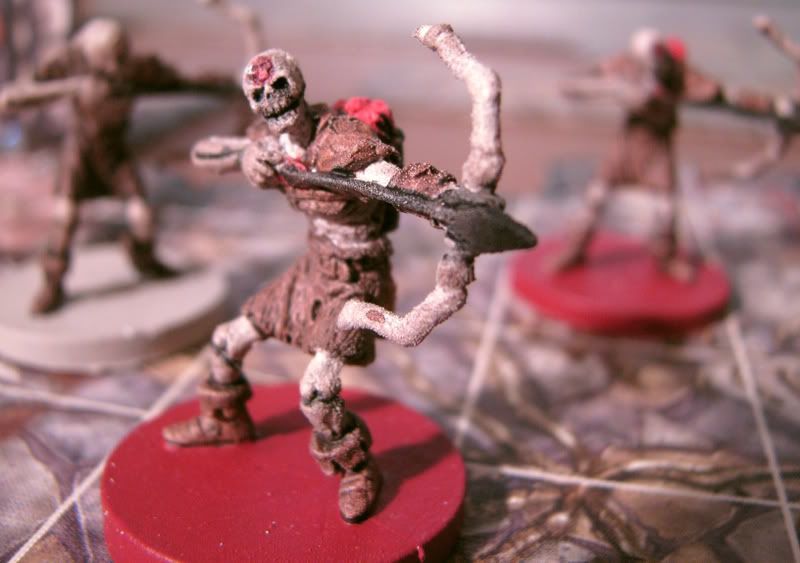
One thing about working with it, though: its very dusty. If you were using it to paint your kids play house or something, you'd be sanding it between coats, so that wouldn't be a problem. You'd think it would be for us, but for this method, I think it actually worked out better than a truely smooth finish. If you look at the pics, you'll notice that some of them are a little rough looking, with some "grit" on the surface. This is that dust. Thing is, some places came out perfectly smoother, and the ink wouldn't grip on them. I'm not sure of the word for this, but ya know how water does over a car, and how water does over a waxed car? That's what I'm talking about, and I think these inks need just a little something to grab onto. So, I will strongly recommend Krylon Fusion as a primer for soft plastic miniatures, particularly if you want to paint them with inks rather than traditional paints. I would not recommend this paint at all for use on metal, resin, or hard plastic models.
The Washes -- GW
The new GW washes are pretty cool, actually. I was all ready to dismiss them as crap -- I mean, its GW. I'm not knocking them (hard) but they just don't really put out much that works for me. Now, the washes are not inks, and if you approach them expecting inks you will be disapointed. The paint density is very low compaired to traditional inks. At the same time, they are strangely think. Not in a dried-up paint sort of way, more a gelatinous quality. Its hard to describe, but they are just sort of viscous. They don't really flow like inks. Sure, you can put the stuff down into the cracks on the model, but were an ink will run and spread out and you have to control that, the wash stays where you put it.
The real point of this formula is to keep the wash from flowing and bleeding everywhere. Because the pigment is so thin, you need to put it on pretty thick to really get a strong effect, so if you just slosh it on over a flowing surface you end up with a very nice very subtle color gradation. You've kind of got to just play with it and see what I mean.
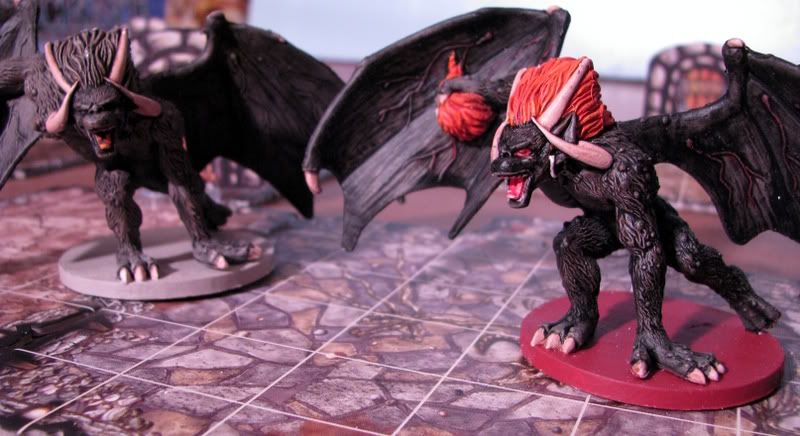
But it isn't going to give you the intensity that an ink would, either. If you want a very bold color, you'll be doing multiple coats. Which is fine, because unlike normal inks, once the wash is dry a subsequent wash over it will not disolve the first wash. Let me try and clear that up with an example. With normal inks, if you inked over something in, say, yellow, and then later after it was dry inked it again in red. The red would partially disolve the yellow, they would mix, and you'd get some orange. With the washes, you can still see the yellow layer, undisolved, sitting under the red layer. Its an interesting effect. One way I used this was to slightly shift the colors of a wash, such as the dark green on the Razorwings. Its just green wash sloshed onto the wing, with another coat of Badab Black Wash slopped over it once its dry.
I have started using the GW washes in my normal painting, to a certain extent. They will not replace inks, but for some tasks where before I would have heavilly thinned the ink, but might not want to because I only need a little bit really quick, I just grab the wash. So far, that's about as far as these have penetrated into my "real" painting.
Another technique I played around with was mixing the washes with other inks. They blend very well with the inks in the P3 line, and pretty well with Vallejo and Reaper inks. Basically, I'd put some GW wash on the pallet and mix in a drop of P3 ink to pull the color one way or another. For instance, one drop of P3 Red ink mixed with a few "brush fulls" of GW Baal Red Wash makes for a very good, strong, vibrant red. I used this kind of mix on the Red Wizards above. The thing to be careful of is adding too much ink, because the more ink you add the less viscous the wash becomes. Eventually, its going to act link an ink, not a wash. I counter acted this to a certain extent by adding Vallejo Glaze Medium along with the added ink, and any traditional inks I used were cut with Vallejo Glaze Medium. The ink/glaze mix doesn't work as well as the wash, but its close.
The Method -- madness
These are the steps I used on the Descent figures:
1. clean off flash -- there isn't much of this, but each figure has one or two rough spots from where it was broken off the sprew. I cleaned them with a sharp knife.
2. Wash -- basic hot soapy water to clean off mold agents.
3. Primer coat 1 -- lay on a basic, all-over coat of white Krylon Fusion, satin finish.
4. Clean off Dust -- using a very old paint brush, I vigorosly swept as much "primer dust" off the miniatures as possible. You won't get it smooth, it will be a little rough, and this is good. Don't worry, you can brush each figure off in about 30 seconds.
5. Primer coat 2 -- get all the funny angles and fiddly bits primered.
6. clean off dust again.
7. Wash/Ink/color to taste
8. Paint base -- after inking, I brush-painted all the bases
9. Clear Coat -- just spray it on
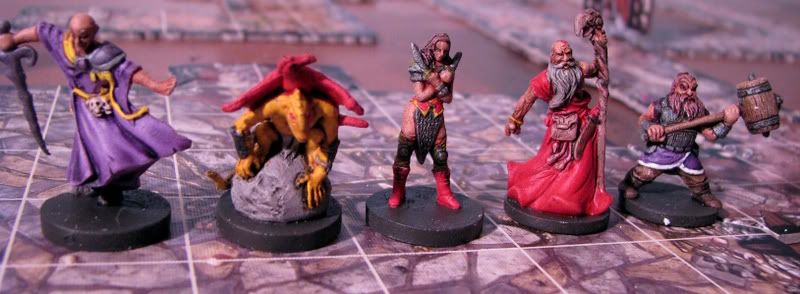
The only real trick to using inks to paint everything on the figure is to let them dry. If you put wet wash next to damp wash, the line between will blend. Sometimes, this can be a good thing, but only if you mean to do it. The other trick is that once you stain something, its stained, so you have to stay inside the lines all the time with every color. Clean up would be very, very hard. So, for instance, on the heroes with fancy trim around their armor, I had to ink most of the armor without getting any on the trim, and then go back and stain just the trip.
I said earlier that all I used were inks, but that's only 95% true. OK, its 100% true, but I had to make one of the inks. For all the metal on these figures, I mixed up a home-made metal wash of Vallejo Glaze Medium and Vallejo Gun Metal. I made it pretty thin, and then used it just like the washes.
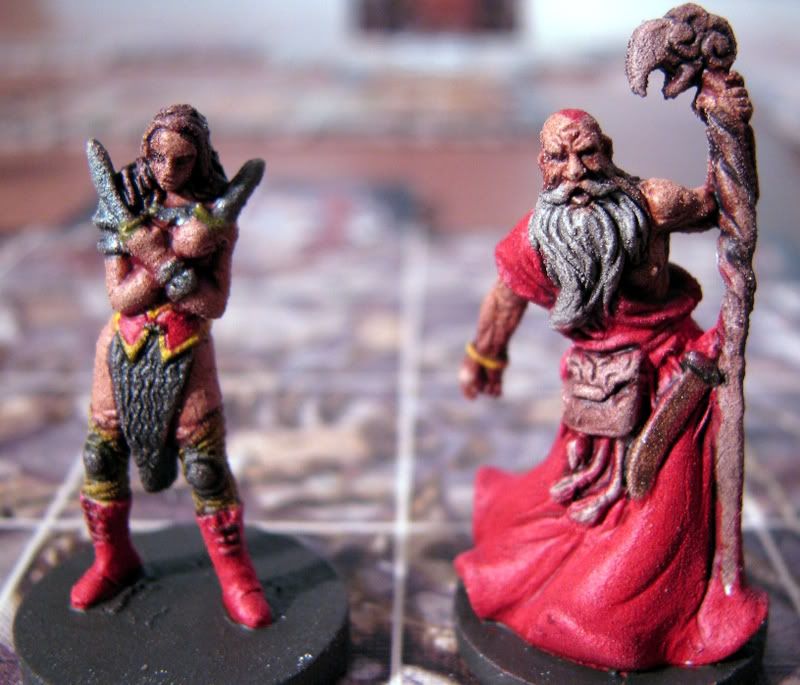
So, take this here fancy armor:
To do it, I sloshed all the metal parts with the Gun Metal/Glaze mix, and let that dry. Then I went over the red portions with red wash/ink mix, and let that dry, before going back again and applyed yellow wash/ink mix.
Base Paint - Foundation
The Descent rules use the base color as a way to distinguish Basic monsters from Master monsters, so they would have to be painted, as well. Besides, it looks much better. Once all the ink was dry, I went back and painted the bases. I wanted this to go extremely fast, so I used the GW Foundation paints. I don't remember their exact names right now, but I went with a very light grey for normal monsters, a redish color for master monsters, and a dark green/grey, Chardonite Granit, for the heroes. One coat was all it took, even the red.
Clear Coat - Krylon Krystal Clear
To protect these figures -- I was planning on just chucking them back into the Descent box without any fancy padding -- I needed something good. I also wanted something cheep, and was enjoying the experimental qualities of this project. Looking over the spray paint isle at WallyWorld, I foudn spray-on Krylon Krystal Clear. I LOVE the brush on product -- its what I use for miniature water puddles in FoW, for instance -- so figured I'd give the spray a day in court.
It rules.
I think it is my new clear coat of choice.
The stuff is VERY easy to work with. Normally, I feather on my clear coats, careful not to get any of that gunking up or clouding over you'd expect from a heavy spray coating. With this stuff, the only time I had that happen was when I tried to do it on purpose just to see how much it would take. A crippled, blind-folded monkey could clear coat miniatures with this stuff! Coverage is excellent, no clouding or gunking (unless you try to do that, and even then it will take some work), nothing, just sprary it all over them bad boys! The protection seems pretty good, too. I tied to scrape some paint off the edge of a wing with my finger nail, and failed. I could probably scrape it off with a knife, but it looks like between the clear coat and the primer that Krylon isn't kidding -- that stuff bonded with the plastic, and anything that's going to take the paint off is also probably going to physically damage the plastic.
I can not recommend the combination strongly enough: if you're into board games with soft plastic figures, and you always wanted them painted but didn't want to put in much effort or thought the paint jobs wouldn't last, this is the way to do it:
1. Krylon Fusion
2. GW wash
3. Krylon Krystal Clear
I don't plan on repainting my paratroopers with this method or anything like that, so don't try it take this to Golden Demon. But this method will render very acceptable results very quickly on low-cost, low-detail miniatures such as those found in high-end modern board games. Last Night on Earth, I'm lookin' at you...
The Game - Descent
That's how I've been summing up Descent from Fantasy Flight Games. There are reviews for this game all over the place, so I'm not going to really write another one, other than to say that if you once played RPGs, and got burned out on them when everyone else got all StorryTeller and you just wanted to push minis, so you dropped RPGs for WarGames, but you've still got that old RPG itch, then Descent will scratch it, without all the overhead of actual role playing. Mostly, though, I'm here to comment on the miniatures supplied with the game and the way I speed-painted them. All I used was inks and washes, no standard paint. For instance, all the human flesh is nothing more than white primer with two coats of GW Sepia Wash.
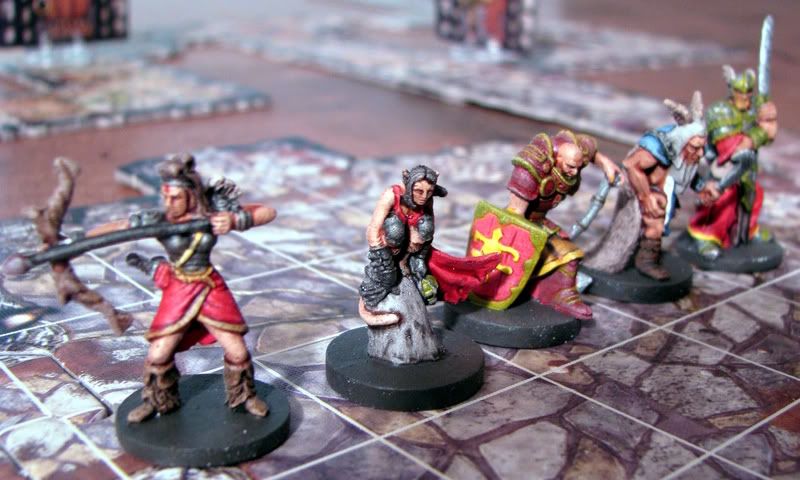
I'm also aiming to comment some on the new GW washes, a new kind of primer I tried out, a new brand of clear-coat, and a method for speed-painting game pieces like the Descent figures. See, they aren't really miniatures. I mean, ya, they are about 28mm in scale, and have pretty good detail for game tokens. But Citadel miniatures, they are not. The detail is pretty shalow, and I was afraid that a standard paint job would just obscure everything. Besides, I like the game, but I didn't want to spend much time on this project at all. Sure, I like to work in one batch of color in between the greyish greens about once a year, and this was it, but I still didn't want to spend much time on it. So I didn't -- painting up all the figures in the basic game plus the Well of Darkness expansion took me about 2 1/2 weeks worth of on-and-off evenings.
The Primer - Krylon Fusion
The Descent figures are cast in soft plastic. Its probably not the same old soft plastic of the green army men, but it is not the sort of thing that is really going to hold paints and primers very well. To solve this, I tried using something new as a primer, Krylon Fusion. According to the label, the stuff is formulated to bond with plastic. It sure seems to, the stuff is very chip-resistant. Sure, you could scrape it off on purpose, but I've had NONE of the problems with paint jumping off the models that I had last time I tried to paint on soft plastic. I call this one a win, and gave all the Descent models a good solid white base coat.
I've only tried the one version, but I think the finish you purchase is going to make a big difference. I used Satin, its as cloase as this line of paint gets to flat. I don't know for use, but I expect the gloss would just be too smoother for painting, and certainly too smoother for just inking.
One thing about working with it, though: its very dusty. If you were using it to paint your kids play house or something, you'd be sanding it between coats, so that wouldn't be a problem. You'd think it would be for us, but for this method, I think it actually worked out better than a truely smooth finish. If you look at the pics, you'll notice that some of them are a little rough looking, with some "grit" on the surface. This is that dust. Thing is, some places came out perfectly smoother, and the ink wouldn't grip on them. I'm not sure of the word for this, but ya know how water does over a car, and how water does over a waxed car? That's what I'm talking about, and I think these inks need just a little something to grab onto. So, I will strongly recommend Krylon Fusion as a primer for soft plastic miniatures, particularly if you want to paint them with inks rather than traditional paints. I would not recommend this paint at all for use on metal, resin, or hard plastic models.
The Washes -- GW
The new GW washes are pretty cool, actually. I was all ready to dismiss them as crap -- I mean, its GW. I'm not knocking them (hard) but they just don't really put out much that works for me. Now, the washes are not inks, and if you approach them expecting inks you will be disapointed. The paint density is very low compaired to traditional inks. At the same time, they are strangely think. Not in a dried-up paint sort of way, more a gelatinous quality. Its hard to describe, but they are just sort of viscous. They don't really flow like inks. Sure, you can put the stuff down into the cracks on the model, but were an ink will run and spread out and you have to control that, the wash stays where you put it.
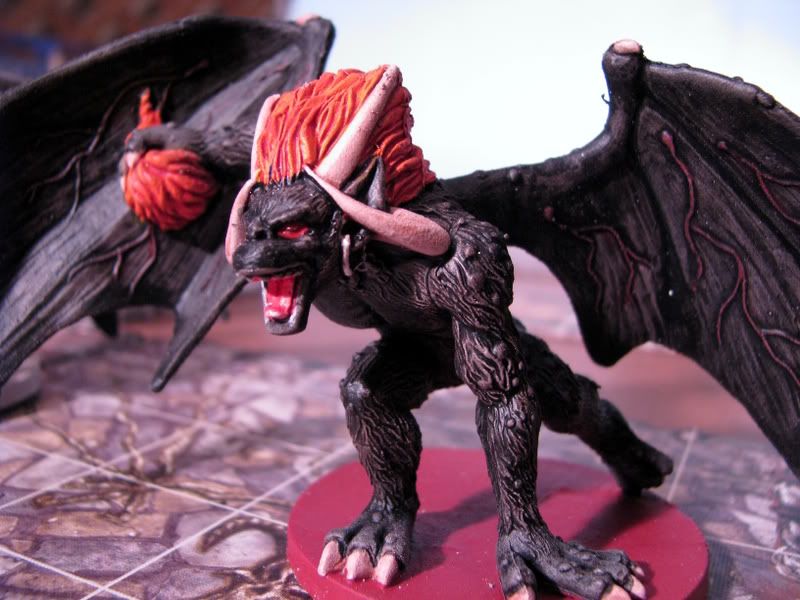
The real point of this formula is to keep the wash from flowing and bleeding everywhere. Because the pigment is so thin, you need to put it on pretty thick to really get a strong effect, so if you just slosh it on over a flowing surface you end up with a very nice very subtle color gradation. You've kind of got to just play with it and see what I mean.
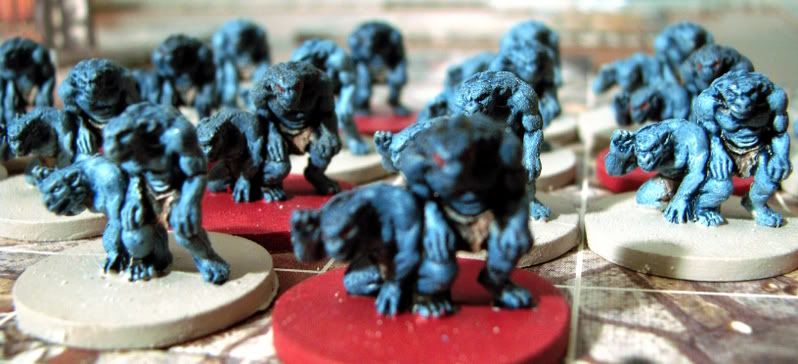
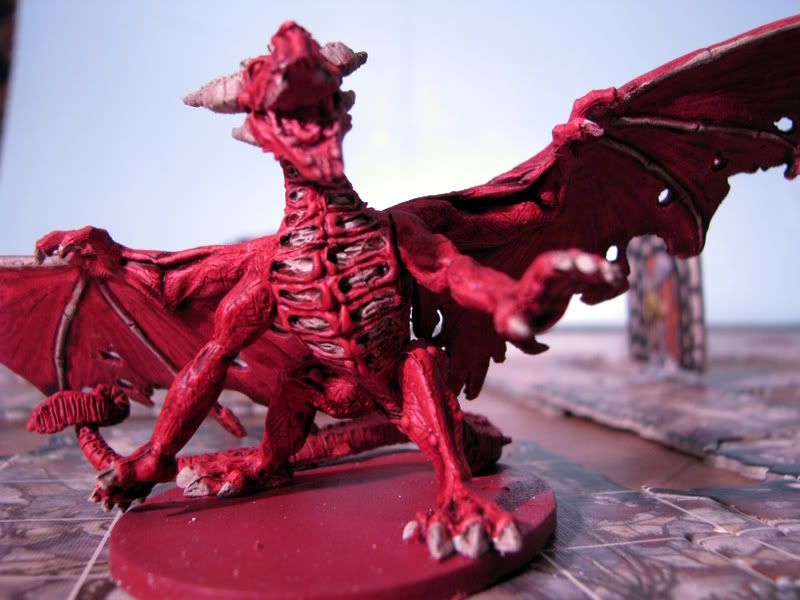
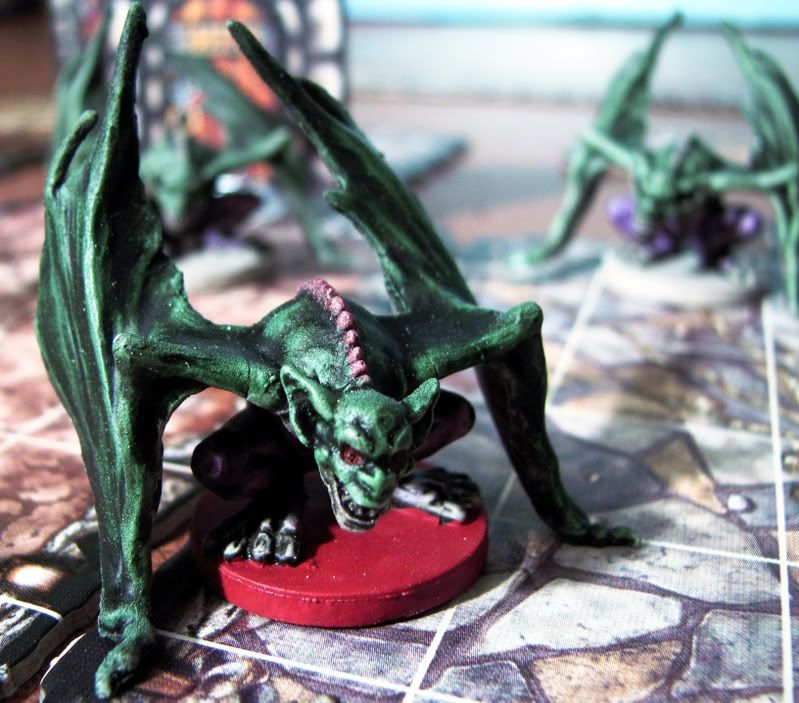
But it isn't going to give you the intensity that an ink would, either. If you want a very bold color, you'll be doing multiple coats. Which is fine, because unlike normal inks, once the wash is dry a subsequent wash over it will not disolve the first wash. Let me try and clear that up with an example. With normal inks, if you inked over something in, say, yellow, and then later after it was dry inked it again in red. The red would partially disolve the yellow, they would mix, and you'd get some orange. With the washes, you can still see the yellow layer, undisolved, sitting under the red layer. Its an interesting effect. One way I used this was to slightly shift the colors of a wash, such as the dark green on the Razorwings. Its just green wash sloshed onto the wing, with another coat of Badab Black Wash slopped over it once its dry.
I have started using the GW washes in my normal painting, to a certain extent. They will not replace inks, but for some tasks where before I would have heavilly thinned the ink, but might not want to because I only need a little bit really quick, I just grab the wash. So far, that's about as far as these have penetrated into my "real" painting.
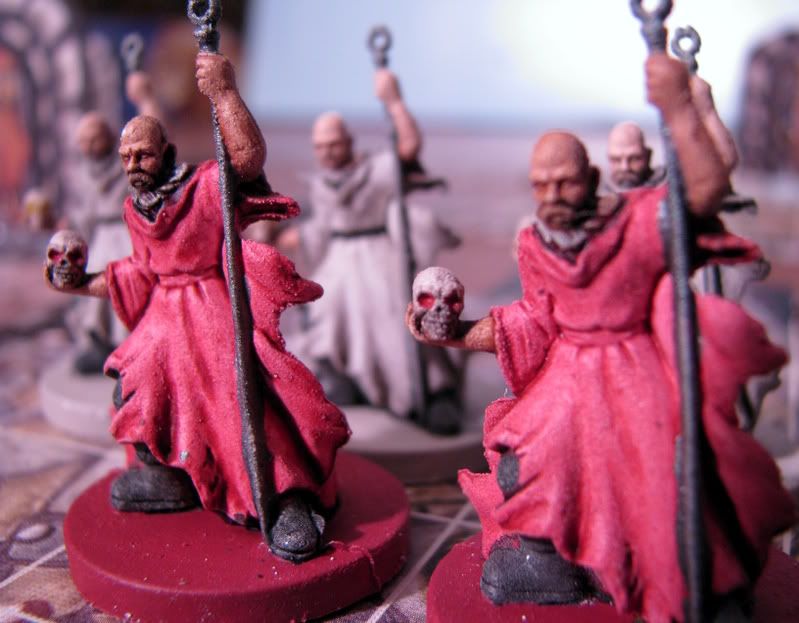
Another technique I played around with was mixing the washes with other inks. They blend very well with the inks in the P3 line, and pretty well with Vallejo and Reaper inks. Basically, I'd put some GW wash on the pallet and mix in a drop of P3 ink to pull the color one way or another. For instance, one drop of P3 Red ink mixed with a few "brush fulls" of GW Baal Red Wash makes for a very good, strong, vibrant red. I used this kind of mix on the Red Wizards above. The thing to be careful of is adding too much ink, because the more ink you add the less viscous the wash becomes. Eventually, its going to act link an ink, not a wash. I counter acted this to a certain extent by adding Vallejo Glaze Medium along with the added ink, and any traditional inks I used were cut with Vallejo Glaze Medium. The ink/glaze mix doesn't work as well as the wash, but its close.
The Method -- madness
These are the steps I used on the Descent figures:
1. clean off flash -- there isn't much of this, but each figure has one or two rough spots from where it was broken off the sprew. I cleaned them with a sharp knife.
2. Wash -- basic hot soapy water to clean off mold agents.
3. Primer coat 1 -- lay on a basic, all-over coat of white Krylon Fusion, satin finish.
4. Clean off Dust -- using a very old paint brush, I vigorosly swept as much "primer dust" off the miniatures as possible. You won't get it smooth, it will be a little rough, and this is good. Don't worry, you can brush each figure off in about 30 seconds.
5. Primer coat 2 -- get all the funny angles and fiddly bits primered.
6. clean off dust again.
7. Wash/Ink/color to taste
8. Paint base -- after inking, I brush-painted all the bases
9. Clear Coat -- just spray it on
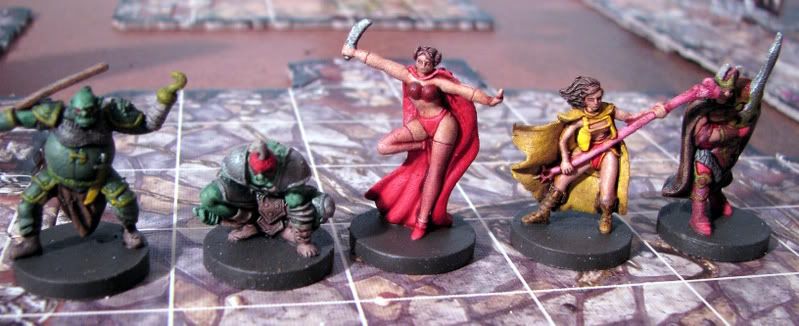
The only real trick to using inks to paint everything on the figure is to let them dry. If you put wet wash next to damp wash, the line between will blend. Sometimes, this can be a good thing, but only if you mean to do it. The other trick is that once you stain something, its stained, so you have to stay inside the lines all the time with every color. Clean up would be very, very hard. So, for instance, on the heroes with fancy trim around their armor, I had to ink most of the armor without getting any on the trim, and then go back and stain just the trip.
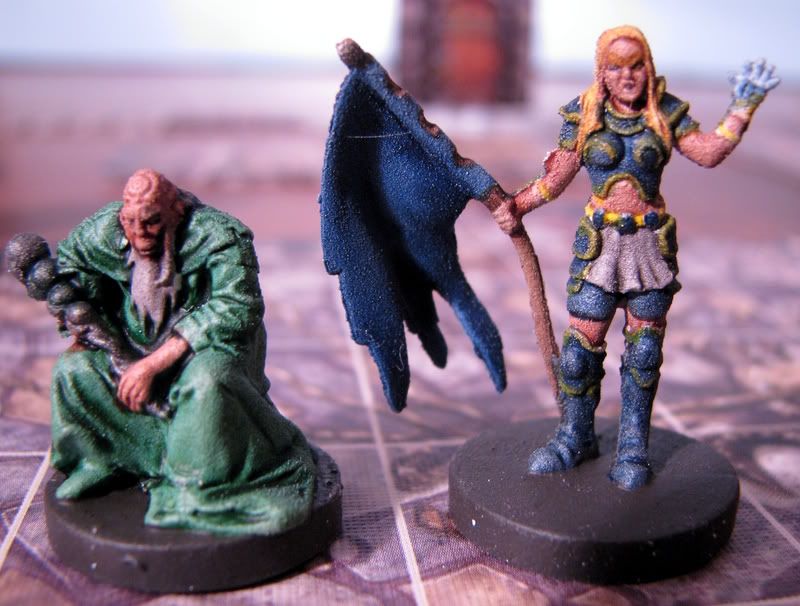
I said earlier that all I used were inks, but that's only 95% true. OK, its 100% true, but I had to make one of the inks. For all the metal on these figures, I mixed up a home-made metal wash of Vallejo Glaze Medium and Vallejo Gun Metal. I made it pretty thin, and then used it just like the washes.
So, take this here fancy armor:
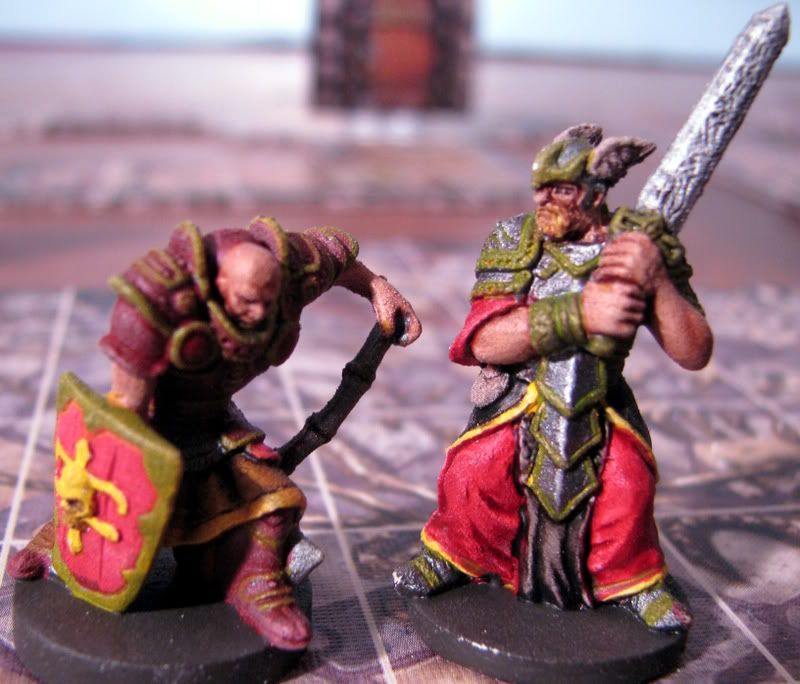
To do it, I sloshed all the metal parts with the Gun Metal/Glaze mix, and let that dry. Then I went over the red portions with red wash/ink mix, and let that dry, before going back again and applyed yellow wash/ink mix.
Base Paint - Foundation
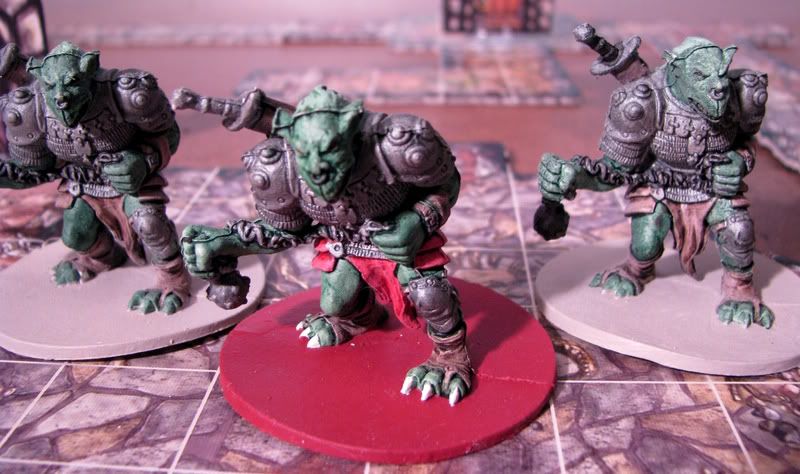
The Descent rules use the base color as a way to distinguish Basic monsters from Master monsters, so they would have to be painted, as well. Besides, it looks much better. Once all the ink was dry, I went back and painted the bases. I wanted this to go extremely fast, so I used the GW Foundation paints. I don't remember their exact names right now, but I went with a very light grey for normal monsters, a redish color for master monsters, and a dark green/grey, Chardonite Granit, for the heroes. One coat was all it took, even the red.
Clear Coat - Krylon Krystal Clear
To protect these figures -- I was planning on just chucking them back into the Descent box without any fancy padding -- I needed something good. I also wanted something cheep, and was enjoying the experimental qualities of this project. Looking over the spray paint isle at WallyWorld, I foudn spray-on Krylon Krystal Clear. I LOVE the brush on product -- its what I use for miniature water puddles in FoW, for instance -- so figured I'd give the spray a day in court.
It rules.
I think it is my new clear coat of choice.
The stuff is VERY easy to work with. Normally, I feather on my clear coats, careful not to get any of that gunking up or clouding over you'd expect from a heavy spray coating. With this stuff, the only time I had that happen was when I tried to do it on purpose just to see how much it would take. A crippled, blind-folded monkey could clear coat miniatures with this stuff! Coverage is excellent, no clouding or gunking (unless you try to do that, and even then it will take some work), nothing, just sprary it all over them bad boys! The protection seems pretty good, too. I tied to scrape some paint off the edge of a wing with my finger nail, and failed. I could probably scrape it off with a knife, but it looks like between the clear coat and the primer that Krylon isn't kidding -- that stuff bonded with the plastic, and anything that's going to take the paint off is also probably going to physically damage the plastic.
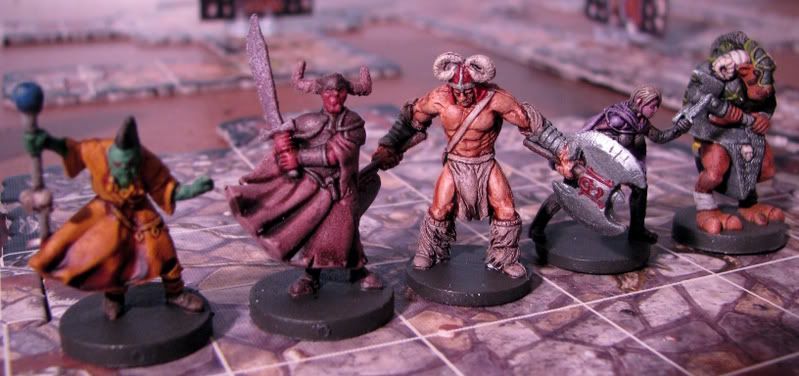
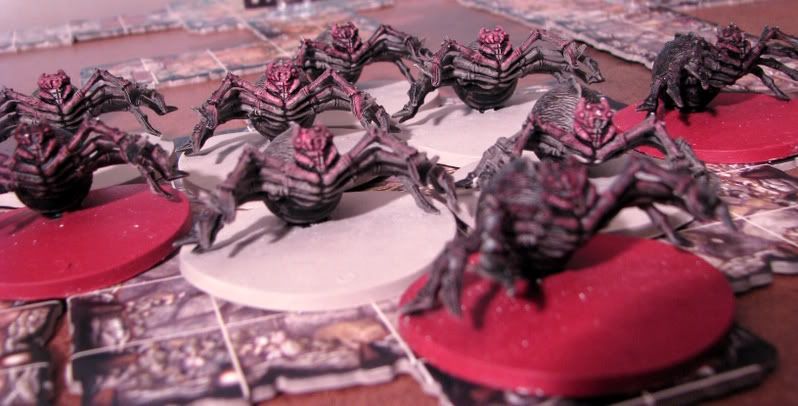
I can not recommend the combination strongly enough: if you're into board games with soft plastic figures, and you always wanted them painted but didn't want to put in much effort or thought the paint jobs wouldn't last, this is the way to do it:
1. Krylon Fusion
2. GW wash
3. Krylon Krystal Clear
I don't plan on repainting my paratroopers with this method or anything like that, so don't try it take this to Golden Demon. But this method will render very acceptable results very quickly on low-cost, low-detail miniatures such as those found in high-end modern board games. Last Night on Earth, I'm lookin' at you...
Tuesday, August 26, 2008
Mesh Schurzen -- painted
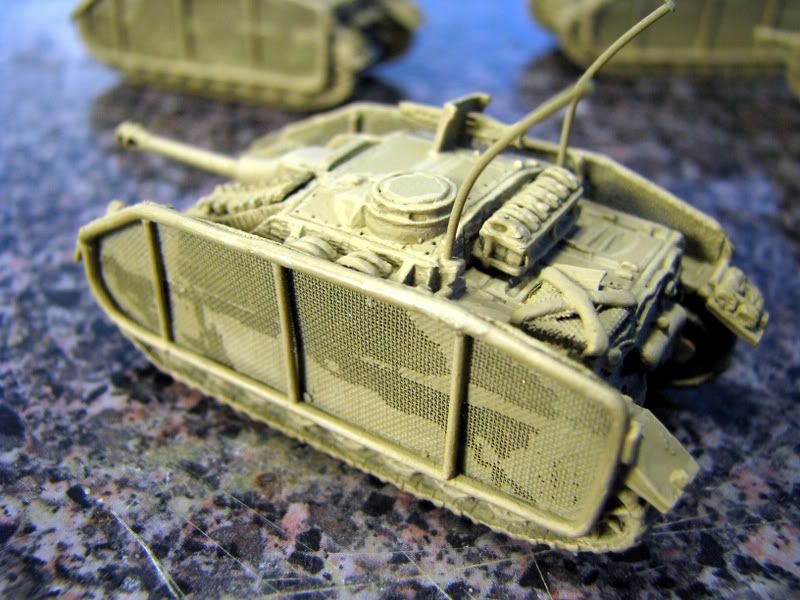
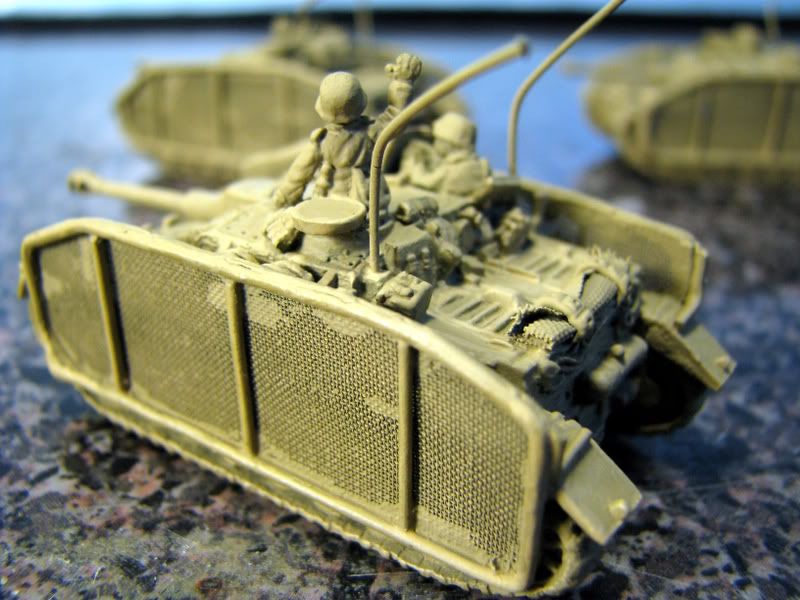
OK, its been a while on these, but I finally got around to painting them up. These shots don't show all the little details, I'm really just trying to show you how the mesh gunked up during painting, but how that wasn't the end of the world. Take a look.
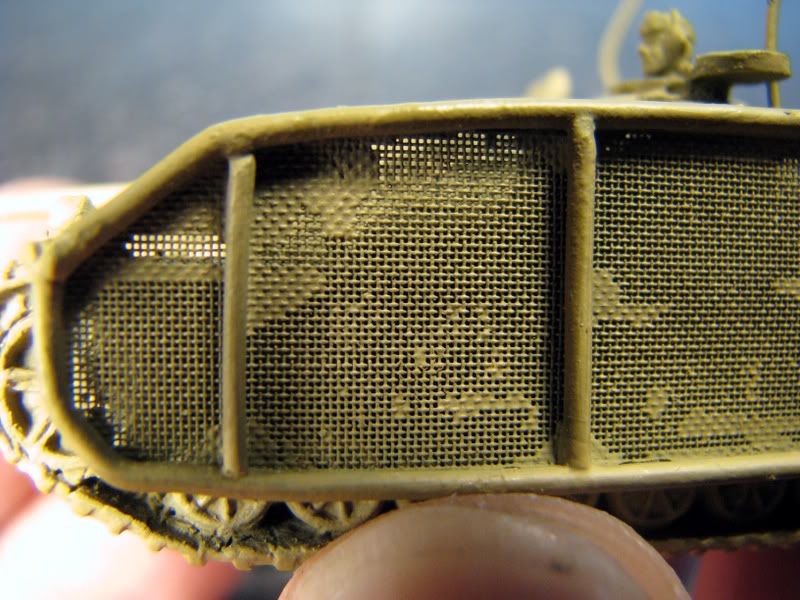
In these few, painted with just an air-brushed basecoat (and maybe a little highlighting), you can see how bad some of it looked. Here's a closeup:
Basically, what you are looking at is superglue from when I mounted them. The paint didn't fill in the mesh, but the glue sure did. It just wasn't really visible before the primer went on. I'm not sure how this could have been reduced, you have to glue them on, right? This glue may also have come from when I first made them, which would make sense. Some places came out worse than others.
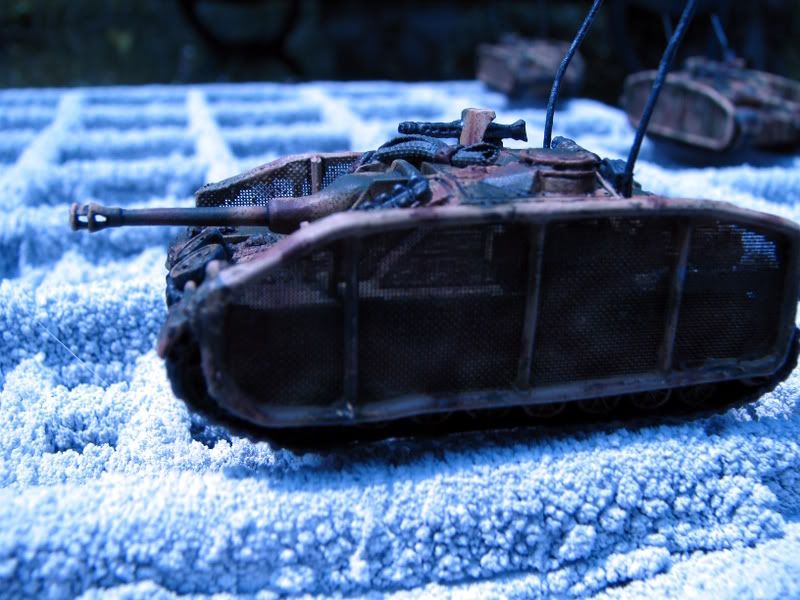
I figured I'd make the best of it, and just go ahead and paint them up. It doesn't really come accross very will in these pics, but I used the camo patern to down-play the filled-in mesh. You can still see through most of it, as these other shots show. And spraying the darkest brown right over the glue-filled bits just made them much harder to notice.
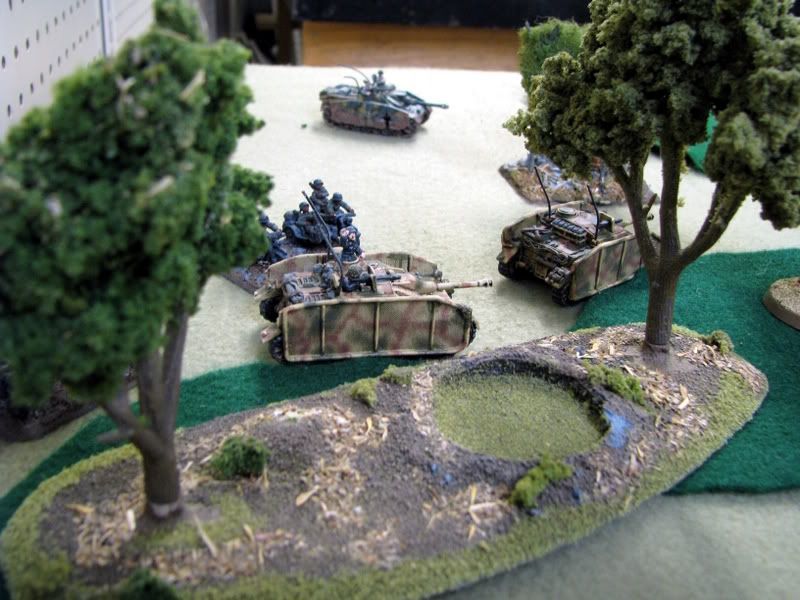
And finally, an on table shot from our last game:
Monday, August 25, 2008
Terrain Tile IDs
Mighty Empires - Finished Map
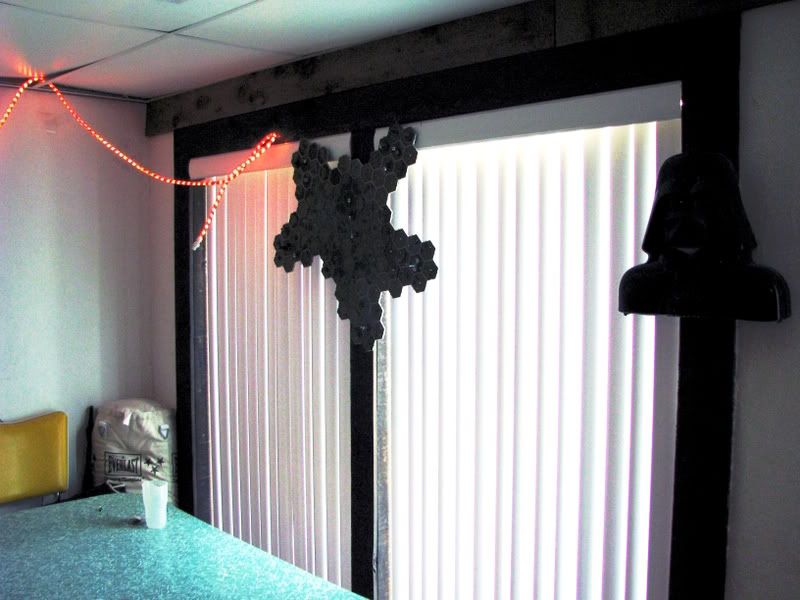
So, I got all the tokens painted up, with clever little plugs in them to hold them up. I even got a bunch of the guys together to put the map together (so everyone gets to place tiles). We got it all hung on the wall...
And that's about it. I think this one is going to end up still-born, because Fantasy Flight has kicked the shit out of the small-end of gaming lately. Descent is pretty much scratching everyone's fantasy itch, and we were not impressed with the game pieces over much when assembling this. Things just fall off too much, and I don't think the pieces will have a long life expectancy. This really might make a better campaign than actual game, but I may still try for it some day.
At any rate, the map looks cool on the wall, even if this pic doesn't:
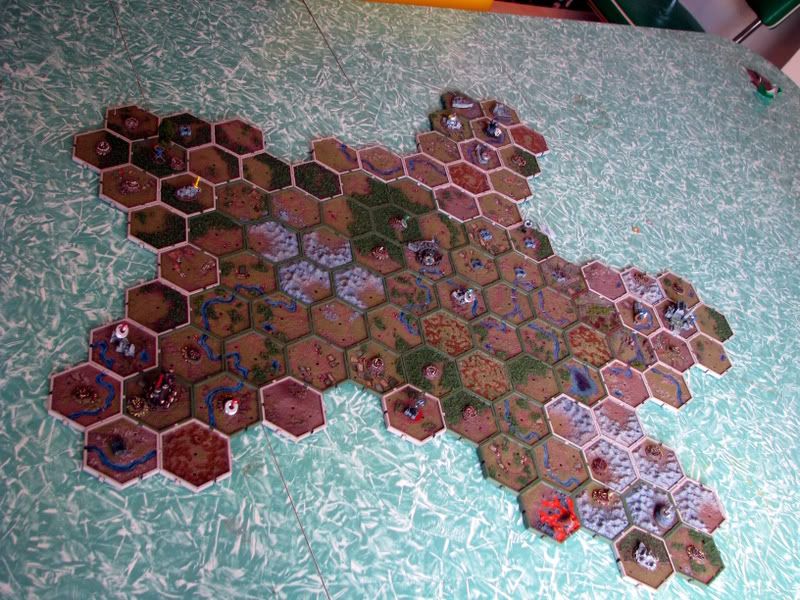
Here's the map laid on the table, with everyone's kingdoms all laid out. Seriously, we'd spent like two hours rolling up all the random tables to determine who got to put a village in the woods and such.
The stronghold of Chaos (mostly old Epic bits):
The seat of the king of Men (made from the top of a broken Minas Tirrith statue that came with Two Towers):
Castle of the Vampire Count (pretty much scratch built with beads and stuff, plus some War Machine bits):
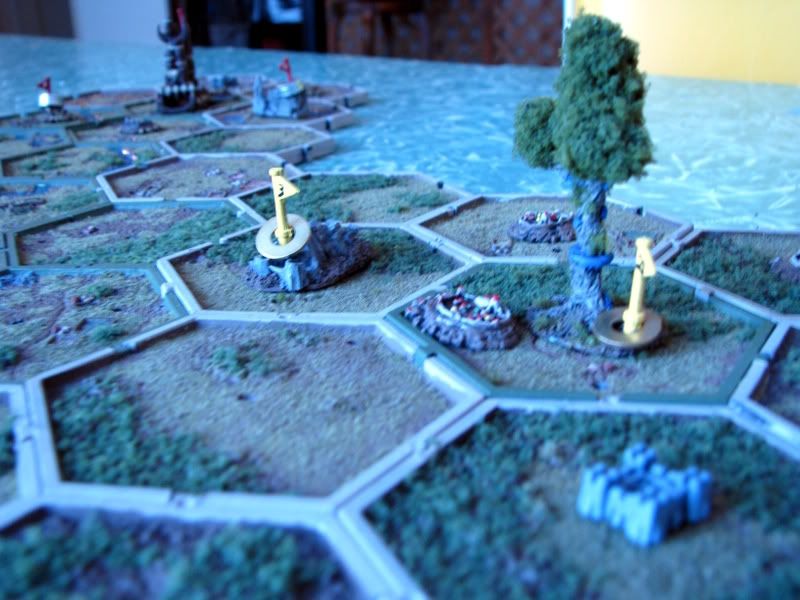
The Elven Kingdom (scratchbuilt tree over wire frame):