We’ve finally got some finished projects rolling out of the workshop in the new, exciting world of 1:1 scale! No more crappy cell phone cam pics, we’ve got something decent to look at today. So, without further ado, let make with some pics!
First up, we’ve got a batch of toy guns. These were done mostly as paint tests – being as how I planned to make such extensive use of spray paint on more involved projects, I felt it important to try out as many brands and colors as possible to see what I liked and what I didn’t. I didn’t want to spend a lot of time moding something only to have the work ruined by a crappy coat of spray paint, so for the most part I kept the modifications to a minimum on these.
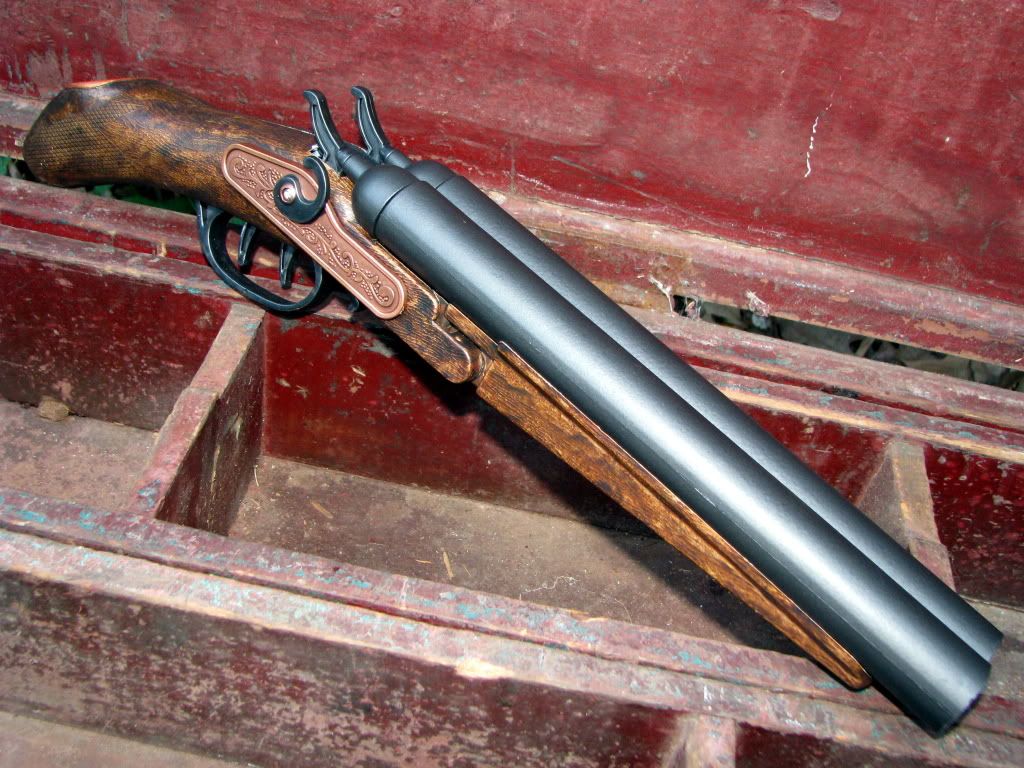
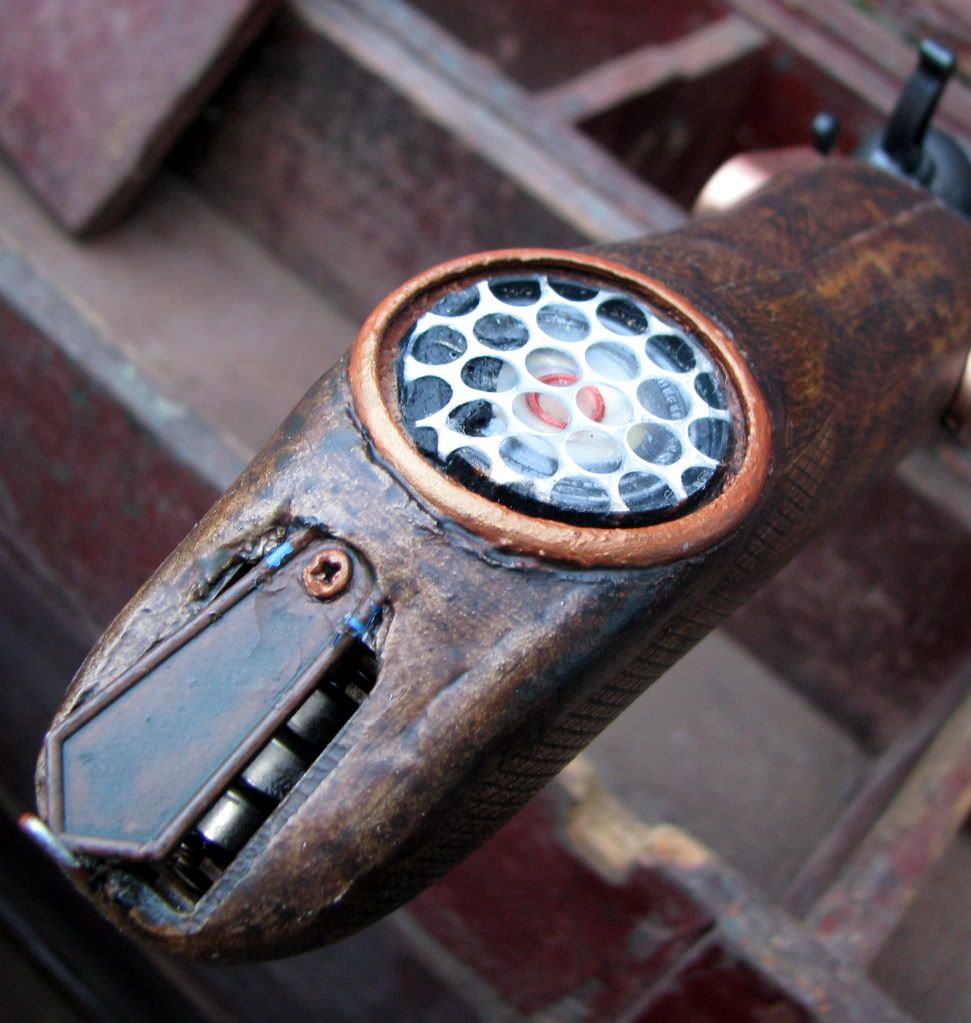
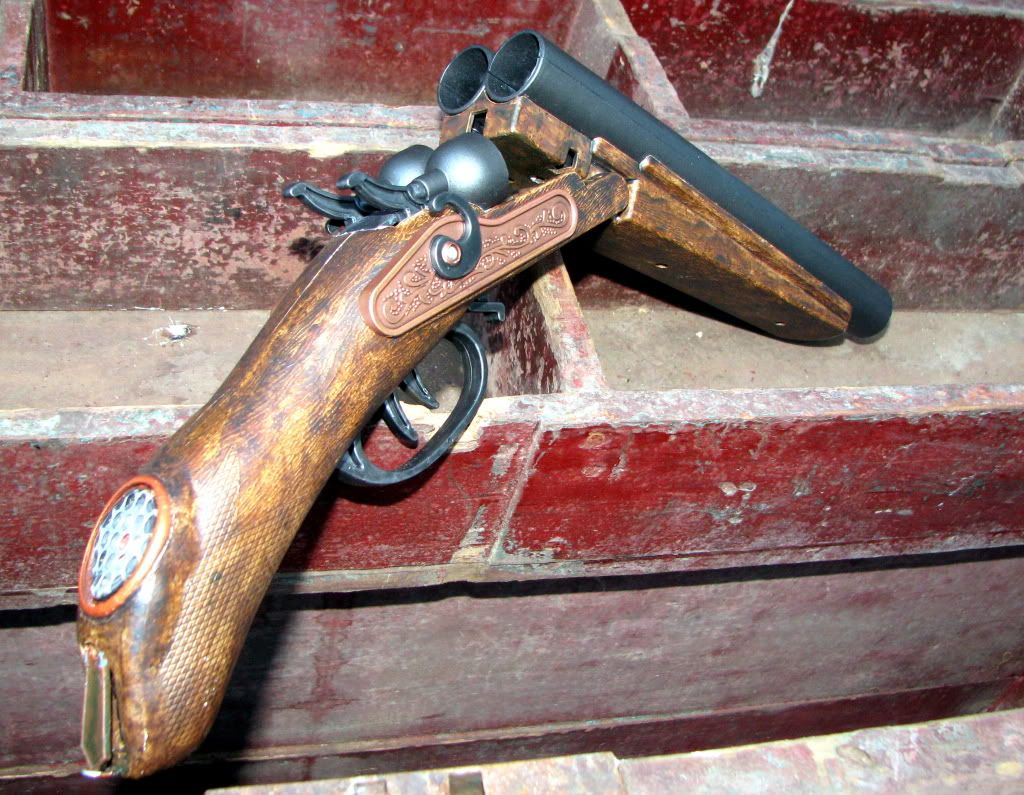
This double-barrel 12 gauge started life as a cheap, dollar-store toy gun with electronic gun noises and a cute ejecting shell feature. I sawed off the barrel with a Dremel tool and saved the end for later, then started in on the stock. Originally the speaker was housed internally, mounted to one side of the stock behind a grill of small holes. As I was removing the stock, I had to come up with new mounts for the speaker and a new hand grip. I laid a sheet of metal foil mesh over the hole in the end of the hollow handle and glued it into place inside the stock. I didn’t take any in-progress shots, but you can still see the foil sheet: it is the silver screen over the speaker. The mesh served as a support structure for the putty I used to resculpt the handle. I shaved and sanded the two-part epoxy putty to get a flush blend with the plastic stock, but a bulge is still visible.
The speaker wouldn’t have looked right just set there in the “wood,” so to dress it up a bit I used a plastic ring from a cheep toy magnifying glass (and saved the lens for later). I cut off the handle from the magnifying glass and used it as a flexible cover for the battery compartment (also moved from the side of the stock and set into the putty) then glued the ring around the speaker before finally setting the speaker into the putty.
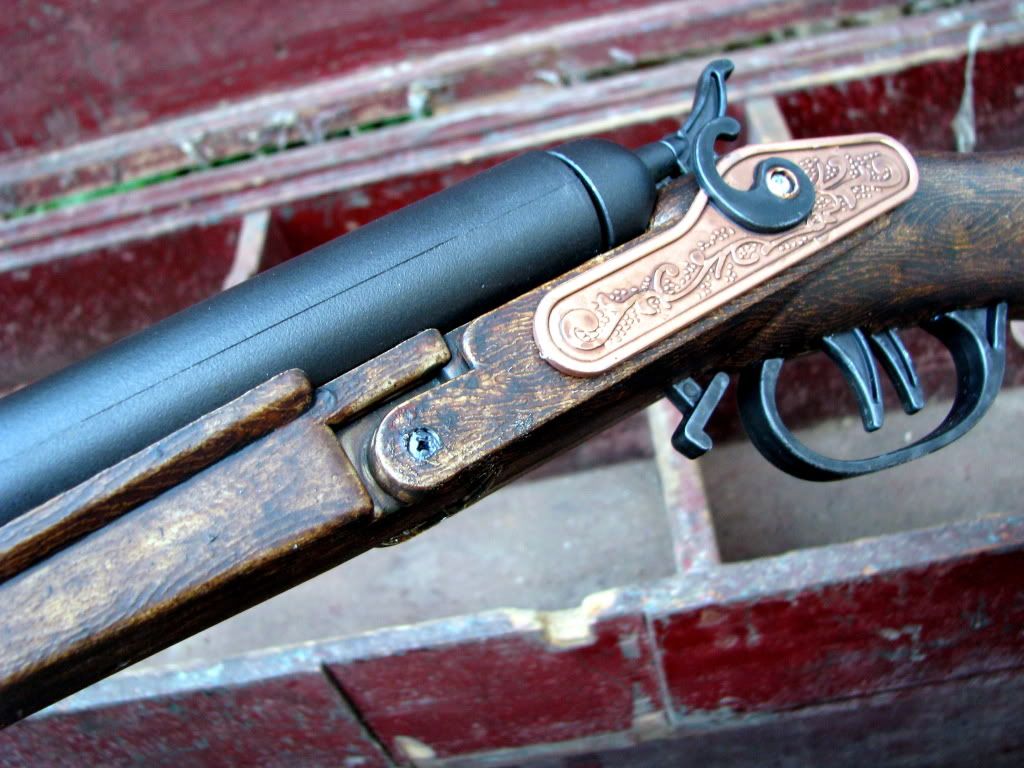
After that, this one was all paint. The metal barrels were painted with a rattle can, and the “wood” was primered in basic white. I achieved a wooden color over the molded plastic wood grain with a series of washes, basically random mixtures of all the old brown inks I’ve collected painting miniatures. I was really pleased with how well it looked like old, oil-stained wood. The copper accent pieces were also spray painted and lightly inked brown prior to final assembly.
At some point I plan to revisit this piece. I’d like to make a simple, low-slung holster for it to make the weapon better for issuing to under-costumed friends on deployment to Conventia. I also plan to mount small LEDs and batteries (basically just small LED throwies) inside the shot gun shells to give them a nice, “plasma inside” sort of glow. I should probably make some small ammo loops on the holster to show them off better.
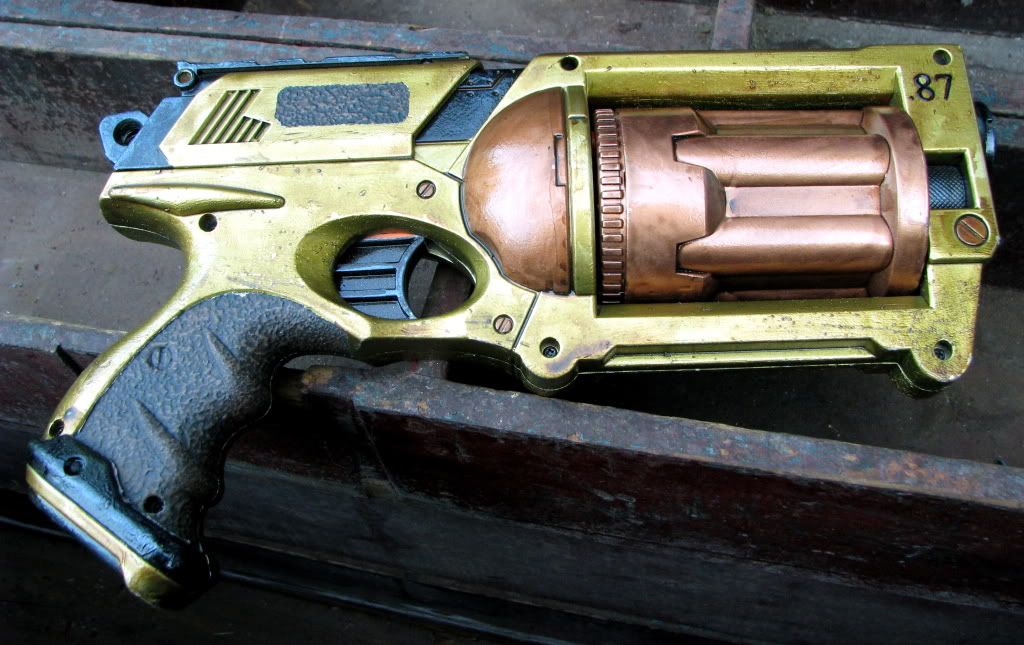
Next, I’d like to take a look at “The Brass Monkey,” and 87-calibre Air Navy Revolver.
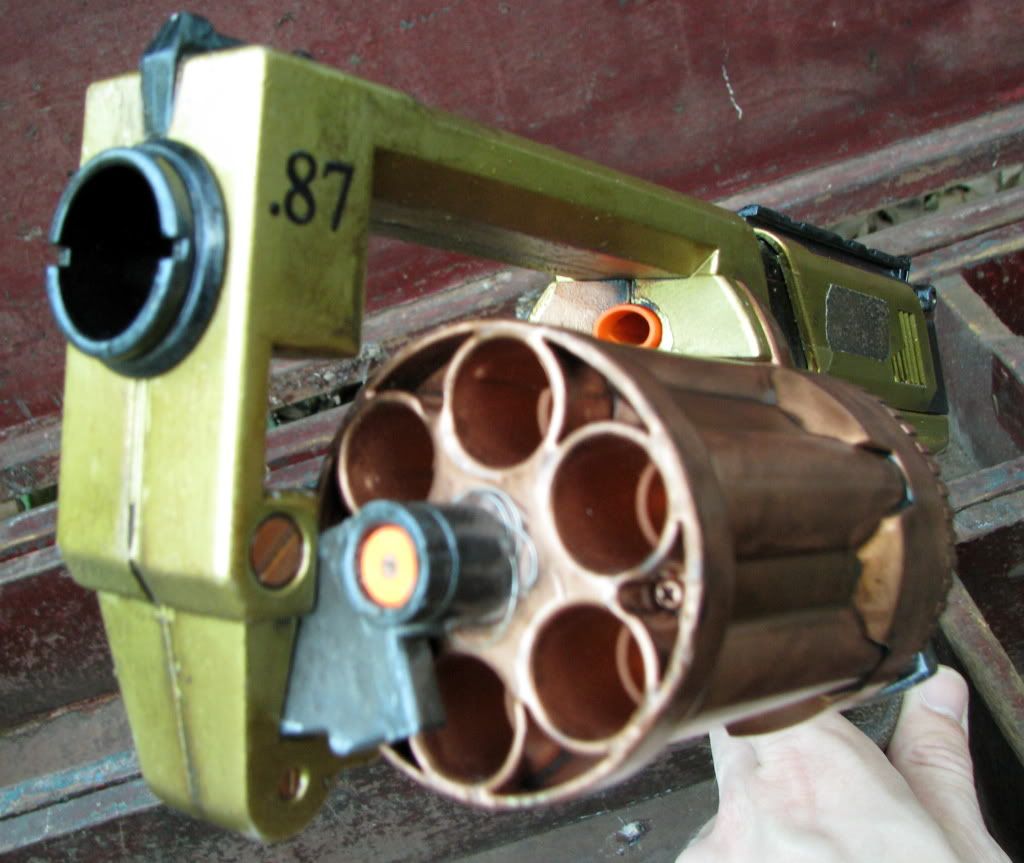
Yes, this is my (obligatory) Nerf Maverick mod. I didn’t do much at all to modify this pistol before painting it, although I did modify it so the cylinder would fall all the way to the side, but I really just wanted to see what I could get away with in terms of masking and multi-layer spray painting before I ruined the gun, so I picked one up at the thrift store for like $3 and just went to town on it. I ground off all the Nerf logos with a Dremel, and used 2-part epoxy putty to fill in some of the unwanted details – in looking at American Civil War revolvers, particularly the Colt Army and Navy models, one thing that stood out to me was the slightly more simplified lines of the Navy models, particularly around the cylinder, so I tried to imitate that look by smoothing out the grooves cast into the hemisphere behind the ammo cylinder. All the lines between colors were achieved by spray painting one color, masking it off with tape, and spraying on the next layer.
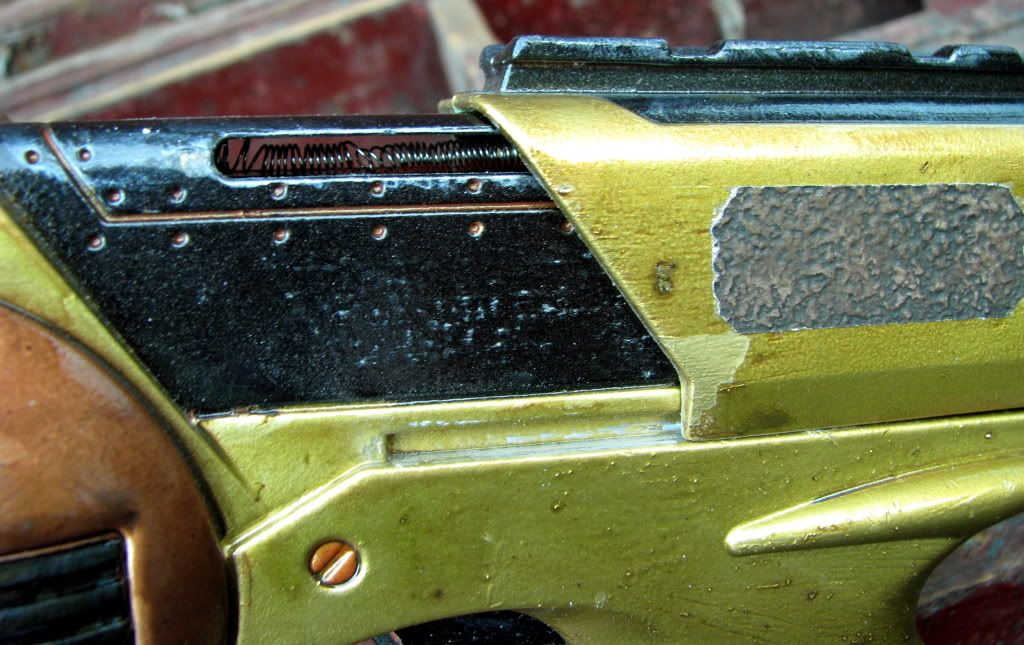
In terms of visual appeal, this method was quite effective. In terms of weapon functionality, it left something to be desired. Actually, I pretty much fucked this one up in that department. I lost on small internal spring, and ruined of the main spring that pulls the slide back into position. I was also way to liberal with the masking and painting, and I got paint onto areas that need to slide freely for proper operation. Oh, well – I set out to make a test piece, and that’s what I got. It’s valuable to learn things, right?
Again, color selection and paint brand choices, as well as clear coats, were selected to give me exposure to as many brands and variants of paint as possible. This one also got an all-over coat of ink to tone down the bright brass frame. The “.87” on the side of the frame is affected with simple stick-on raised letters from the scrap booking section of the local craft store. (I got the 87 by measuring the inner diameter of the barrel, not the actual size of the darts.) I’m very happy with the way this one looks, I just wish the damn thing still shot.
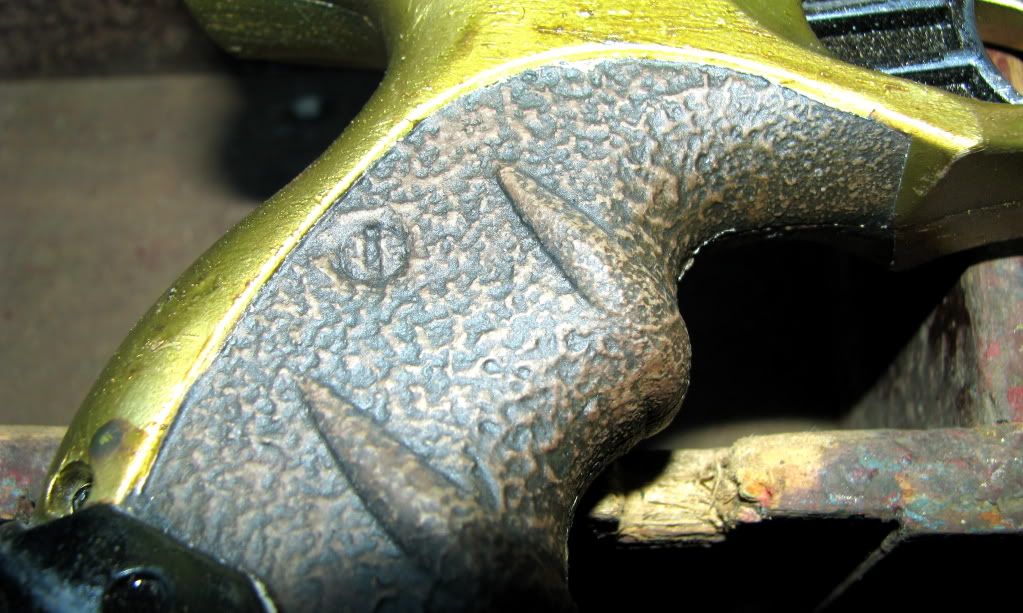
The really interesting detail on this gun, and the technique that I’ll be reusing later on other things, is the fake leather grips. I sanded off the little nubs that had been on the grip, and after everything else was painted I masked the gun to show just then handle and a small rectangular area on the sides of the slide. Then I sprayed these areas with textured spray paint, the kind that is supposed to look like stucco or, well, I don’t know what it’s supposed to look like, but the paint has fluffy, chunky material suspended in the paint. The more you spray, the more gunk builds up. I’ll play with it more as I go to see if I like it better with a heavy coating of gunk or a lighter dusting, but here I tried to put it on pretty evenly. Once it was dry I needed to make it look like leather – I’d used a light beige color I picked up for an as-yet unfinished 28mm shopping mall I was gonna make (I’m sure you’ll never guess what I planned on killing by the bushel in a shopping mall…). I’ve got notes on the exact mix someplace, but it was basically just a simple wash of strong brown ink, then a bit of matte finish clear coat. The leather grips are my favorite thing about The Brass Monkey, and I’ll definitely be reusing this technique.
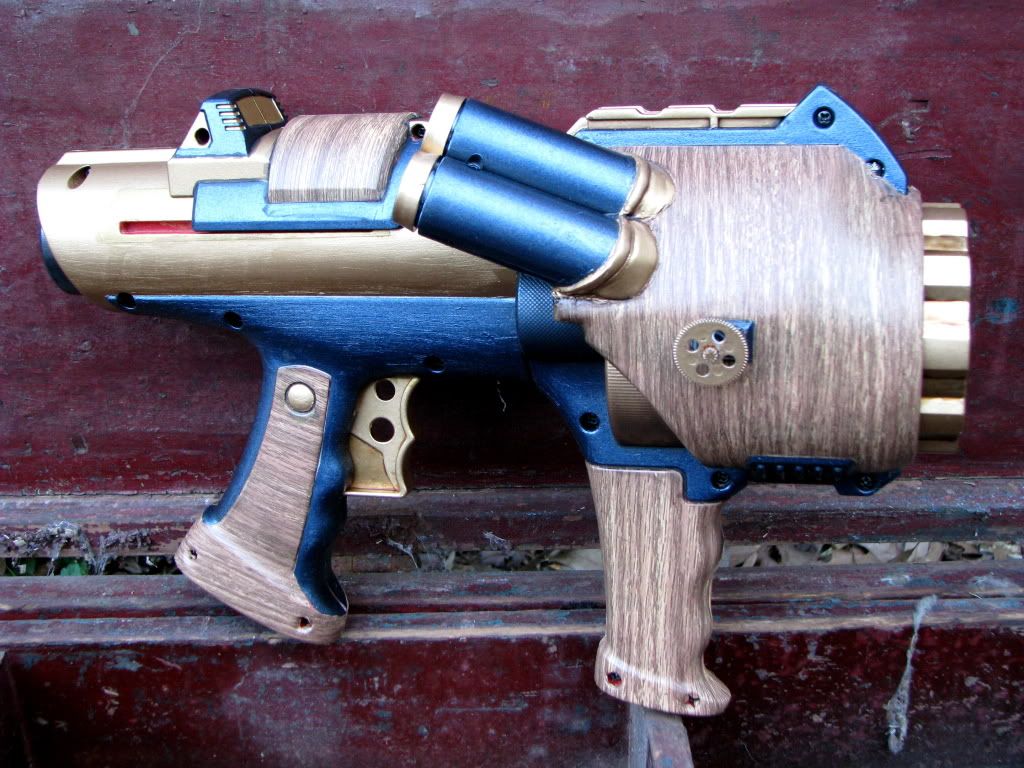
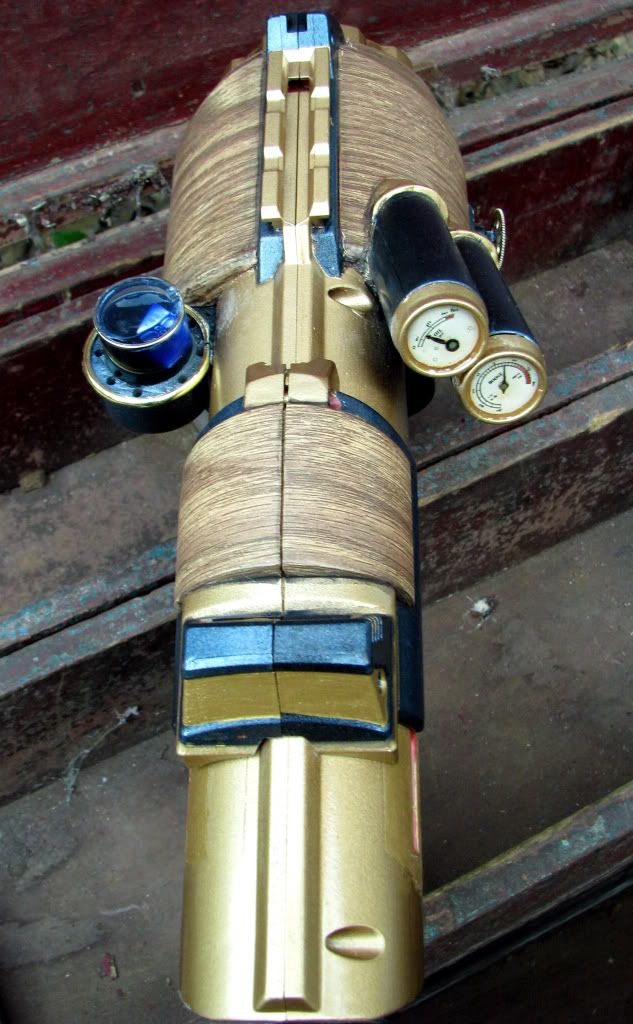
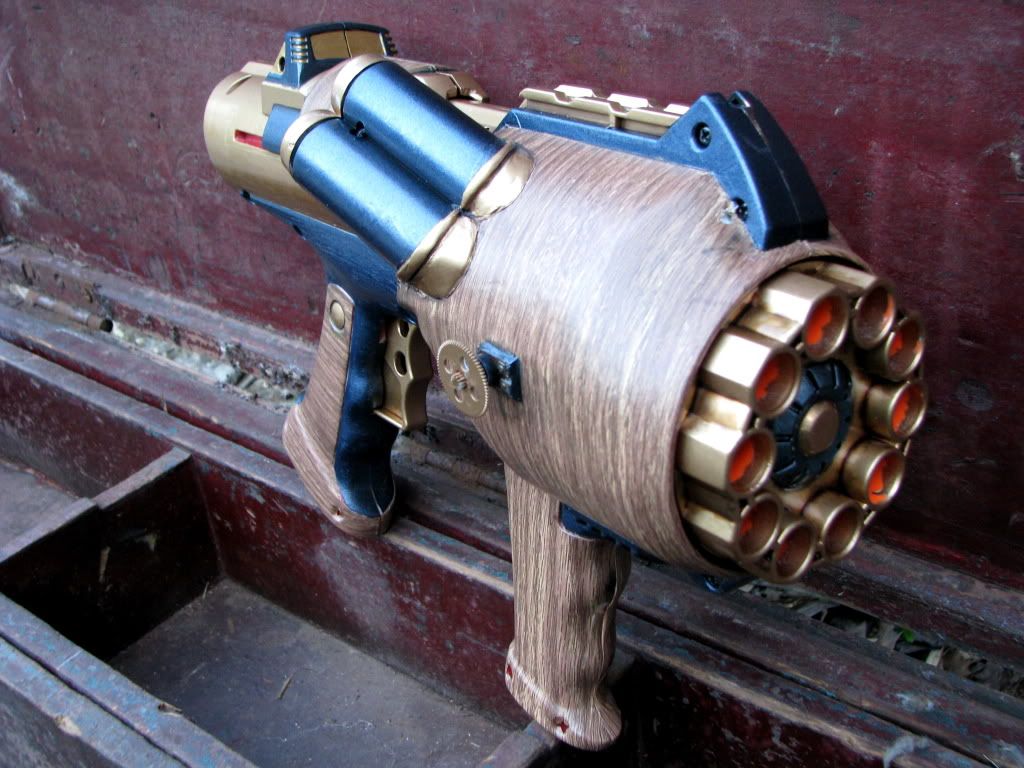
Last but not least, I’d like to present this interesting but unnamed weapon for your consideration. Several names came up during this project, many involving words like Bootstrap, Blunderbuss, Bumble Bee, and keg, but they never really fell into the right mix for me. Oh, well. This one’s the most ambitious of the three, with the most sculptural modification and a few other new techniques. Oh, and this one still works, so its got that going for it, which is nice.
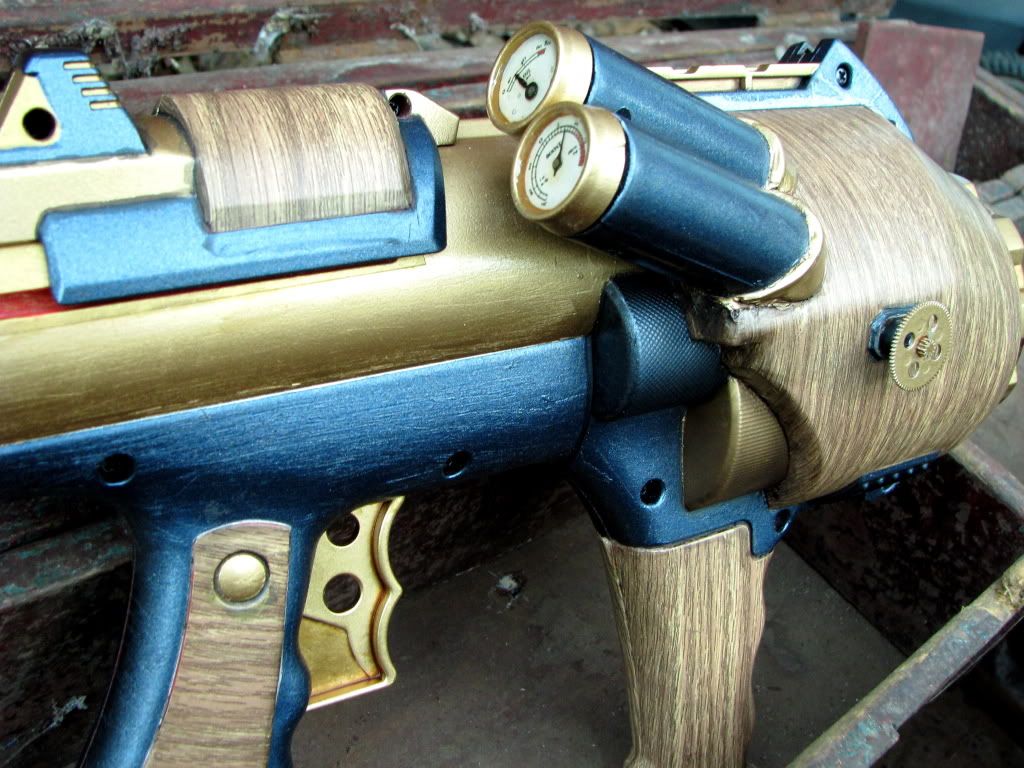
The gauges poking out at such an odd angle are, in fact, the end of the barrels I cut off from the shotgun. I cut the open end off at an angle, epoxied them onto the side of the gun, and built up half-decent mounting brackets from two-part putty. To make the gauge faces, I started by finding a company that sells custom gauges to hot-rodders with a nice catalog of available faces on their web page. Their low-res free samples looked just dandy when scaled down to about ¾ inch with a little color added in the GIMP.
The ends of the shotgun barrels were made as a separate piece of bright orange, “oh, god, don’t shoot me it’s just a toy,” plastic, which I simply removed and spray painted brass then glued in the new gauge faces. The hands came out of old pocket watches, held into place with tiny little brass nails (I picked those up 7 or 8 years ago, and they are still coming in handy. Check model shops that sell wooden ship models if you want some, they rule.) The lens effect is just several coats of brush-on thick gloss varnish, with a dab of brown ink added to one of the middle layers to take the edge off the bright white paper.
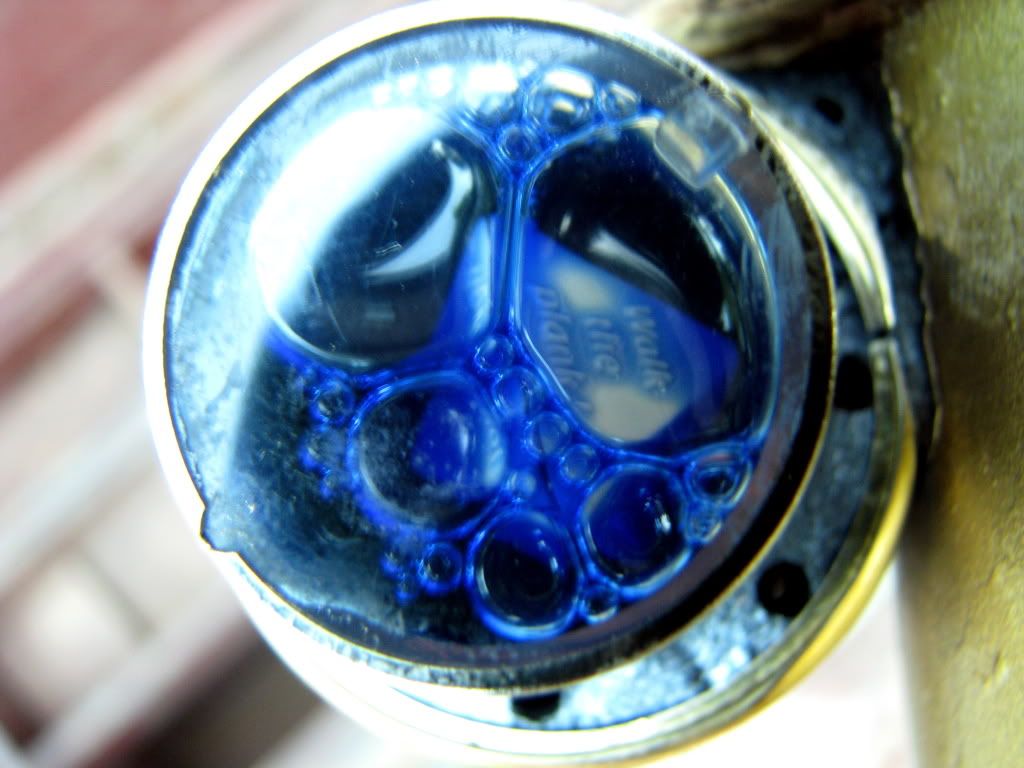
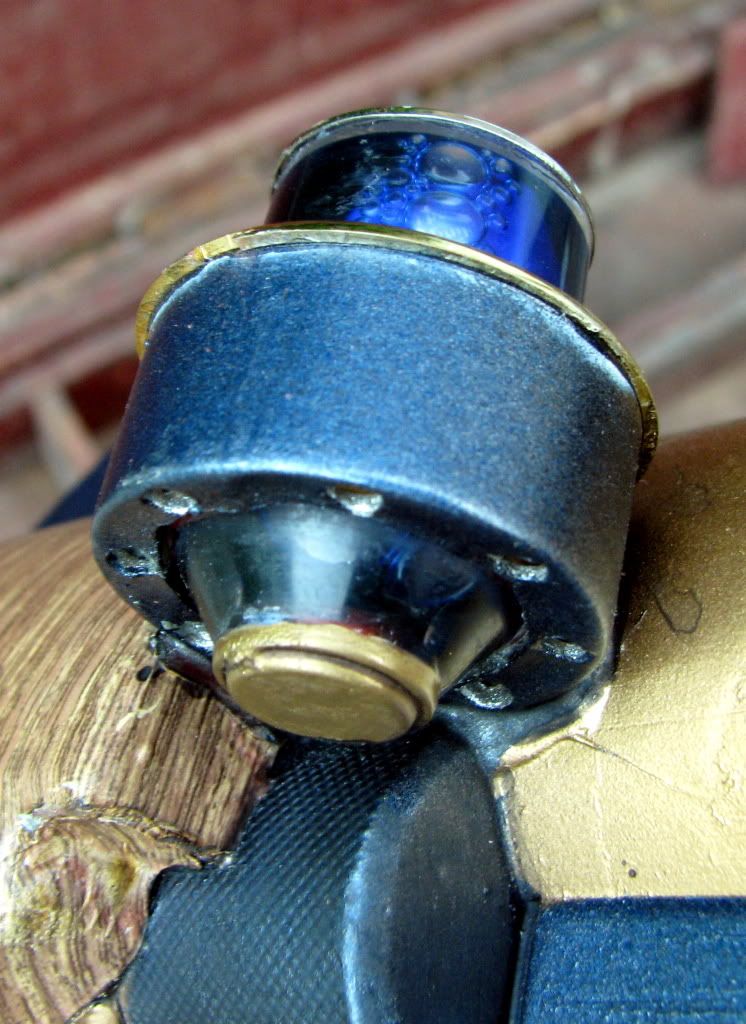
On the other side of the gun I mounted a small “magic 8 ball.” I have no idea what it’s supposed to do or why it’s there, it just looked really funny and I ran with it – hay, it is a pirate-themed magic 8 ball thing, ripped from the chest of a really awful toy figure. The fluid inside also matched the blue color I had in mind for the main body of the gun. It is set in the plastic shell of an LED “tea candle,” filled with putty to keep it snug. I drilled holes around it to give it a more “machined metal” shape, and totally lucked out by finding brass rings to fit in the spares box.
Other modifications were minimal – I drilled out two holes in the trigger, again to make it look more like machined metal. I added a small knob – I think the cog came out of an old printer -- to one side of the “keg” structure. It turns, but doesn’t connect to anything.
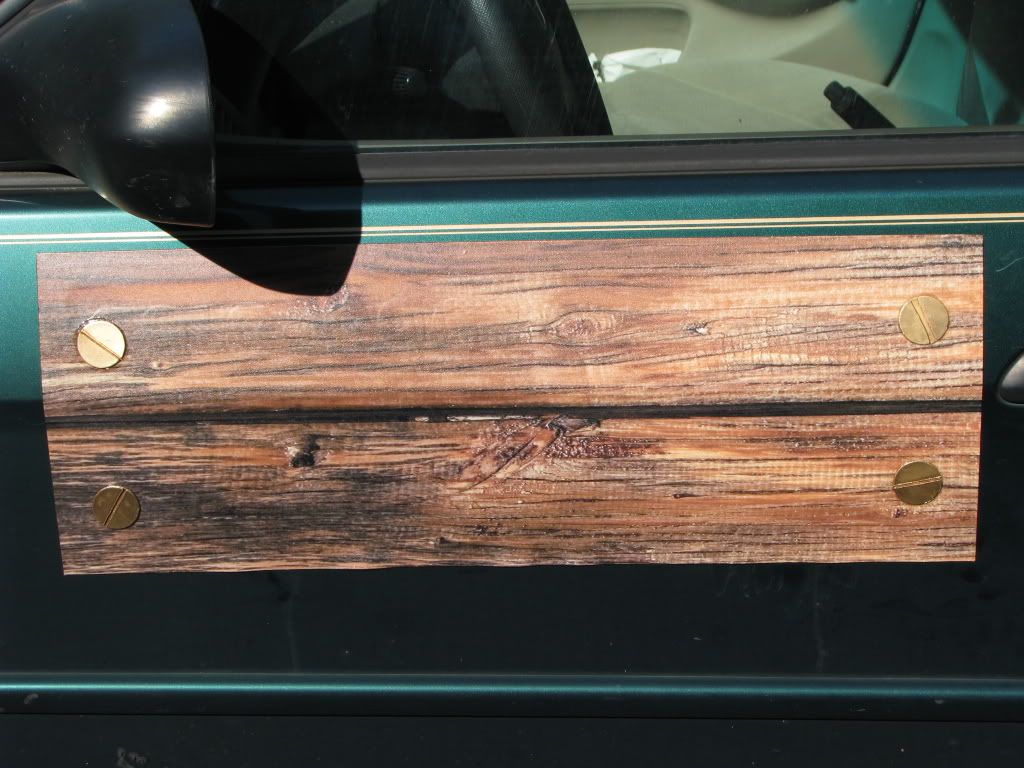
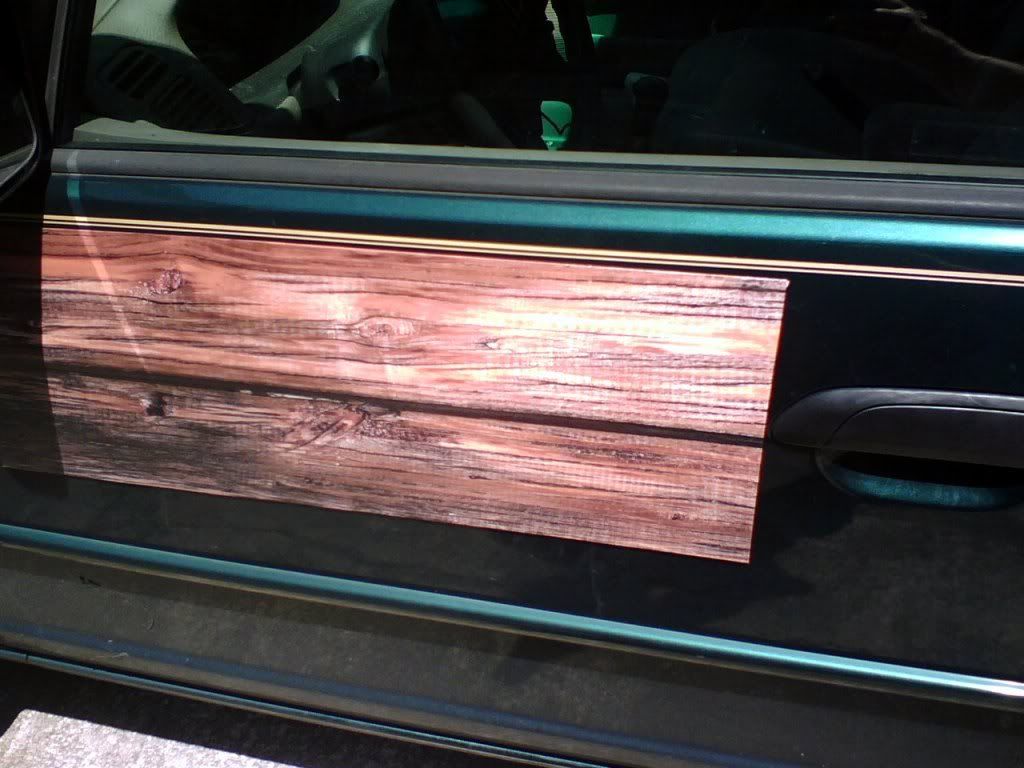
There were two techniques that I wanted to test out before using them on other, fancier, projects – fake wood over plastic, and air-mixing spray paint. I knew I was going to have shapes in the future that I couldn’t (or wouldn’t want to) replace or replicate, but that I would want to look like wood. I’d hit on the idea of using wood grained vinyl contact paper, the sort one might use to line a kitchen drawer, and needed something to test it out on. Everyone told me this would just never work, it wouldn’t stick, I wouldn’t be able to get it around all the corners, and well – that just meant that I had to try it. But they had a point, I really didn’t want to invest a lot in a project assuming this would work, only to get to the end and find out my who plan is crap. This gun (another thrift store find) was selected precisely because I hated it, so if I totally screwed it up somehow with the contact paper I’d only be out a few bucks and a couple of hours. It turns out that I had a lot of fun modding it and now I really like this gun, so I’m glad it worked!
Here’s the low-down: before I did any paint work but after all the sculpting was done I sat down with the gun, a sheet of contact paper (remember, they call it paper, but its plastic), an Xacto blade and a Bic lighter. I cut the paper to about the size I wanted for a given section, and just slapped it down – you may notice that I slapped too quickly on one side of one hand grip, and now the wood grain doesn’t line up. Don’t do that. I worked the contact paper over all the shapes and contours, cutting it away with the knife as I went. This needed to be done before painting, there’s no way I could do it without ruining the finish on the paint around the wood grain sticker. I used the lighter – sparingly – to heat the plastic and stretch it over curves and around corners and made sure to get the edges well stuck down. I really wish I could give you better pointers, but you’ve just got to get your hands on it. It’s actually pretty easy to do, but very time consuming. I can see why everyone said it wouldn’t work, without heat stretching it they would have been right. But in the end, I think it came out pretty good – but if you look for them you can find places where I didn’t get the sticker all the way back into a corner, or some bit of edge is peeling up. Its also next to impossible to get the contact paper over all 3 exposed sides of a rectangular corner without it wrinkling up. You can minimize this with careful heating and stretching, but its hard to do that enough to get it smooth without either rubbing off the wood print or melting right through the vinyl. I tried to use solvent-based model cement to soften the vinyl and glue down its edges, but this did more harm than good overall and I don’t recommend it.
This would probably be a good time to warn you – if you do this, which I do not advise, you are going to be heating flammable materials in your hands, probably right next to your face. I don’t have any idea what kind of fumes this crap releases when heated, but I’m sure they don’t contain vitamins or grant super powers. If you use too little heat and try to stretch the vinyl it will rip. If you use too much heat – meaning, if you hold the lighter too close for too long – it will melt and/or catch fire. If you tried that stupid trick with the model cement, it will almost instantly catch fire and spread to all near-by model cement, including any that may still be wet on your fingers. I don’t think additional details are necessary, let me just make this very clear – I do stupid shit in the work shop. Don’t be like me. It can give you cancer.
But that wood-grain vinyl contact paper stuff rules. I’m gonna be using more of it.
“Air Mixing” is a term I just made up to describe what I did to achieve the blued gunmetal finish on the main body of the gun. I couldn’t find a color like that in a single rattle can (I’m sure its out there, I just couldn’t find it). So I got a can of middle-grey gunmetal, and a bright blue metallic intended for model cars. After masking over the fake wood I sprayed a base coat of gun metal (more to get decent coverage and make sure the paint got into all the little corners and crevasses) I took one can in each hand and sprayed them both at the model in the same time, feathering the blue into the gunmetal as I went. This was all kinds of fun, much more “painterly” than the normal rattle can experience.
After that I masked again, to cover the blued metal, and sprayed brass over everything that was left. Then it was time to remove all the masks and see how it turned out. Well… if I was too liberal with the masking on the Brass Monkey, I was too conservative with it on Bootstraps Unnamed Wacky Thing. While none of the moving parts were impaired, you could still see lots of red plastic showing through in places that I really should have left exposed to spray paint. In the side view, you can very clearly see the red showing through in the groove for the charging handle. Less obvious but still noticeable is a rectangle around this groove where the brass color doesn’t quite match up. I’d left that whole area totally masked, so at first when I pulled the masks off there was a big, wide, red stripe down both sides of the gun. I touched this up with brush paint, as I did everywhere else I felt really needed it and it wouldn’t mess up the functioning of the gun.
The other problem I had when removing the masks was in several points they pulled up the vinyl contact paper. For the most part I was able to fix the damage, but there are places that looked nicer before they got tugged and pulled at by masking tape. I don’t have a good solution for this, other than to slow down, be careful, and never remove the mask over the vinyl from the edge towards the center, always pull the tape from the center first, moving out to the edge. That rule won’t apply in all situations, but it will help.
Still, I was well pleased with the effect I achieved with the vinyl wood grain and a heat-stretched application. I’ll definitly be using this technique again. I’m also very pleased with the blued gun metal. Its not quite as blue in real life as it looks in the pictures, and I think next time I’ll use less blue, but it was fun and now I know you can spray two paints at the same time for interesting effects.
So, there you have it – my first batch of SteamPunk styled custom toy guns. The three toys themselves cost me a grand total of about $10, but I spent considerably more on the spray paint – but I can defer that cost somewhat because most of the paints were also used for other projects.
