Seriously, they were one of the things that really drew me to Flames of War to begin with. I like the idea of fighting over a place/thing instead of just killing every man standing, and they look cool. I love that the game mechanics require you to make something, which can be anything at all but must be something, that will not fight or be destroyed. It just sits there, looking pretty.
I can come up with ideas for my own objectives all day. Really the only thing that keeps that end of the hobby in check is the need to build actual troops! But I do love me a themed objective... and it drives me to such distraction when my opponent doesn't have one, or worse, has one that makes no sense, like Desert Rats defending a blown up T-34. I'd love to have something to let them use, but it would be really nice if it matched, and I don't wanna make stuff for armies I'm not running. On the other hand, I've got a lot of strange little miniatures that arn't part of units, but I'd like to do something with. I could make them into an objective, but then they would only be part of that one objective, and never anything else.
Between these lines, I hatched the idea for a Universal Generic Objective, an UGO. It looks like this:
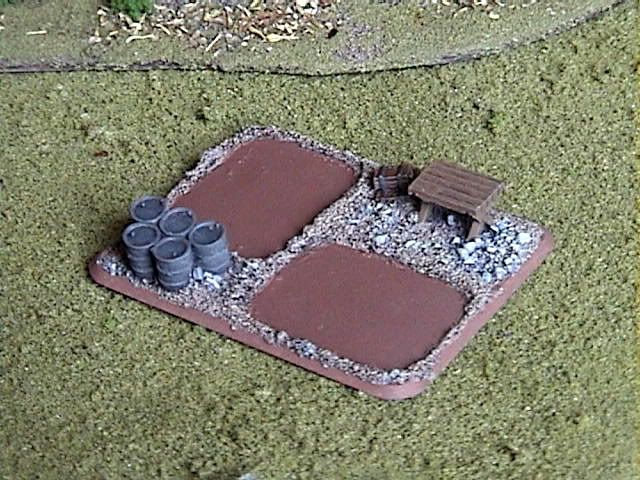
Basically, we've boiled the military objective down to its basic gamer essence, and added in the idea of Socketing. Look at all the really generic objectives out there, you know, retail? You've basically got dead tanks, staff offices, and supply dumps. So, here I've got a table and some barrels. What could be more generic? Now, for the theme!
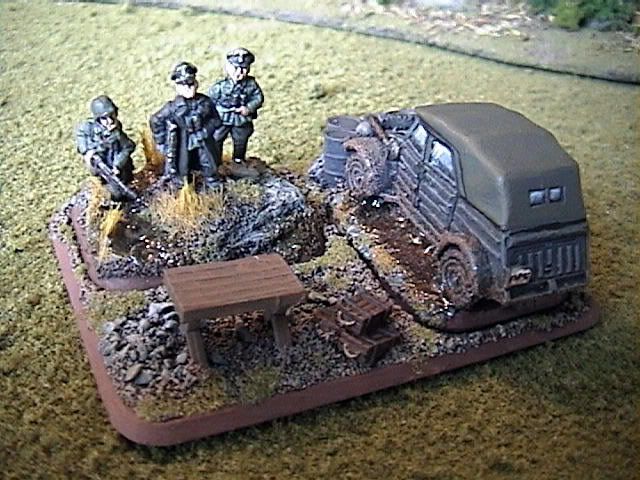
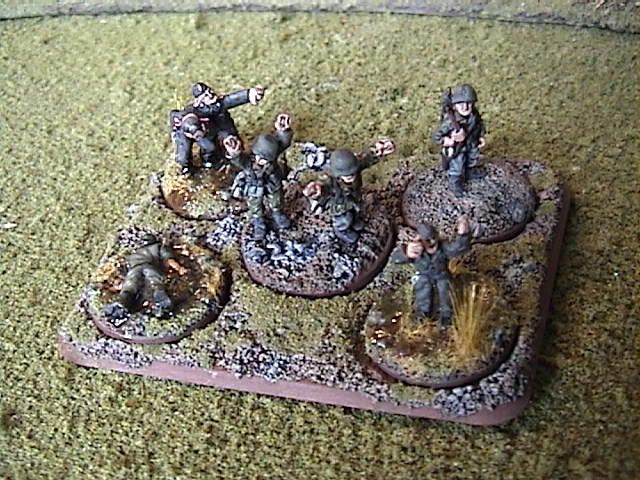
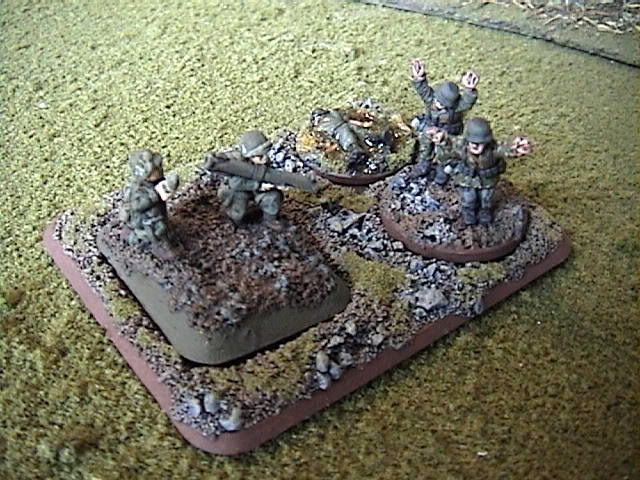
Look! Ze Germans!
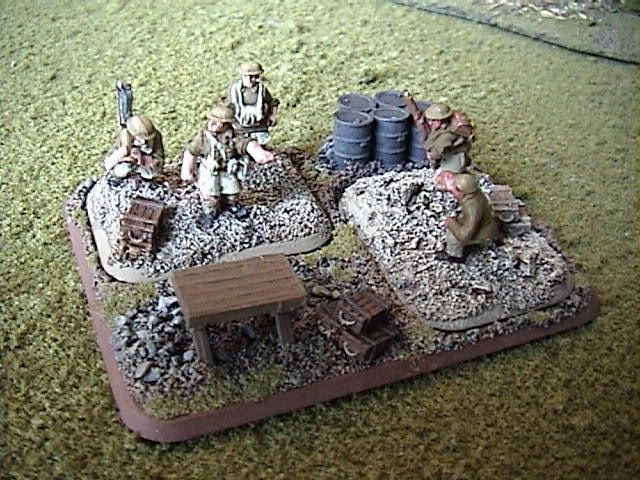
Now here come the Yanks!
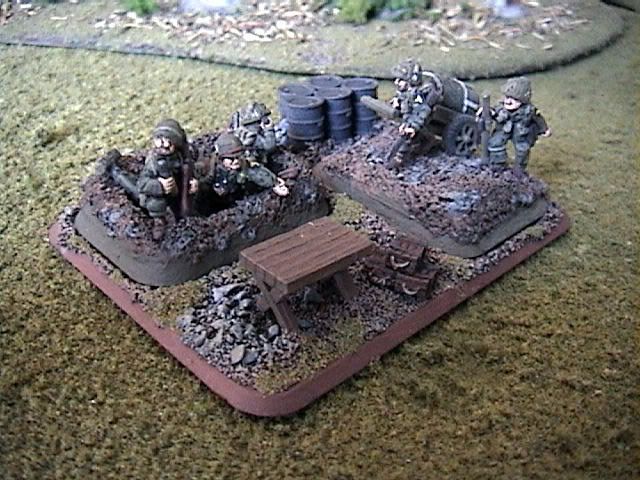
But what if they're British?
Basically, you take out your UGO, hand it to the other guy, and if he has two spare small stands in his box you will now fight over a matching, themed objective. Beautiful! Simple! Generic! Modular! By this point, I'm sure you're dieing to make your own. You must first assemble these rare, exhotic elements:
Materials:
- Large base (or same size piece of something flat)
- two Spare small bases (you can reuse them later)
- a few bits (I went with a staff table and barrels because I had pleanty)
- Super Glue
- Sand
- marker
- scraping tool (I like bent paper clips for this job)
- dirt shades of paint
- fake grass of your preference
The only real trick to this whole thing is making a decent socket. And its not much of a trick.
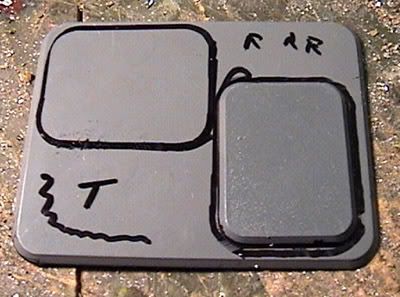
Lay down your large base and set the two small bases on top. Arange them so things will fit well later, no matter what those things were. I went with the perpendicular arangement because I thought it would make two command teams standing there look like they were having a meeting. Now outline the bases with the marker, being careful that they don't slip and ruin your trace. Set the small bases asside, and maybe make a note or two about where you'll place your bits of junk later.
Now we're going to lay the edges of the sockets. This is the only remotely tricky part.
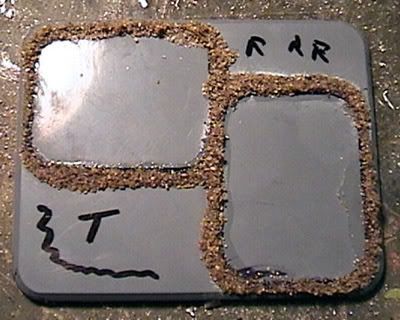
Lay a bead of superglue just outside the mark, running all the way around the line you made by the small base, and dump sand onto it. You should lay this line of glue just outside the width of the marker's ink, it is going to spread a bit. Scrape up anything that slid over the line too much with you bent paper clip, and test fit with the small base to get a good fit. You will want to do this quickly, but you've got a few seconds. You will be scraping up sand to get a good fit. Actually, for a really tight fit, you can let one or two drops of super glue cross over the line and then use the edge of the small base to shovel it out of the way.
After this has dried, you should have a decently tight fitting socket. It may be desirable to touch up the rim of the socket with another pass of glue and sand, it will all depend on how it feels. Normally this isn't necessairy or desirable.

Now just take your bits and glue them on. As you can see, I really didn't put much on there, just a table, some oil drums and an ammo box, but it will be pleanty. After all, there's going to be a half dozen people showing up! Just don't set items so closly to the sockets that they could get in the way when you try and add other miniatures later.
The fine details of the base work -- patches of rock that over lap, contour lines accross both pieces, etc. -- are what really sell an UGO, though. I don't think this would work if you just set down a piece of card board with some flock glued to it and called it an objective. Once you've glued down a few bits, fill in the rest of the smooth are with either sand (you'll have it handy) or whatever you like to finish your bases with.
Painting and Finishing
I'm not going to spend much time talking about painting dirt. You know how to paint infantry stands. I will say that to my eye, natural objects require at least 3 color, not including the primer, to look alive and organic. In other words, I dry brush my dirt with three shades of brown, and my rocks with three shades of grey. Do this to your taste. I finished the base edges to match my German army; this is one point where you won't be able to predict how your oponent will paint their troops. It might look silly to see snow-covered Russians standing in a Tunisian UGO, but hay, its generic! That's why I painted mine in nice, neutral woodland colors.

The same holds true for flock, static grass, and other artifical foliage. You'll probably want a little of it, but keep it to a minimum. I suspect the grasses and plants could look more off setting than the wrong color of dirt. Besides, how much time do you want to spend on makig an adapter? I just dabbed on a little bit of my basic flock color and called it a day. Obviously, you'll have to paint the bits you glued on, too.
Other Ideas for Sockets
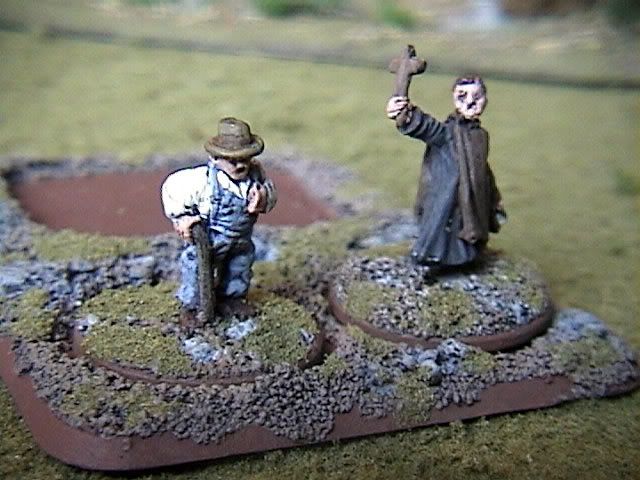
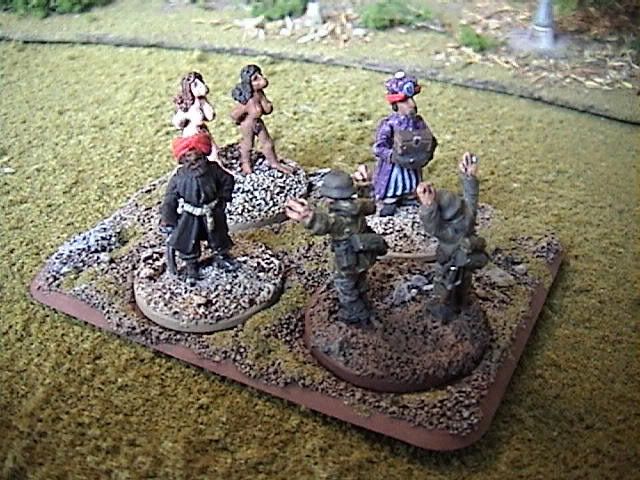
Once you've got the idea in your head for Sockets and Adapters, all kinds of ideas might come to you. Now, the other end of any socket is the plug, and you'll need things to fit into them. We've all got small bases, but chances are good that in your group other things have become semi-standard. For instance, folks around here like to base bailed out tank crews on pennies and nickles. For my self, I use pennies and nickles all the time to base single and double non-combatant miniatures, like villagers and refugies and stuff. A few random little odd ball characters can spice up a table nicely. But would you want them based alone like little table trinkets, or would you like to base them together, effectivly makeing civilian teams? Again, I'm thinking UGO.
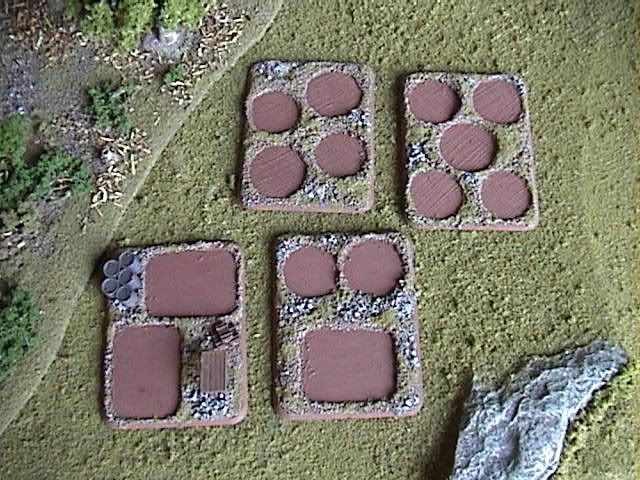
Using the same method as the standard UGO, I cranked out a few other little adapter plates in combinations I thought might be useful. I've got one with a sockets for a small base, a pennie and a nickle; one with two pennies and two nickles; and one with two nickles and three pennies. I painted them all up together. Now just drop combinations of individually based miniatures and anything on small bases, and you could have a different objective every game! To this end, I've taken a few "guy just standing there" poses left over from each of my armies and based them on pennies just to use them in UGOs (normally I put two bailed crew men on a nickle and use pennies for pin markers, but they work, too.)


No comments:
Post a Comment