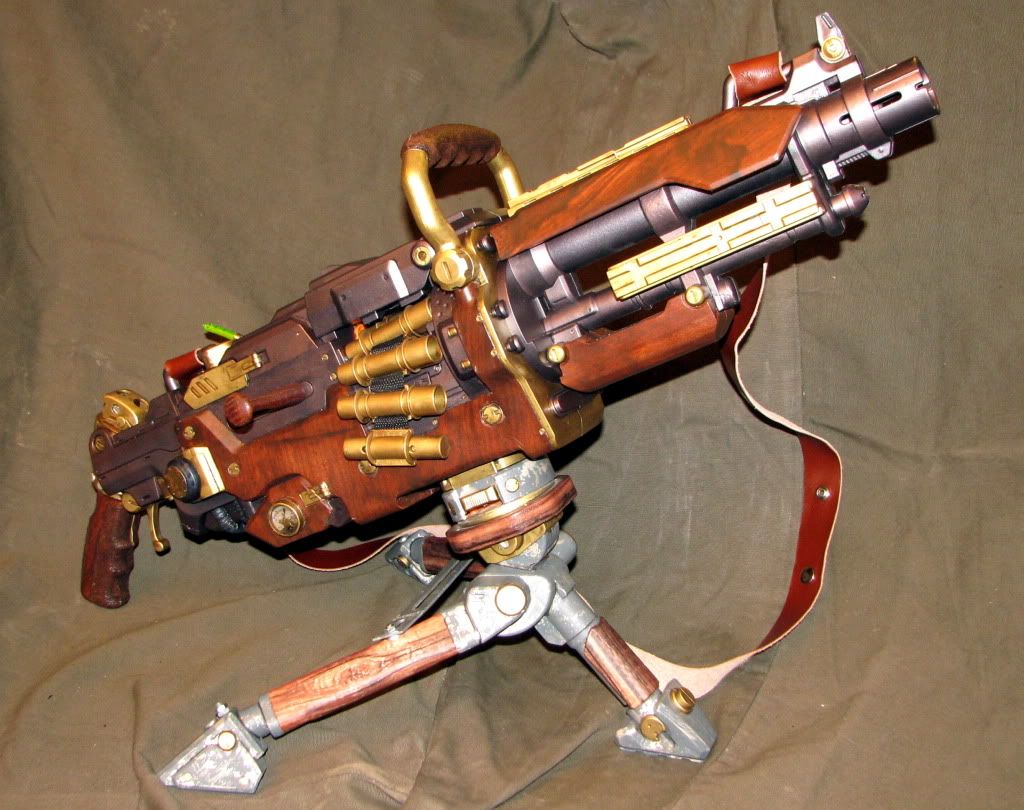
Its a modded Nerf Vulcan, but I think I've gone a bit beyond the typical repaint -- and dear god, did this project involve a lot of masking! The metallic color of the main gun parts was "air mixed" onto the gun, meaning I held a can of spray paint in each hand, one of them a purple metallic and the other copper, and sprayed them both at the gun at the same time, varying the color as I went.
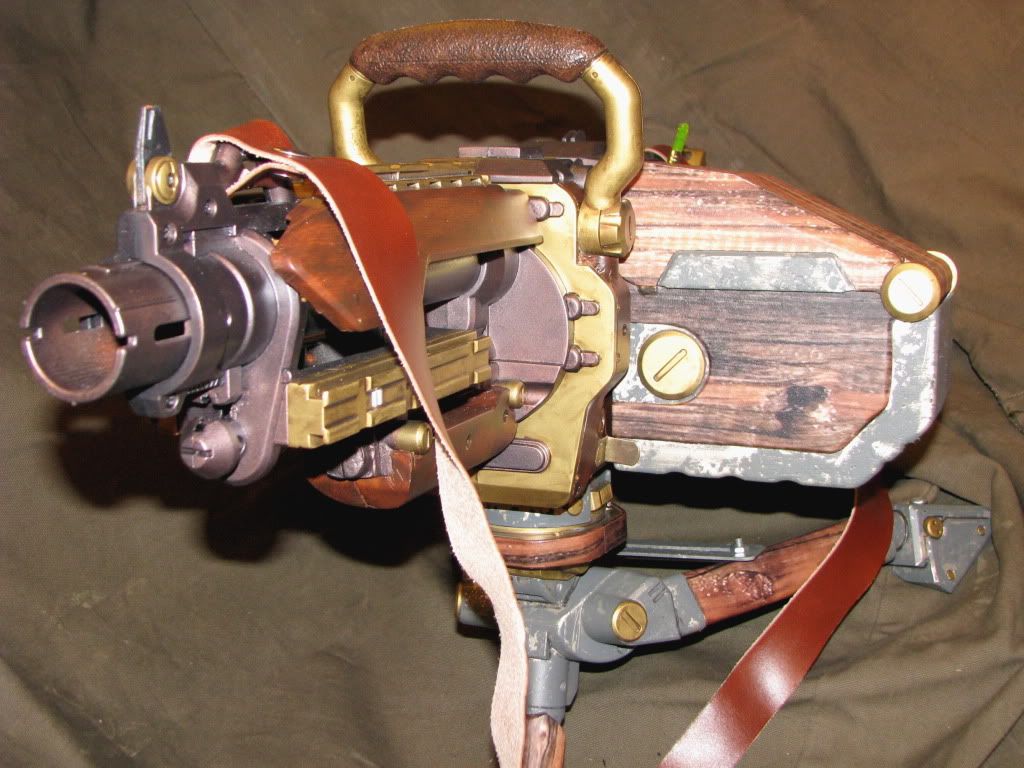
Aside from the standard internal Nerf mods (removal of all air-flow restrictors) I simplified the lines of the gun. I wanted the gun to look more like a real machine gun and less like some kinda techno-space-blaster-thing. This basically meant grinding off most of the raised little techno-gobbins with a motor tool and filling in the recessed mechano-crap with putty. Like, 5 or 6 sticks of epoxy putty.
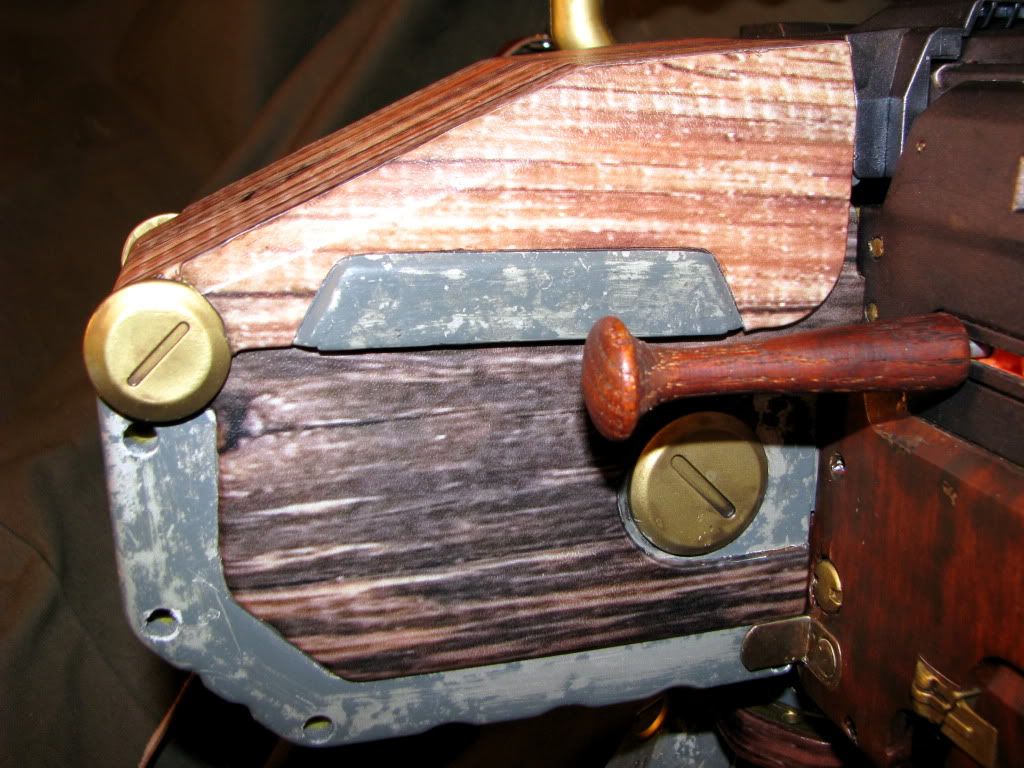
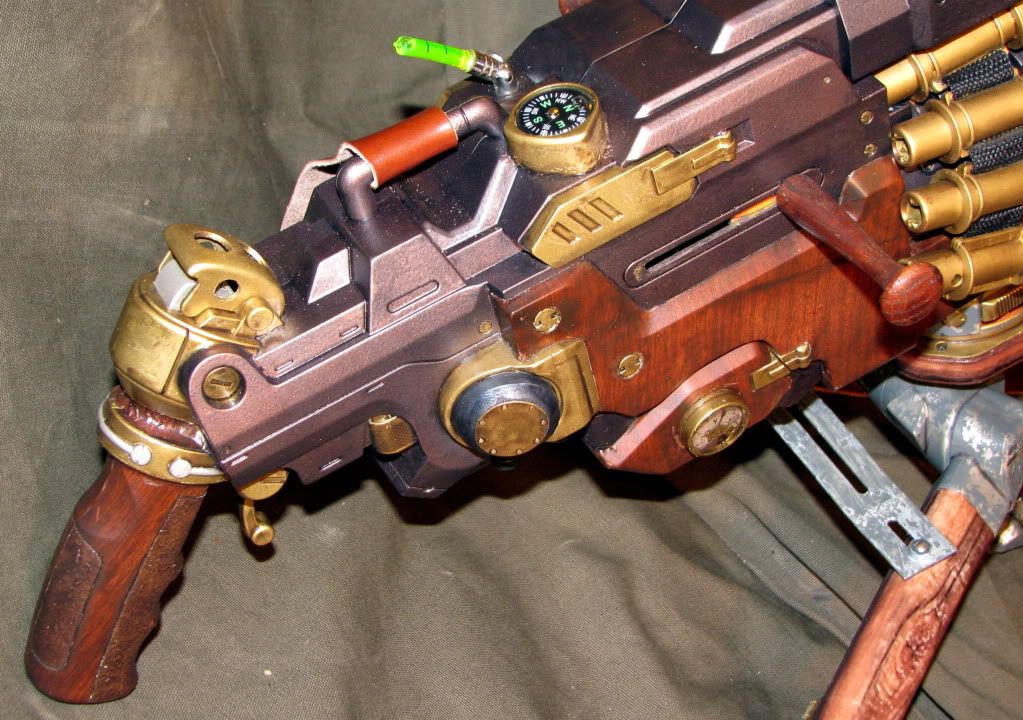
I had to do all the grinding, puttying, and sanding to get smooth surfaces to mount the fake wood-grain on. The smooth, dark wood grain on the gun itself is the same contact-paper died with acrylic inks that I've used on previous toy mods...
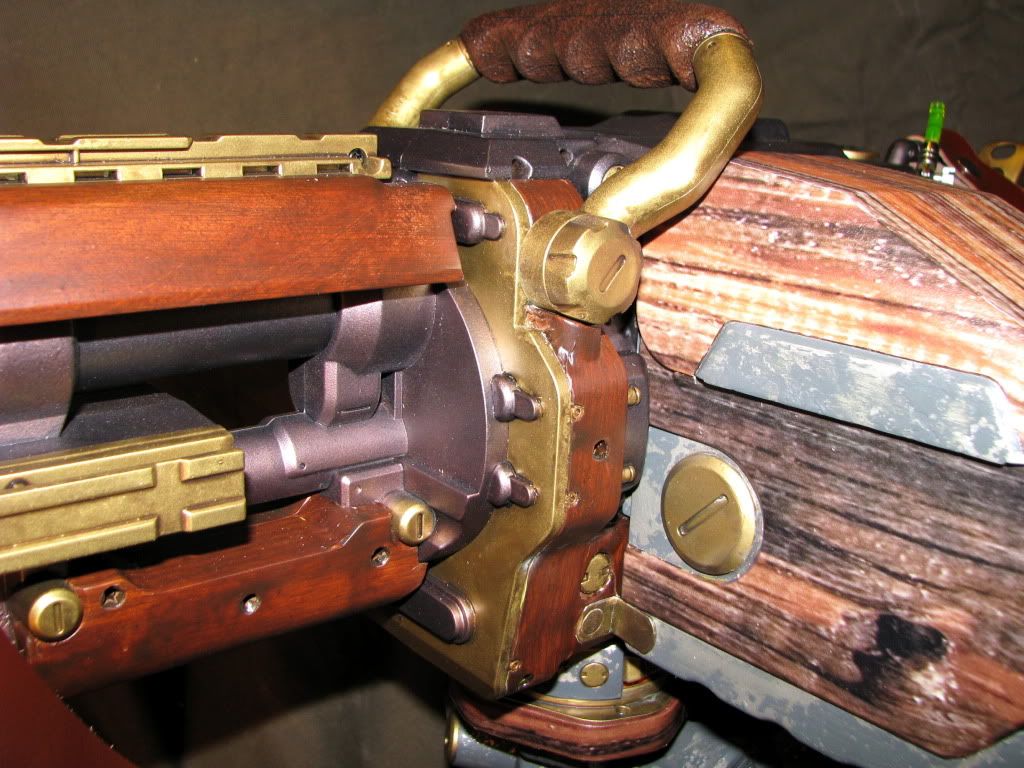
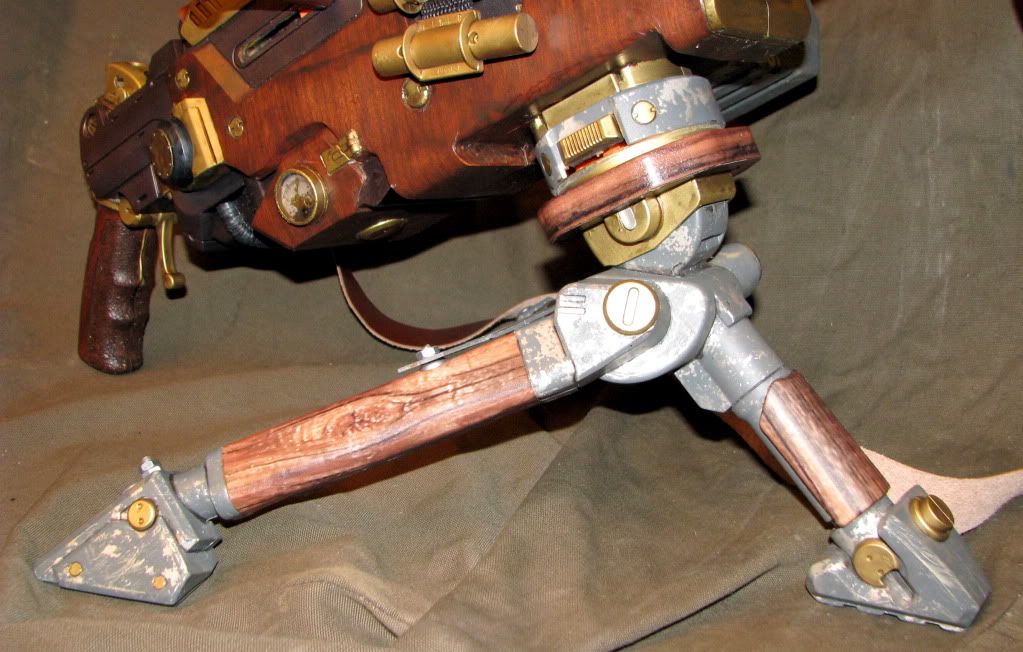
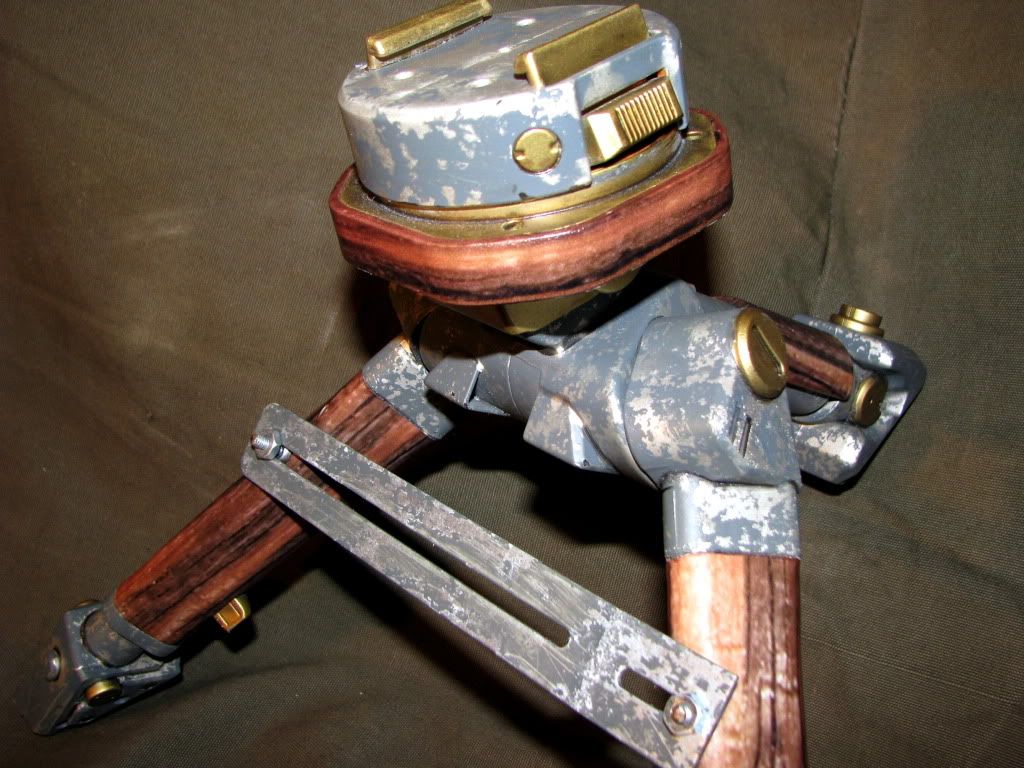
...while the lighter rougher-looking wood is a thick vinyl car-wrap sticker. I used off-cuts from a project we did for the National Guard at work, so good luck finding something similar. But I wanted the tripod and ammo box to look more beat up and disposable than the gun itself, which is oiled and cared for. I added a little support bar to the tripod, too.
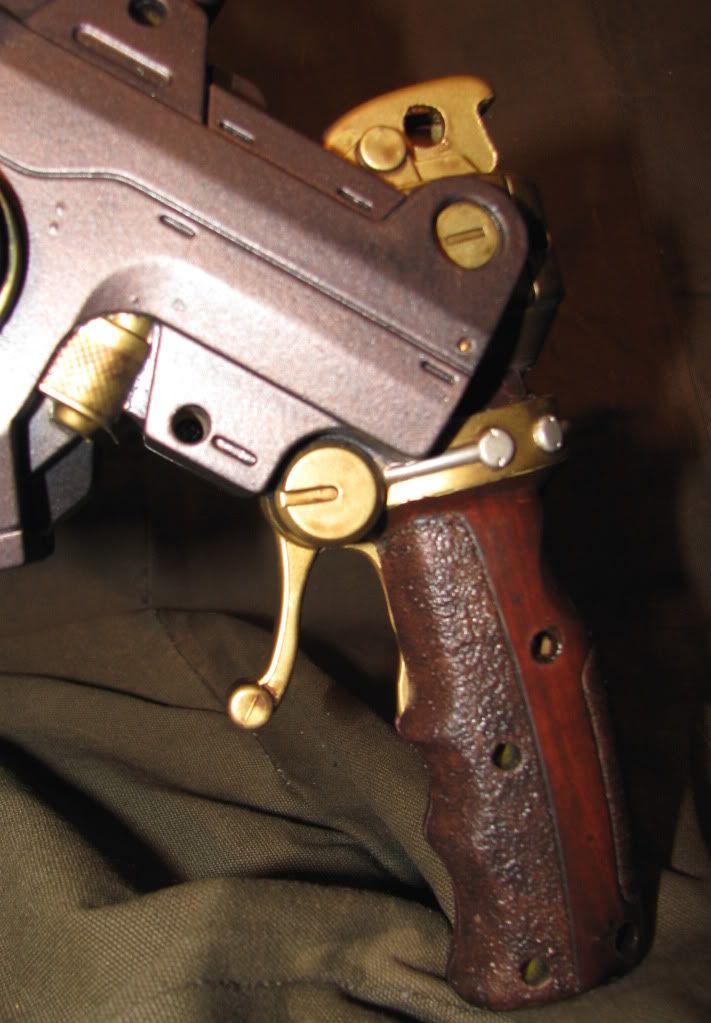
The grips got my now-standard fake leather treatment of textured spray paint, dry brushed acrylic paint, and inks.
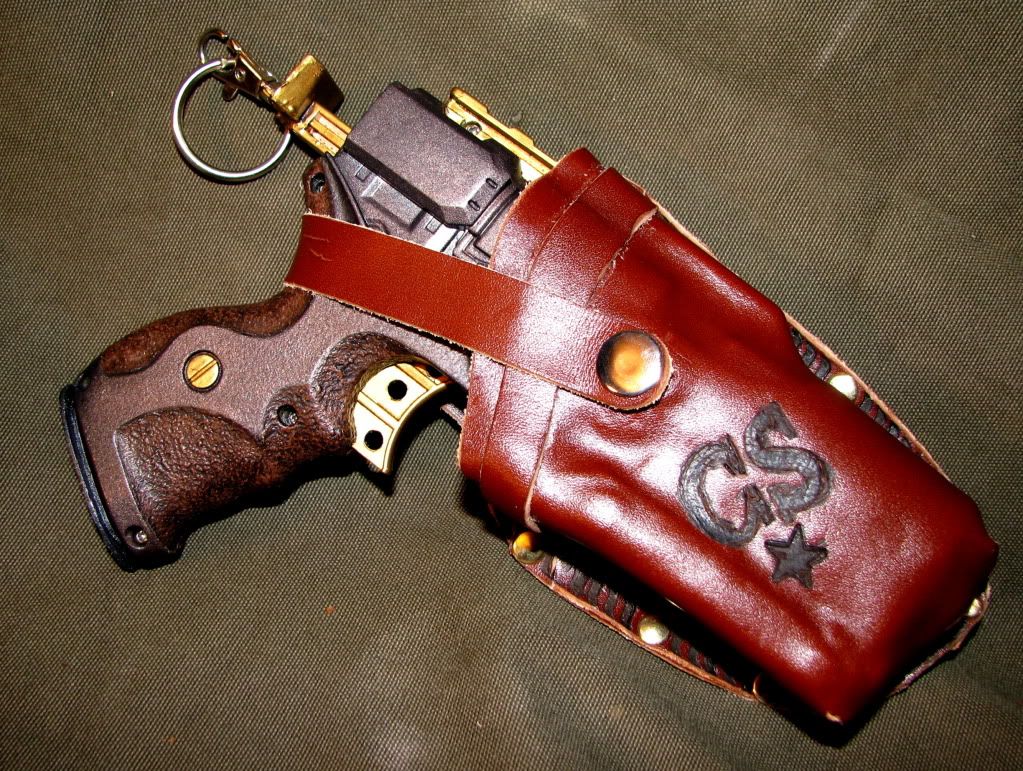
I really kinda like the chipped up paint look I got on the "enameled" parts of the tripod and ammo box. Continuing with the logic that the gun is cared for but the extras are not, I wanted to paint it to look really beat up. I also wanted to pick a color that would like militaristic, but not remind you immediately of any particular military -- paint it olive dab, and it looks like the US Army, paint it dark gray and it looks like the Whermact, paint it tan and it looks too modern. In the end, I went with a color called "Confederate Gray," which works just fine, since I kind of do a CS thing on some of my military toys anyway.
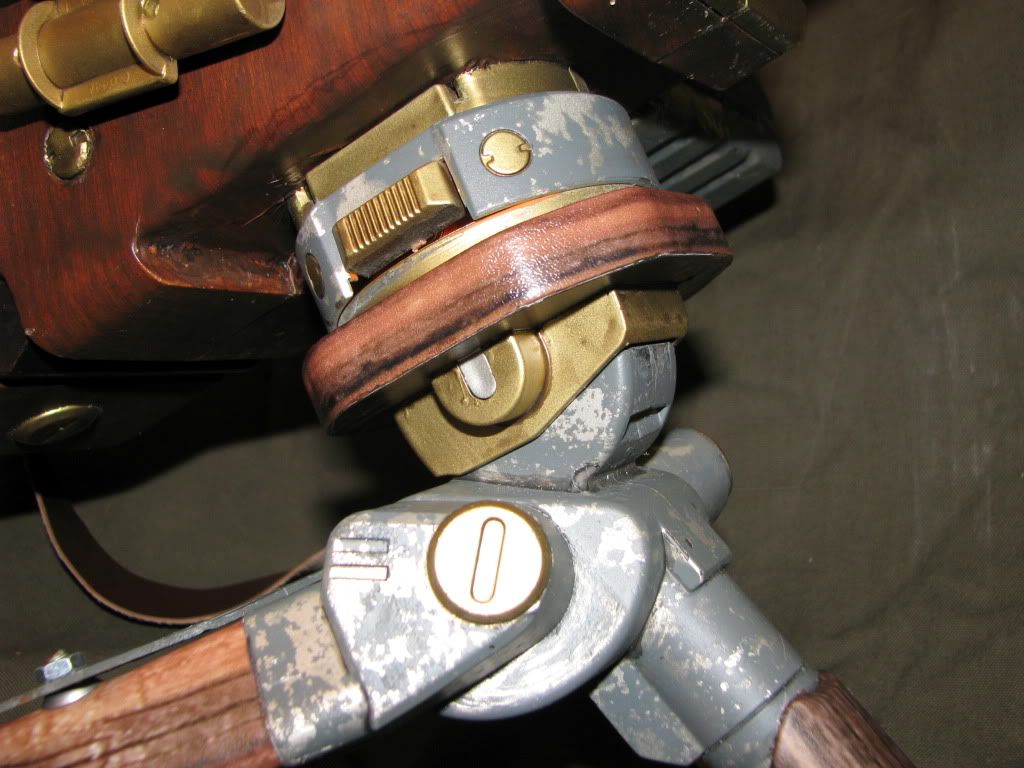
To get the chipped paint effect, I use a technique model makers call a "salt mask." Basically, what you do is mask off the area that you want to look like rough paint, and paint it silver (I used "nickel" paint, but whatever you want the base metal color to be). Then, using water to make it stick, cover the high-wear spots with salt. I used rough sea salt, but the grain of the salt will determine the size of the paint chips. The water will dissolve it somewhat, you really just have to play with it. After the salt is completely dry, you spray on the "enamel" color (meaning, whatever color you want that part to look like it was once painted) right over the salt and the model section. When the paint is totally, completely dry you just scrub off the salt with an old rag. Most will fall right off, showing you lovely craggy metal beneath; scrubbing off the last bits will give you a nice pattern of smaller surface scratches and generally distress the paint. When you're happy with it, wash off the last of the salt, let it dry again, and spray on a clear coat. After all that abuse, it isn't the strongest coat of paint in the world and will really need that protection.
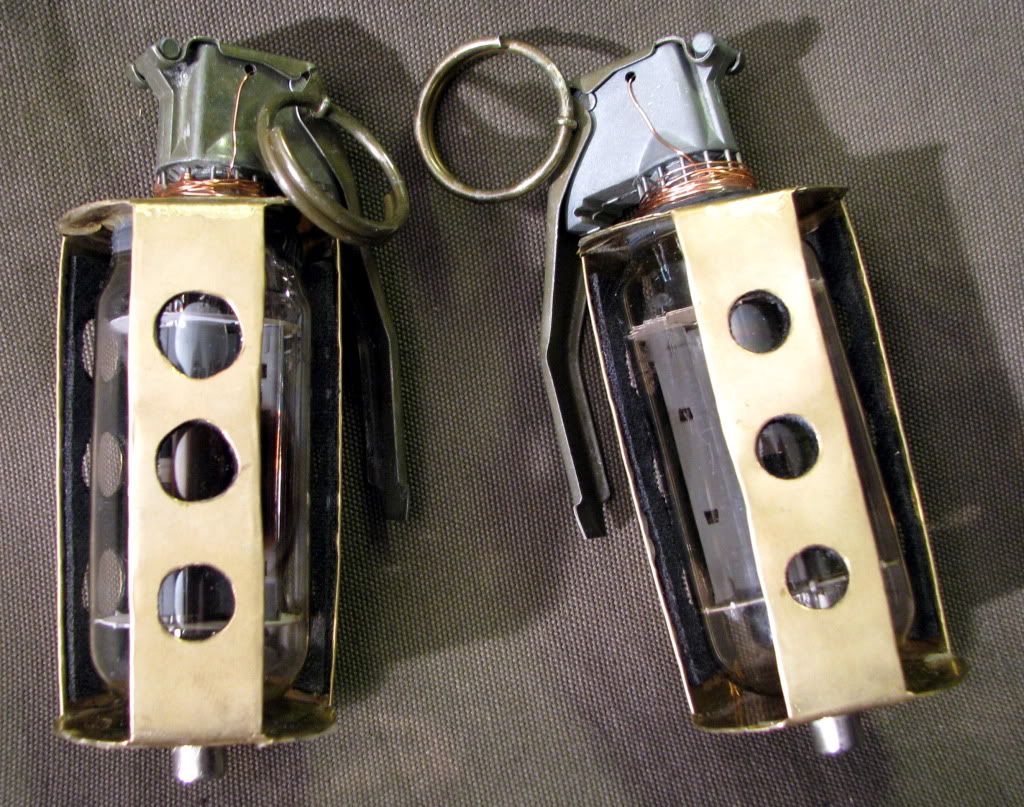
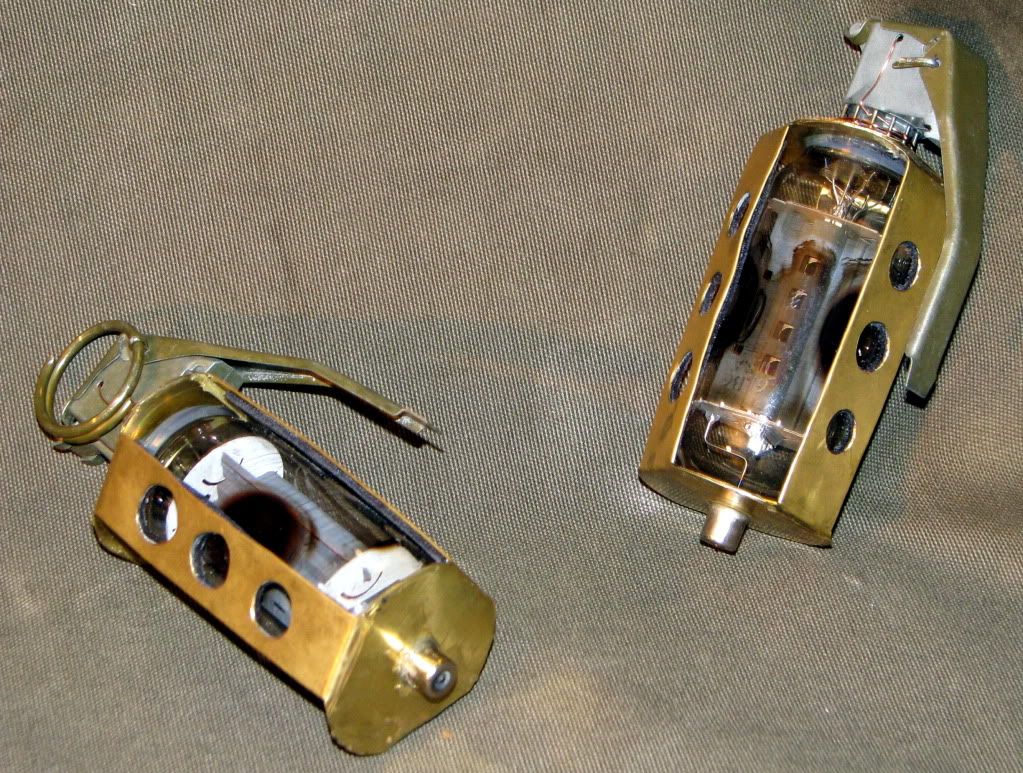
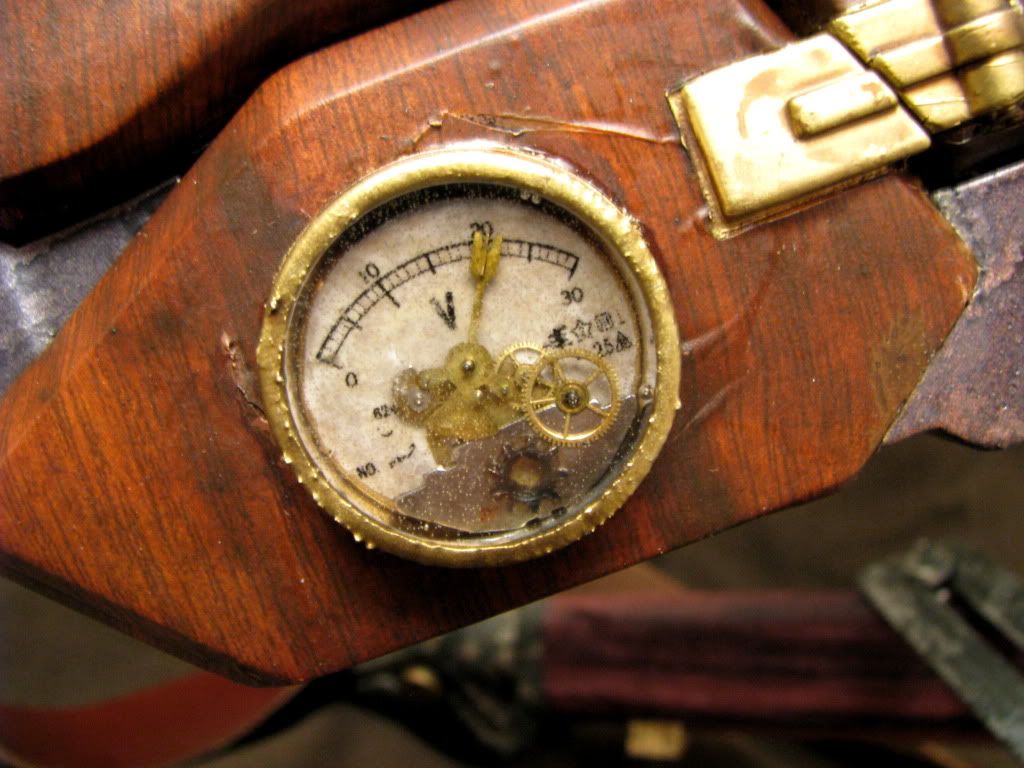
I added a few other little bits, like this cool looking fake power meter, made from broken watch guts, set into a cap from one of the tubes of putty, backed with a printed-out gauge face plate, and filled with epoxy:
And she's even got a compass and a level in the back:
She still fires, but only with a stock, unpainted ammo belt. I painted one of the ammo belts, so I could look cool and everything, but the paint-on-paint doesn't slide freely enough to keep from jamming. So I keep an un-modded belt handy for field expeditions, and a painted belt for dress inspections.
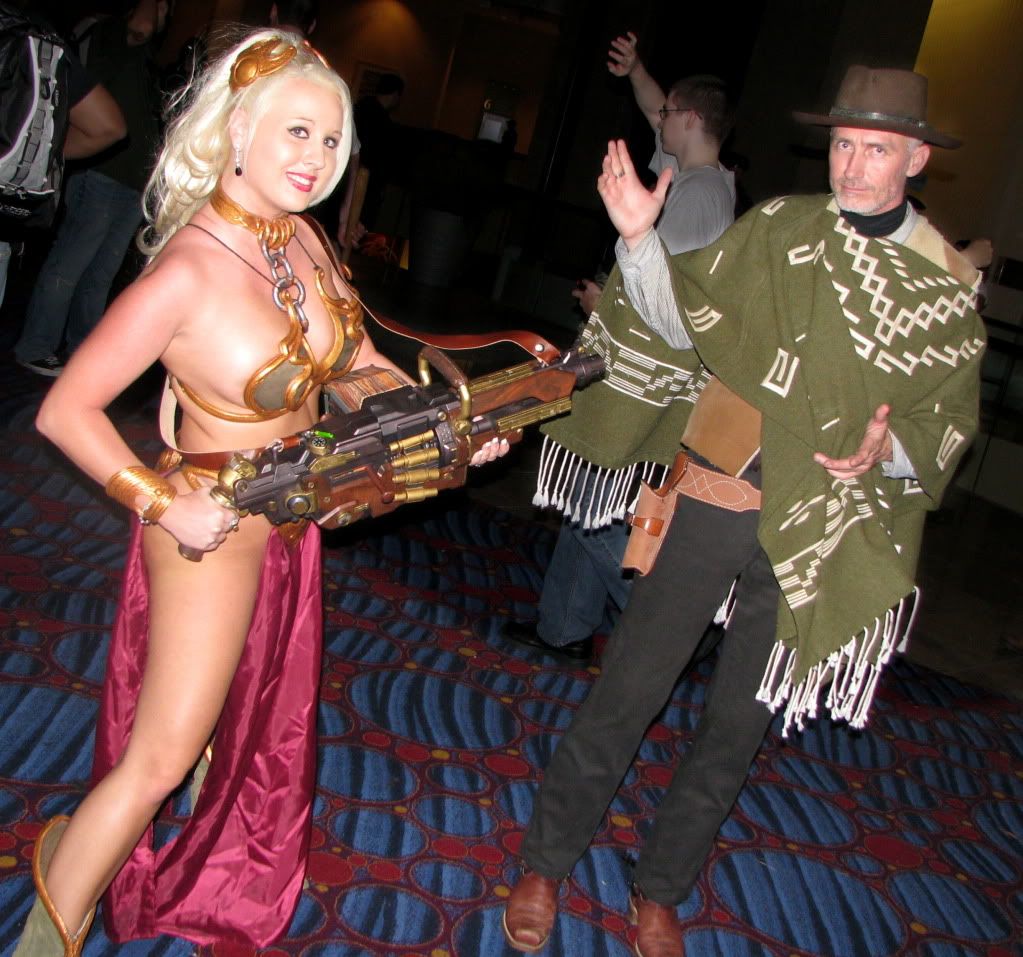
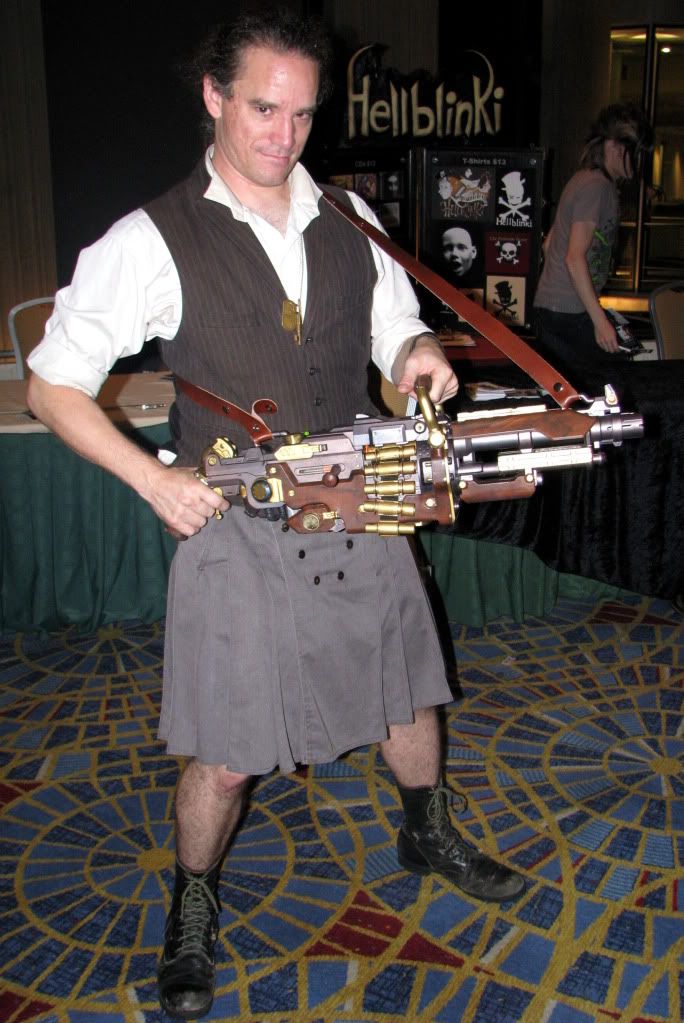
I must say, Eunice was a big hit at DragonCon this year: