So, I got the nutty idea in my head to make a diving helmet, and I just sorta ran with it...
Thing is, I didn't want to make a
costume helmet, I wanted to make a
working helmet. I'm not trying to show BP how to fix things, but I did want to be able to play with it in a swimming pool. I wasn't really sure how to do that -- I have NO dive training or experience -- but I just sorta got in there and had at it.
About half way through the project, I figured I might need to check in with some vague form of expert, so I started looking up how to do something like this and not die from it. I found two articles from the '30s that were invaluable in working this design and trusting it to not be an aquatic suicide attempt. You can find them here:
Modern Mechanics article 1Modern Mechanics article 2My design is really very close to the design shown in those articles, just made with 21st century materials instead of 1930s junk. So, what did I do?
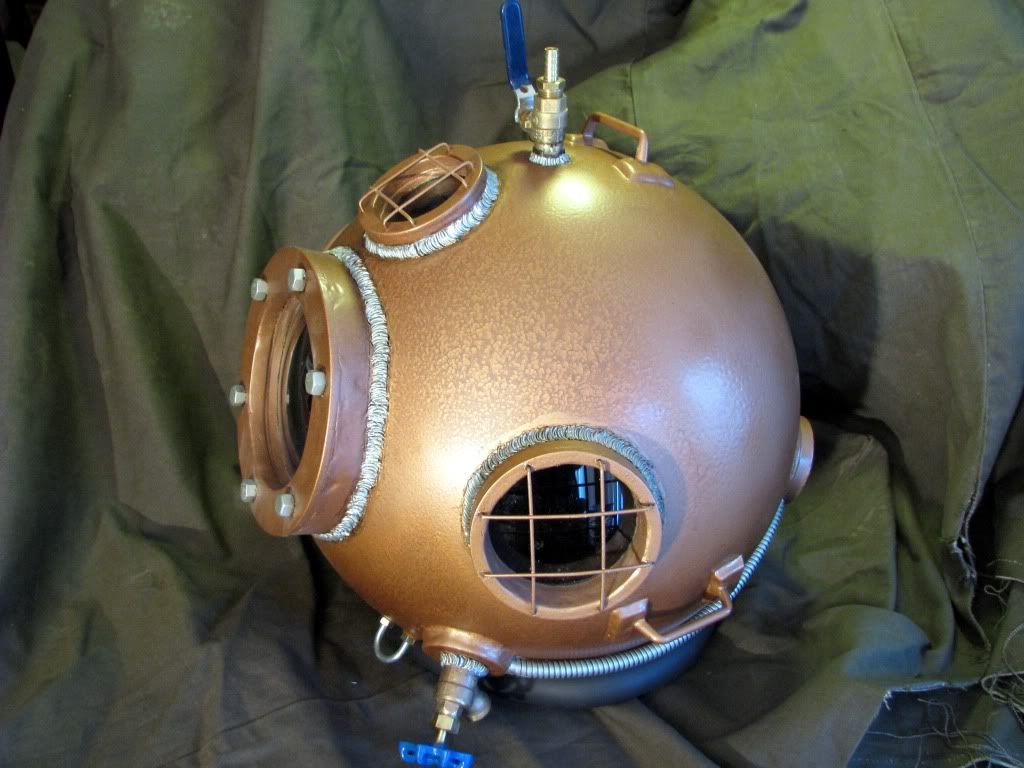
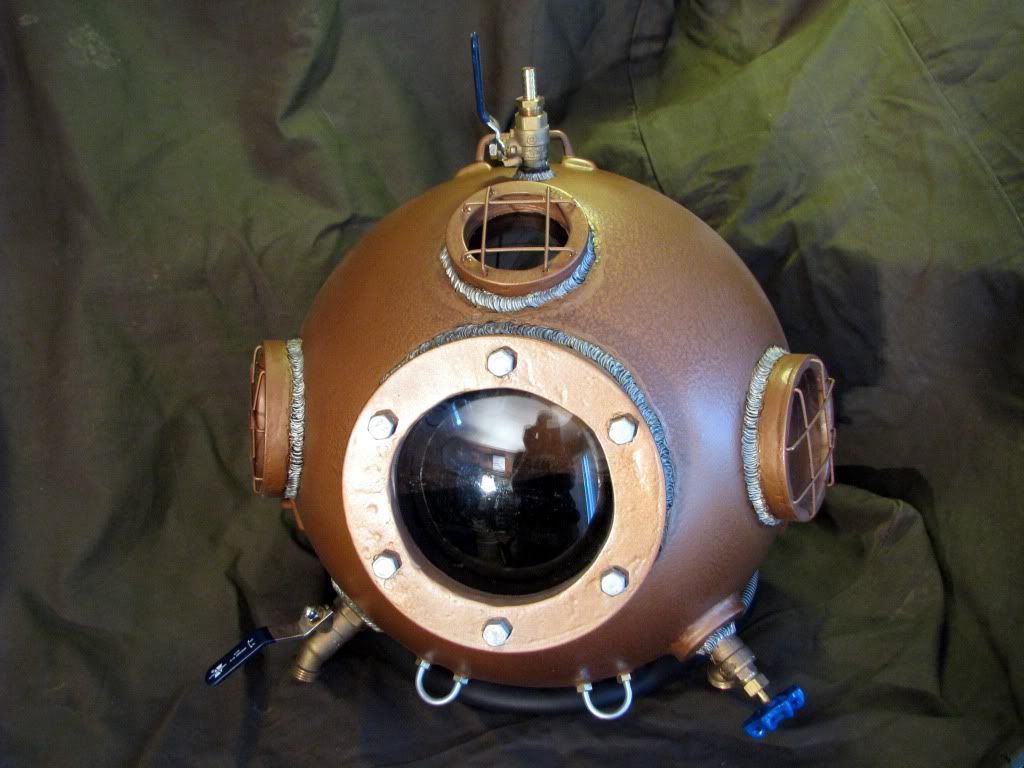
DO NOT TRY THIS AT HOME! I HAVE NO IDEA WHAT I'M DOING, AND SURVIVE ON FOOL'S LUCK. YOU MIGHT NOT BE STUPID ENOUGH TO TRY THIS AND LIVE! SERIOUSLY, I FRIGGIN' WARNED YOU!ConstructionThe core of the helmet started life as an acrylic sphere with a round hole, intended to serve as the cover for some kind of big industrial/commercial light. I found it on the intertubes, ordered myself one, and cut a bigger hole so it would fit over my head and down to my shoulders. I didn't want to have to worry about water pressure busting seals too much, and I figured basing it all on a single piece of plastic would save me a lot of head aches.
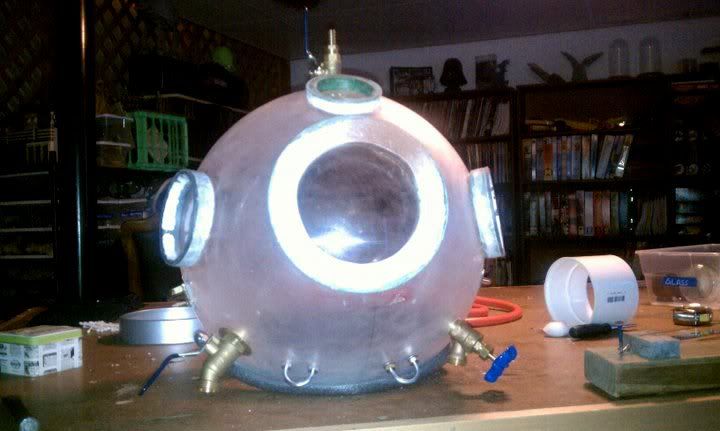
The cosmetic details are all basically just glued onto the surface of the sphere with two-part epoxy adhesive. The round portholes are plastic drain pipe covers cut to fix with their cross grills cut out and sanded smooth. They were all tapered, and I filled in the taper with epoxy putty and steel BBs. See, I
thought I was adding "weight." More on the weight issue later...
On the back I added more "weights." These are basically just random plastic scraps (you Flames of War players might be familiar with the size and shape of the rectangular bulge on the back...) filled with lead and steel and epoxy resin stuck on the outside of the plastic bubble.

The functional parts took a bit more work. Each of the three valves on the helmet are working garden hose spigots. I drilled holes through the bubble and fitted them in place with epoxy. I also added steel U-bolts around the lower edge of the helmet. These are drilled through and bolted in place with over-sized plastic washers to spread out the area of the bubble they press against. I figured this would help disperse the pressure they would put on the plastic, and maybe delay a break in the main bubble. I'd thought about maybe using these U-bolts to mount straps to hold it onto the user, but that was kind of a frightening prospect. As it turns out, they are where I attached the
real weights.

I also added three handles on the sides and top to help hold the thing in place. Much like the U-bolts, these are bolted through the bubble with large plastic spacers to prevent metal-on-acrylic contact and disperse the pressure somewhat. I also covered the mounting points in big thick lumps of epoxy putty. Partly this was a cosmetic choice, but I also thought it might help disperse the strain of holding the helmet over a larger area of the bubble.
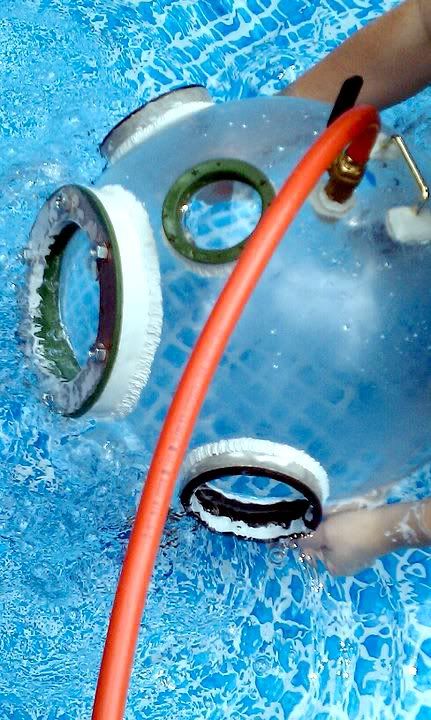
 Testing
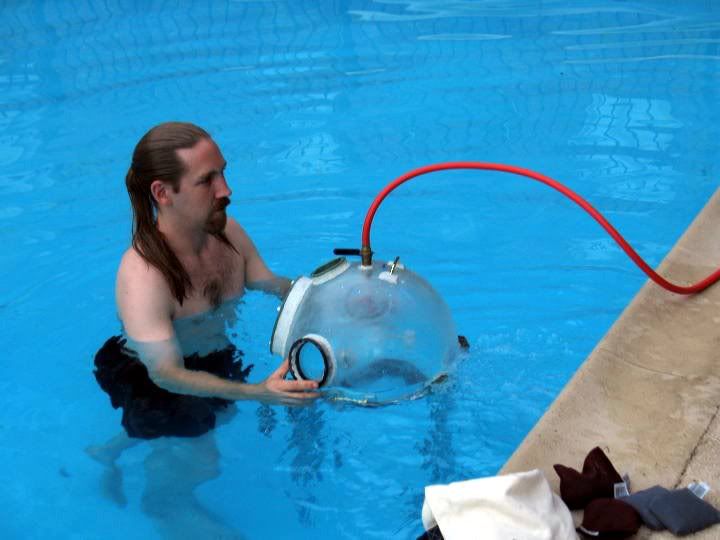
With all the basic parts in place, I figured it might be a good idea to try this thing out in the water before finishing and painting everything. So out to a friendly pool we went! The first dive made it painfully obvious that I'd need a LOT more weight to offset the buoyancy of that big ass air bubble in there. But the seals all held, and it blew in air so that was a start.
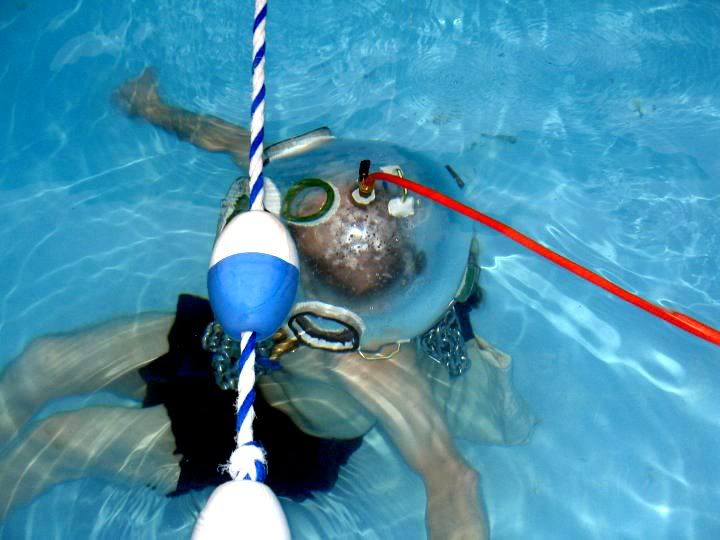
The second test was in a deeper pool, and involved a batch of borrowed scuba diving weights. I also picked up some long, heavy chains. I needed enough weight to pull the sucker down, but I was very worried that if I put too much weight on it I could snap the plastic around the U-bolts, so we added weight very slowly. The chains alone kept it upright in the water, but didn't sink anything.
On the other hand, the pump was clearly pushing air into the helmet, which was a nice feature.
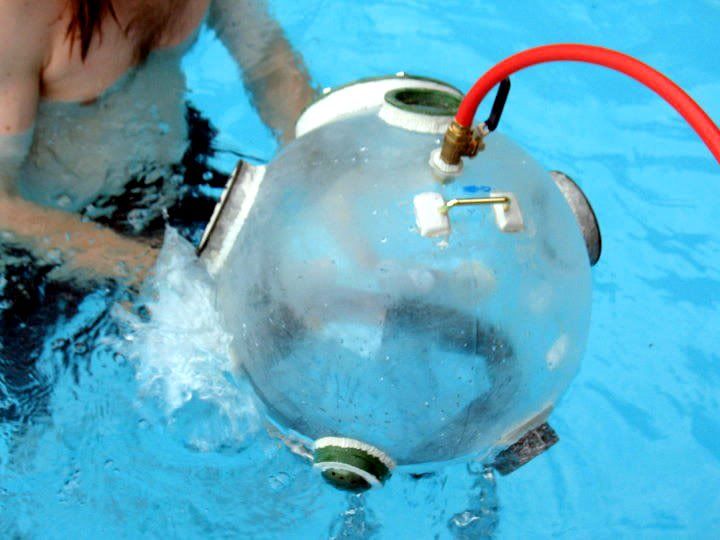
Unfortunately, at some point during this test I dropped the helmet and cracked the bottom edge. This turned out to be a blessing in disguise: to fix it I wrapped the lower edge in steel wire mesh, then covered over the mesh with epoxy. It is now much stronger and less likely to flex and break on the bottom around the U-bolts now. At any rate, this took a while, so Test 2 was fairly inconclusive. Test 3, however, was a lot more interesting. We started off the same, first putting the helmet in the water before adding the chains.
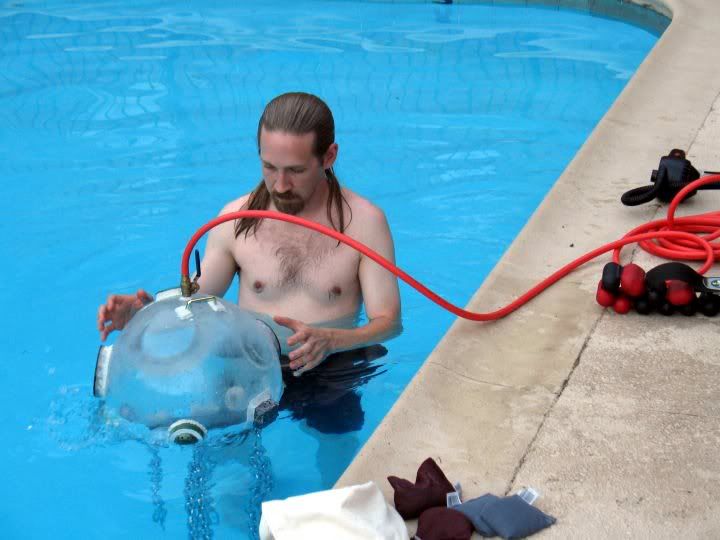
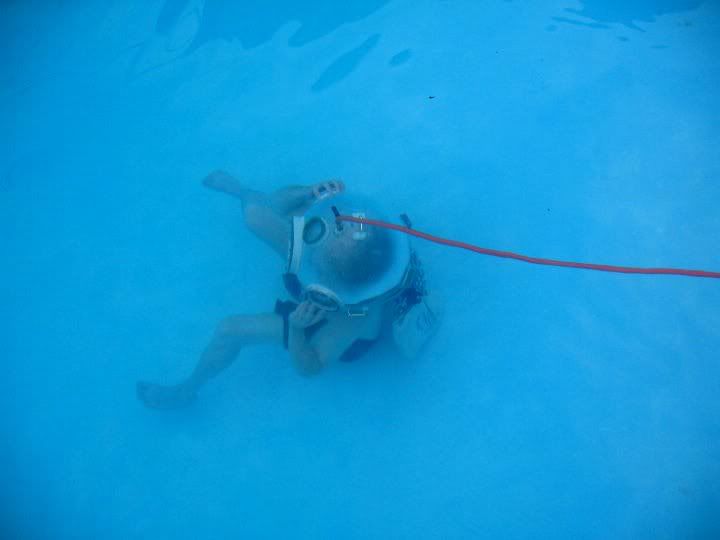
Then we started adding weights to a bag attached to the chains. Eventually, somewhere near the 60 lbs point, the thing finally slipped beneath the surface. And, what do ya know, the air pump kept pushing in air and bubbles kept churning up out of the bottom. So... in I went!

Dive! Dive!
It was at this point that something went very wrong....
See, I had planned on using a foot pump, and had my hose linkage all worked out for that, but it just wasn't going to cut it. I swapped over to an electric air pump intended to inflate air mattresses, but had to rig up the hose connection. At about 5 feet deep (or more...) the pressure was enough that it was easier for the pump to just blow out the hose where I had it crammed on that to keep inflating the helmet. I learned this the hard way when I slid to the bottom of the deep end, popped the hose, and the helmet started rapidly filling with water.
I managed to get out of the helmet and back to the surface without breaking anything, and we did a few more test dives until we were satisfied we'd figured out the problem. I just needed a better connection for the air hose. (If I'd remembered the cut-off valve on top of the helmet, I'd have had a few minutes of air left to solve the problem with, rather than the few seconds I actually ended up with. Oh, well, that's what dumb ass novice untrained diver gets, I suppose). The solution is the dremmeled up adapter pictured below, along with the air pump I'm using.
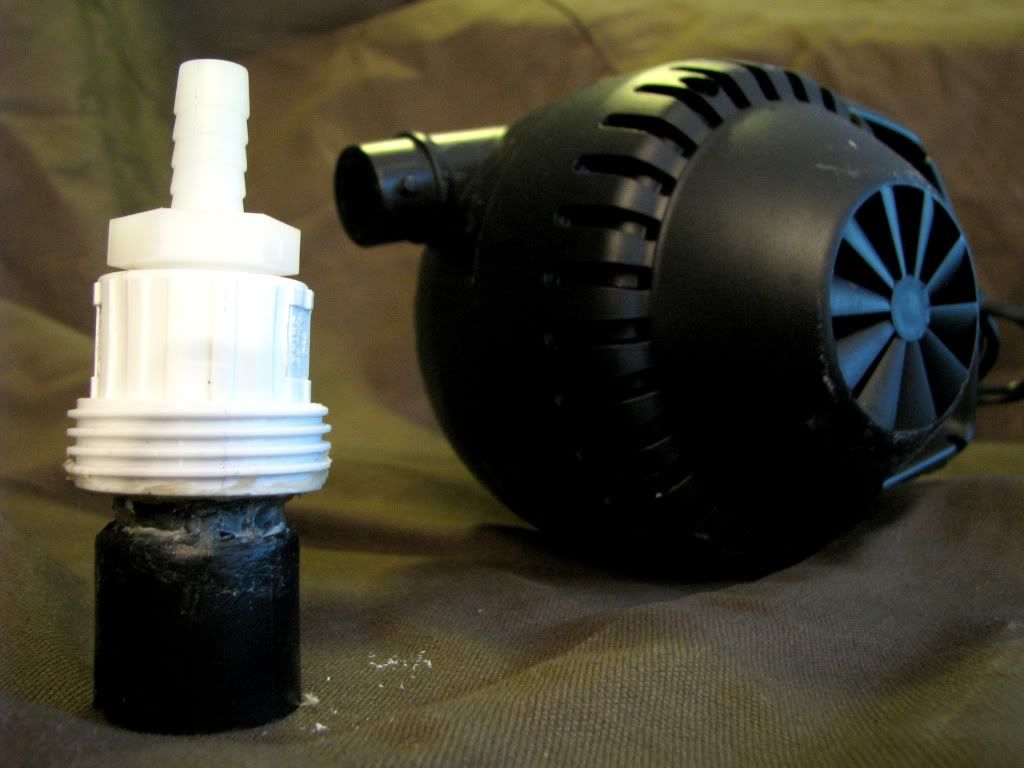
I have not had another chance to test the helmet since making this fitting, but I expect to get at least a few feet deeper now. We'll see on Saturday!
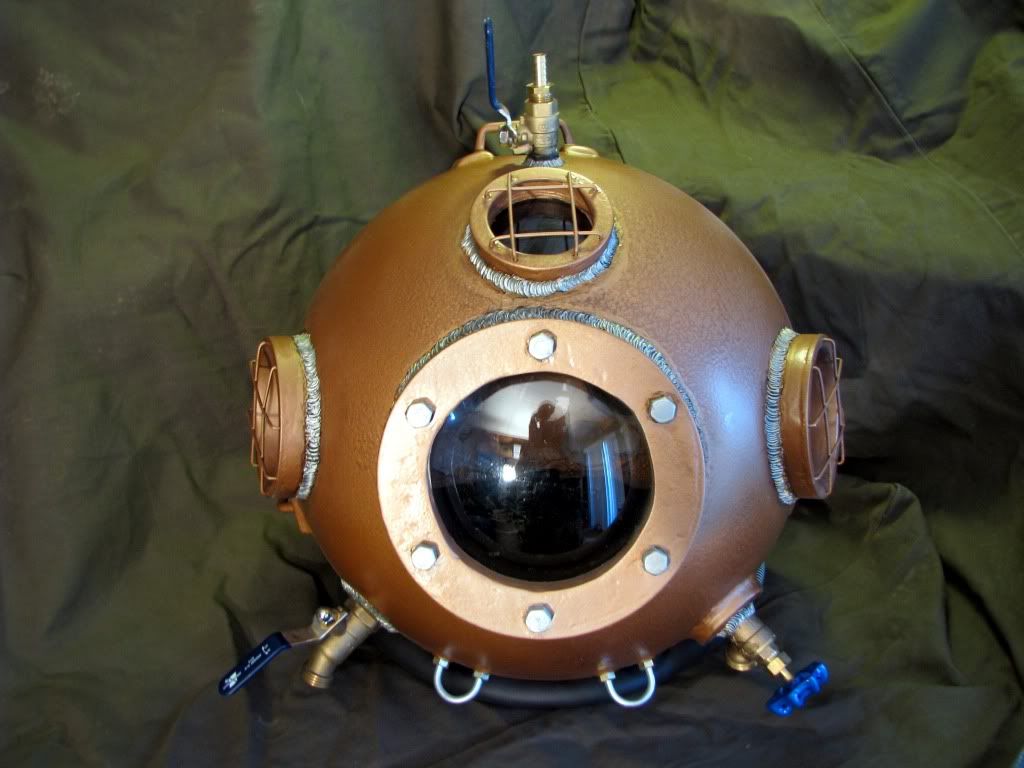
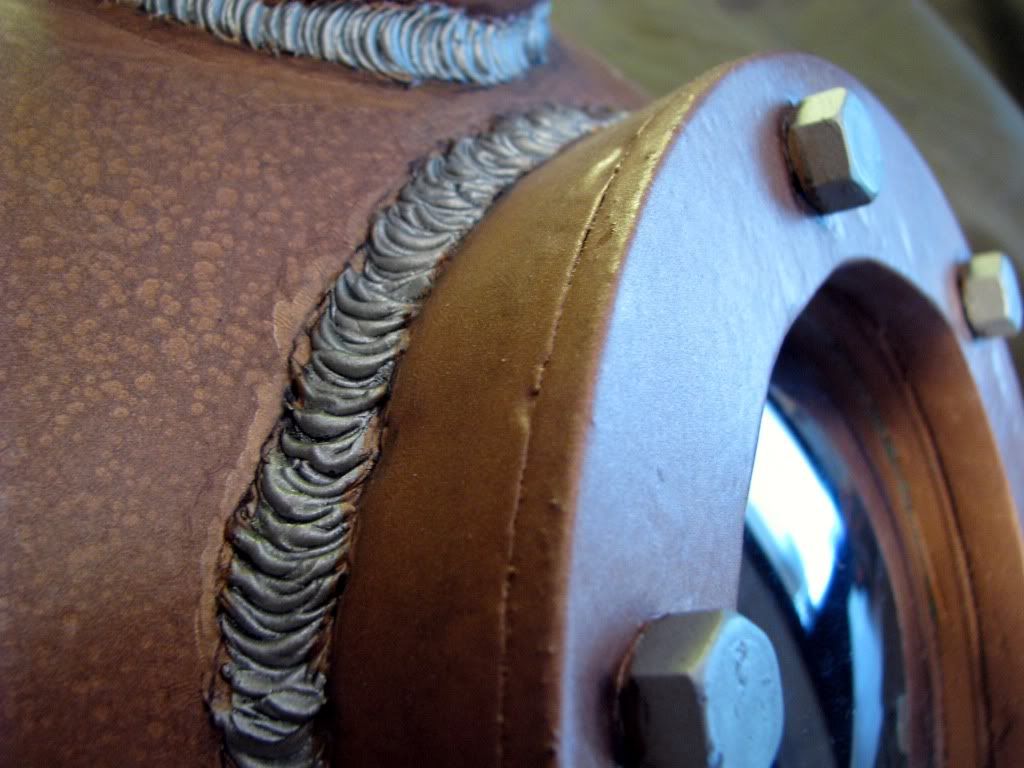
DetailingOnce I knew everything was going to work, I went in for the final detailing. The "bolts" on the front are just glued on nuts. The "welds" around all the portholes and stuff were sculpted on with epoxy putty.
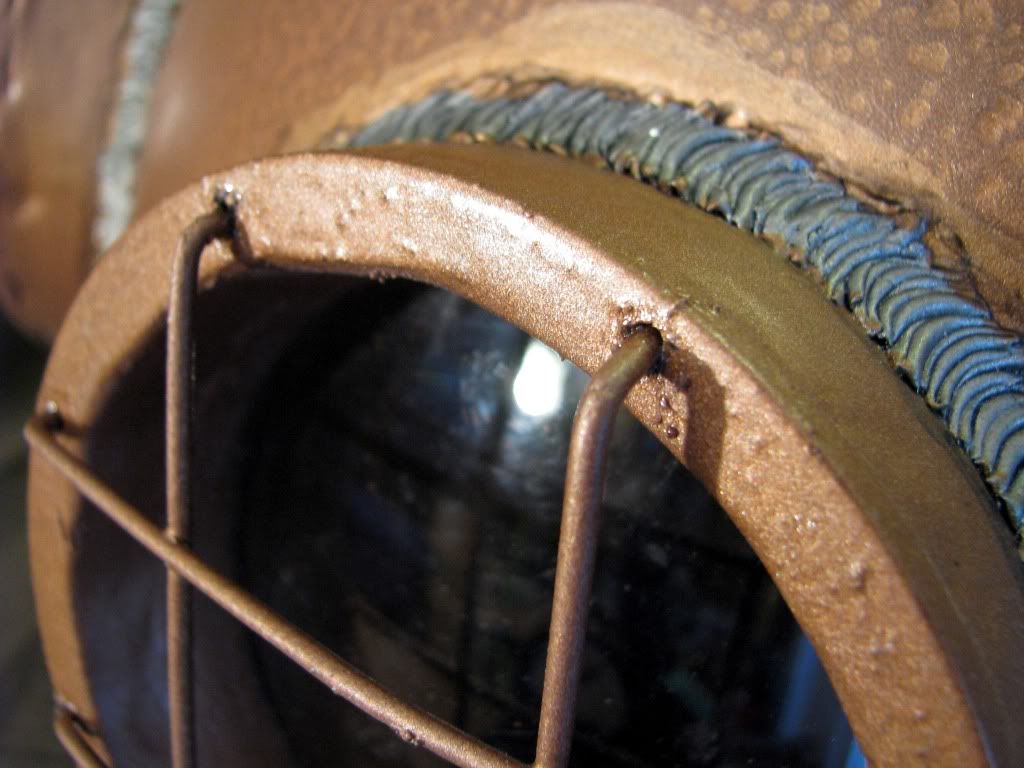
The grills over the windows were cut from a wire basket shelf then fitted in place after painting.
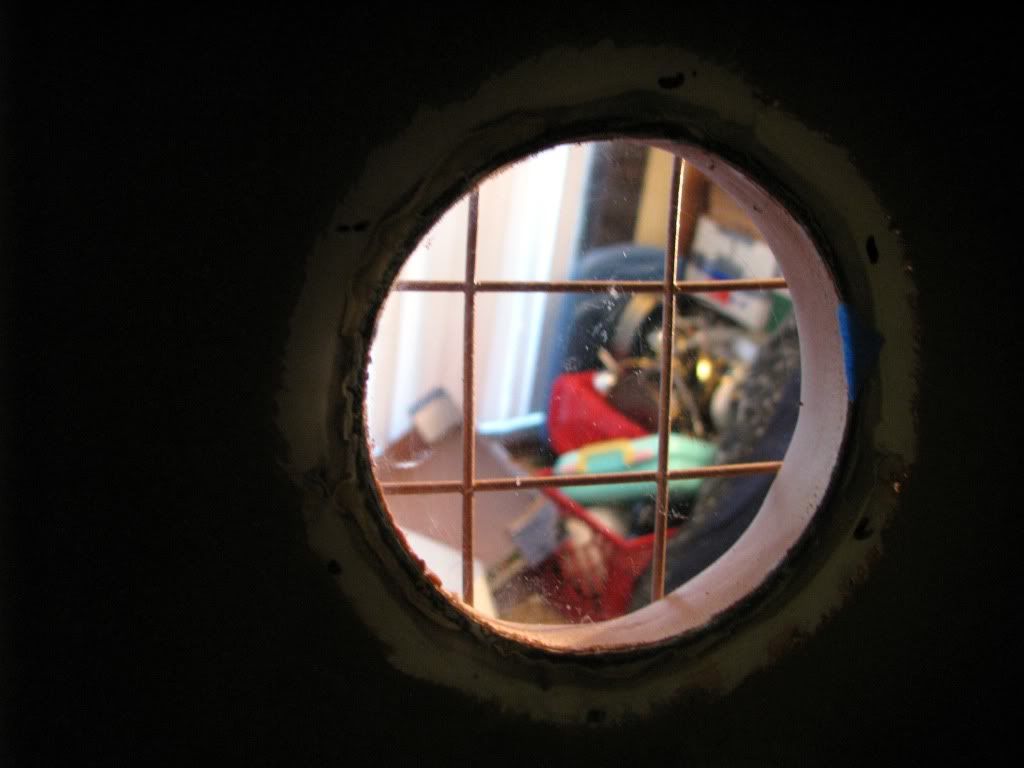
Here's the view from inside:
Painting was pretty straightforward. After masking the portholes and metal fittings, I painted a silvery, "nickle" color over the welds. I gave the whole body a slight base coat of the coppery color I'd use later, then went over the whole thing in nickle as a base.
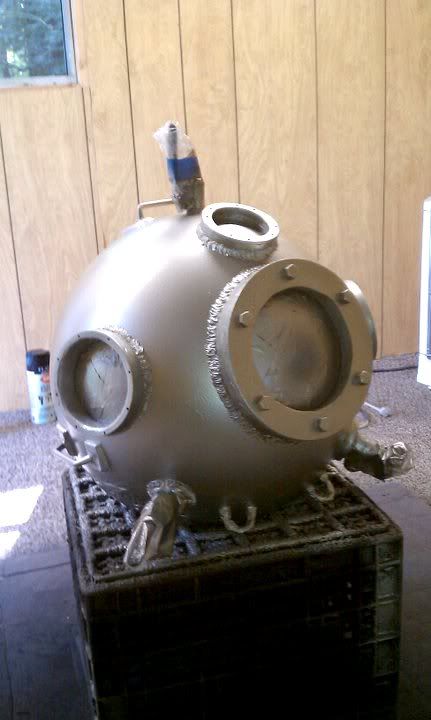
After that was dry I masked over the welds with Silly Putty, then let loose with three cans of "hammered metal finish" spray paint. The hammered texture worked in some places better than others. You have to lay that stuff on fairly thick to get its effect, and the nearly vertical sides of the sphere just wouldn't have that. So I got a mixed effect, but one I'm happy with. After it was dry I pulled off all the masks and went over it with two cans of gloss clear coat. I topped off the whole piece (well, bottomed off, as it were) with a length of black foam rubber padding around the lower lip. It doesn't seal or anything, but it is a fairly snug fit, which is what you want -- tight enough to stay in place, and loose enough to let the old stale air out.
 How's It Work?
Beats me, dude. Several folks have asked me about air pressures and consumption ratios and gas mixtures and all kinda of shit I don't know a damn thing about. All I can tell you is clean air gets pushed in the top, old air bubbles out the bottom, and I can breath the stuff in the middle quite comfortably for several minutes.
I'm taking the helmet out to
PlayOn Con this weekend. We'll see how the new air feed holds up, how long I can stay in, if others are stupid enough to try this thing, and if my new toy is as popular as I hope it is.


 Birmingham played host to PlayOn Con again this past weekend, and I finally had a chance to put the diving helmet through its paces in front of a live studio audience. PlayOn's more of a gaming and party convention than a costuming convention, so there wasn't quite as much camera work for me at this as there are at some other shows. But it was a good time, and I totally got to show off.