Of all the platoons in this force, 2nd platoon is the most literally accurate, in the sense that I didn’t need to do any event-shifting. People were still swapped about, giving real actions to real people who simply didn’t perform said action, so that I could use all the cool elements from the mini-series and keep my roster accurate. But the theme for this project is “The first night of snow in Bastogne,” and on that night, Easy Company was in their fox holes. So is 2nd Platoon.
I just realized that I don’t think I’d mentioned the theme in any of the previous posts.
Anyway, what scenic elements might I include to make these guys look like they are dug in under the trees overlooking Foy? I always try to have certain elements (like the mud or snow) that match across the entire army and unify the force, with other elements that match across a given platoon but distinguish that platoon from all the others. That way I know which platoon just lost its bazooka, for instance. Hum… dug in over Foy… maybe fox holes and trees? These two elements would be my “platoon unifiers” for 2nd Platoon, and every team would have either a tree, a hole, or both. Trees would be easy. I never like it when folks permanently mount trees to their infantry bases – its just too much, too tall, and looks wonkers when they go to a city fight, dragging part of a forest with them. I would resolve this problem by using Woodland Scenics brand trees. These are modeled with a separate tree and base part, so that the trunks could be kept removable. When not in place, I’m left with a stump. I probably won’t ever play with these guys with the trees in place, but it is a nice element when they are on display.
The fox holes would be just a bit more work. I toyed around with a few designs before settling on a technique that I thought looked good enough, wasn’t too much work, and that didn’t suck. I’ve tried something similar with one platoon of my Germans, using Old Glory pieces meant to be in fox holes. Basically, they were just cut off at the waist. That never really satisfied me. I mean, it works, but leaves you with the guy just sort of disappearing, and no real representation of the inside of the fox hole. I also tried simply sculpting the rim of the fox hole on top of the base, but that made everyone look like they were inside personal volcanoes.
In the end, I settled on a layered approach. I would cut pieces of thick card to the size of the bases and draw the rim of the fox hole onto them. I could then stack these on an infantry base to thicken it – depending on how deep I wanted to go, it would usually take 2 to 4 layers of card. I’d cut out the hold in the top card, and trace the outline of that hole onto the next card down. Repeating this process dug out most of the hold, and depending on which side of the tracing line I cut on varied the slope of the inside of the hole – that is, if the marker I used drew a 1mm wide line, if I cut on the “inside” of the line I would get a more gradual slope than if I cut on the “outside.” Using layers of card, in addition to my normal ground paste, gave me an extra little bit of depth to the fox holes. The other nice benefit to using card in addition to some kind of ground smear is that I could cut a hole in the top layer for any base tab, just like the fancy cast resin bases from Battle Front. One layer of card was about half the depth of each tab. I used this trick all over the place, particularly with castings that I couldn't quite get to set down on the bottom of their fox holes. It gave me a wonderful cheat, and when mixed with things like cutting off half the base, setting one foot up on something, and smearing coffee over the end result, the base tabs often just went away.
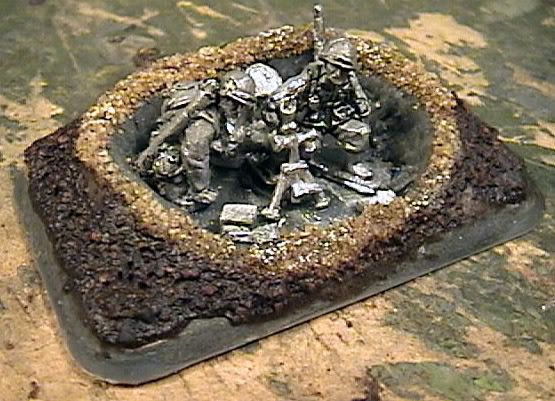
Once I’d cut all the cards I could set the last one on the base itself, trace its outline onto the base, and sink the final hole into the base itself. Using a Dremmel tool, I carefully ground out the bottoms of the foxholes, trying to remove as much plastic as I could without going all the way through – I slipped a few times, but for the most part it worked pretty well. This gave me most of the fox hole depth, but I would still need something of a lip around the rim to really get it too look deep. I made this lip with the same epoxy paste I’d used on 3rd Platoon. I also evened up the edges and smoothed over the roughly cut card layers. It was during this stage, which turned out to take a lot longer than I’d expected, that I did all the figure conversion work and added the big details like ammo boxes and the like. The results looked something like this:
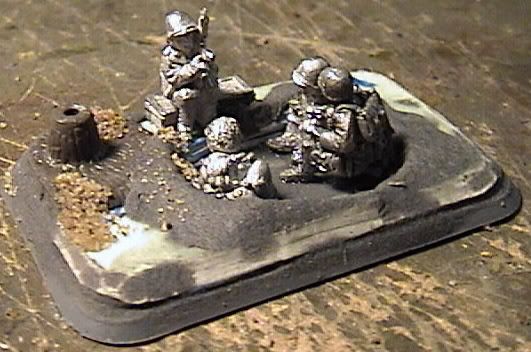
Most of the conversion work for this platoon wasn’t very exciting, just making every body sit down! There were a lot of arm adjustments to get models to interact with each other, and quite a few repositioned legs. Anyone even close to seated had potential to become seated. Just like 3rd Platoon, when they were done every team got my standard coating of coffee/mud.
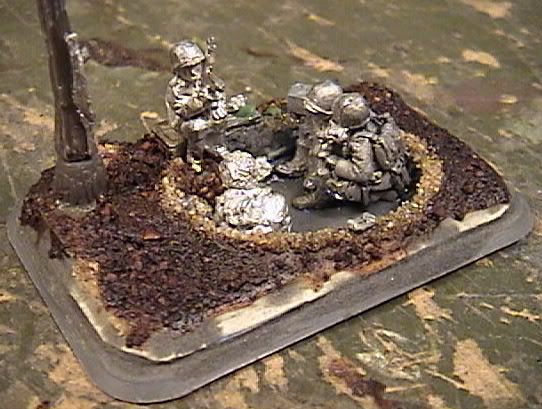
When this was dry I went back through with green stuff and added all the little custom details like rations or cigarette packs. It was the little details that really made this platoon work for me. I didn’t want clean fox holes, I wanted fox holes filled to the brim with crap!
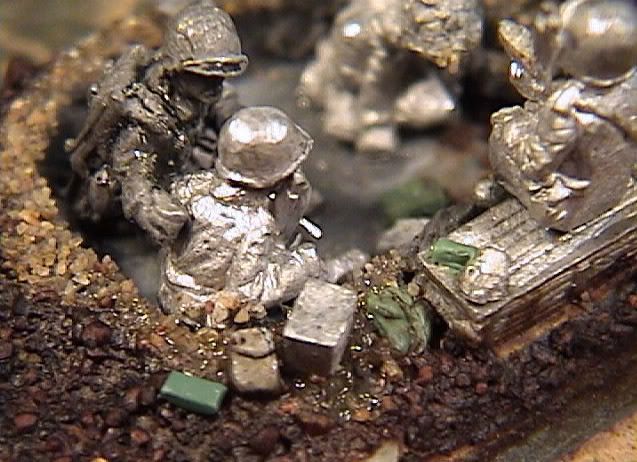
The rest of the platoon was modeled using the same techniques – cards were cut to the size of the base, the fox hole was drawn onto the top and cut out to make the pattern for the next layer down, and so on, with putty used to form a lip and smooth over the seams. The hardest part of doing this platoon was matching the teams to scenes in the mini-series. I mean, its one thing to make the moment of tossing a grenade down a gun barrel exciting, dynamic, and recognizable. It is something else entirely to make one group of guys sitting around a hole look different than the other scenes of guys sitting around a hole. For example, this team is very similar to the one we were just looking at:
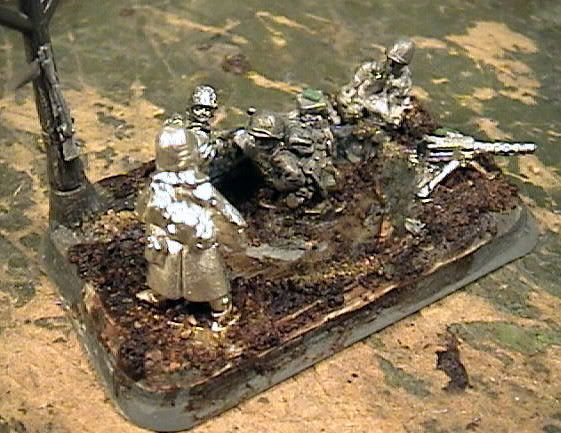
They are both basically guys sitting around a hole next to a tree, but if you look closely several details are different, and they both represent different scenes. I’d thought about doing a side-by-side with my models and shots from the mini-series, but I think I’ll save that until the army is painted. Maybe you can guess some of them from these “making of” shots.
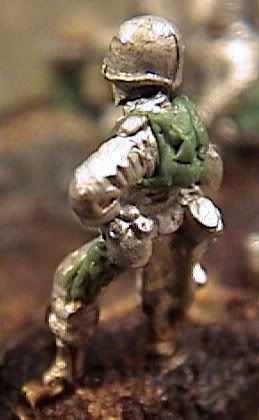
It was a constant challenge to find or make enough miniatures that looked like they could be in or around their fox holes. To get by, and for variety, I ended up making paratroopers out of lots of castings that used to be standard infantrymen. As I worked, I realized that, at least in 15mm, there are really only a few things that clue in the eye that the
 miniature
 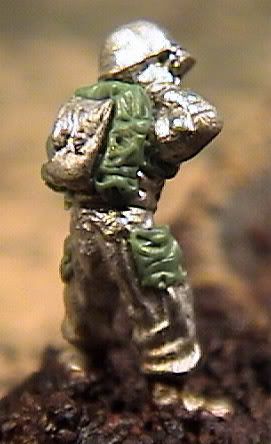 is a paratrooper – lots of webbing and kit, a backpack, and big leg pockets. Take these two guys, for instance. Both got green stuff pockets. One also got a green stuff back pack, while the other got a backpack cut from a paratrooper. In other instances, I used the backpacks from the Battle Front vehicle stowage pack.
This guy also shows one of my classic base tab hiding methods, the half-cut & prop.
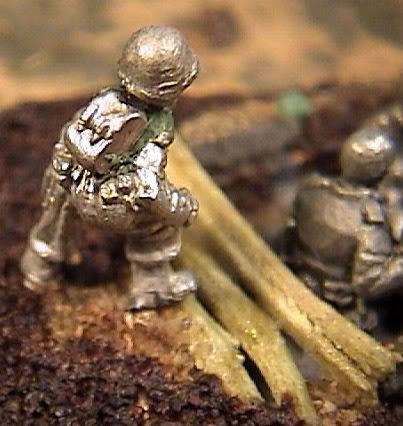
The base tab was cut away from the front foot with a razor saw, then clipped in half with a wire cutter. I bent his rear ankle just slightly to increase the height of the lead foot, and glued him down so that his foot would rest on the log. While this guy is just chillin’, this technique can really add a bit of dynamic action when used on an advancing team.
I really had a lot of fun with the small details on this platoon. Some of theme were just random junk thrown around, but many of the details were inspired by shots in the mini-series, like this one, the classic “dude cooking in his helmet”:
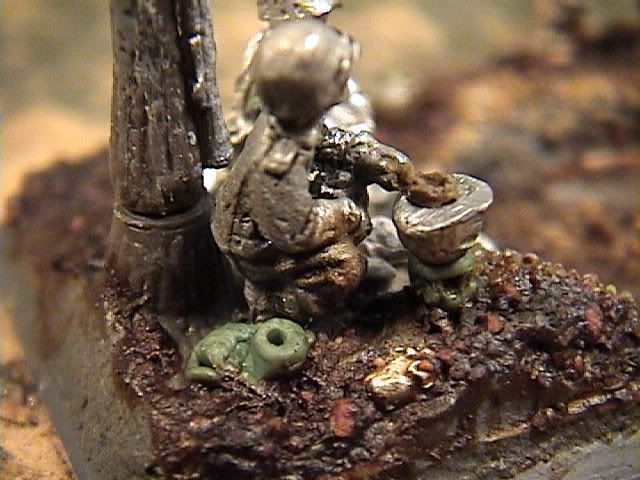
On a technical note, in a few instances such as this you may notice a brown putty, in addition to the green stuff. This is basically the same stuff, but I don’t like it as well. I generally buy Reaper branded green stuff, just because it is easier to get locally than anything else – I can pick it up within 2 minutes walk of my office. The brown stuff is also reaper branded, but it cures a good bit faster, and doesn’t take detail at all as well as the green stuff. For the most part, I’ll be using it just for bulk crap, nothing with any kind of detail, from here on. It makes a good enough gap filler, but I won’t be getting any more.
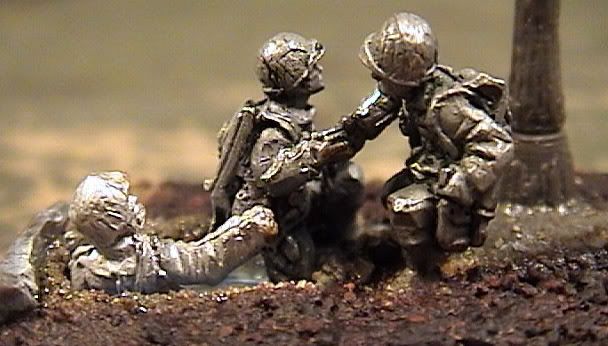
One of the first scenes I thought of when I decided to mimic the mini-series was the scene of Joe Toy and Bill Guarnere being wounded in the shelling. Some might see it as a touchy subject, and some others might do it for shock. To me, this one is all about respect. I also wanted to include Lt. Compton’s reaction to the incident. In his memoirs, Dick Winters described what he called a universal gesture: when a soldier checked out he took off his helmet, ran his fingers through his hair, and dropped his helmet. After that he was done. According to Winters, this action was a universal sign of combat fatigue. So in this piece you can see both the war’s wounds, both physical and psychological.
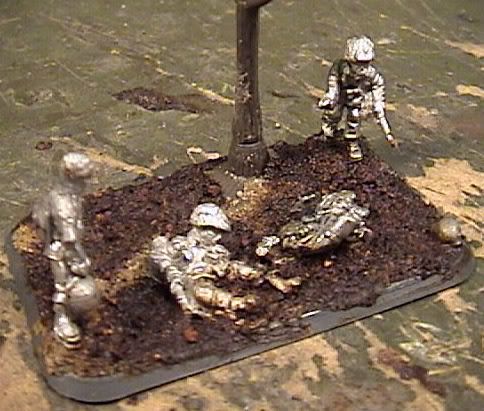
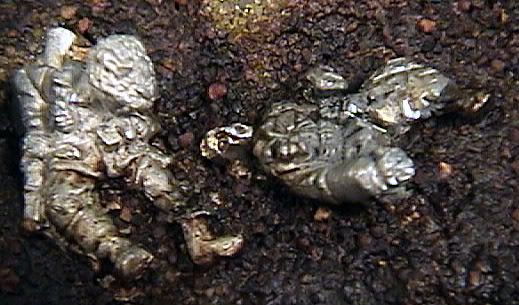
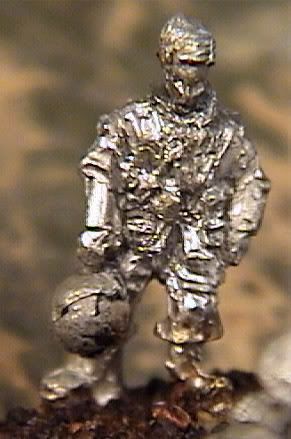
But 2nd Platoon wasn’t all about pain and suffering. There are a few lighter moments included, such as the famous encounter with “Hinkel.”
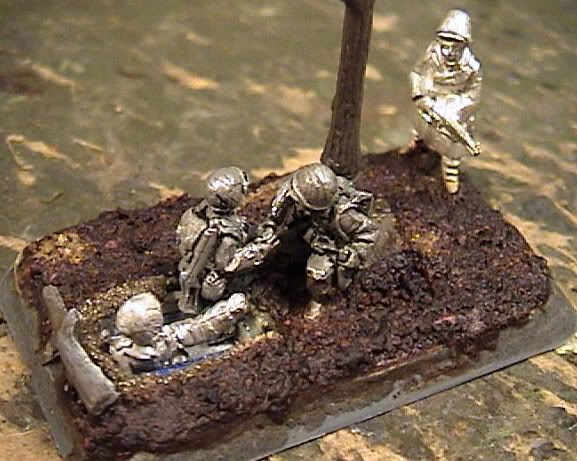
The basic process was the same for this hole as all the others, but to get the German down deep enough I did resort to cutting his legs off. That’s fine, this guys is going to be half buried in the snow when it’s all said and done, anyway.
By the time this platoon was getting close to the end, maybe I was getting uncreative, or bored, or whimsical. Or maybe I’d just dug too many holes. But I was tired of making guys sit down, I needed just a bit of action, so the bazooka team for this platoon seems to be in a bit of a hurry:
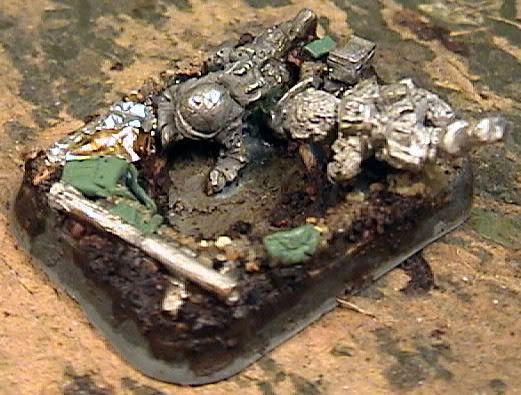
There must be shells on their way in. This one was just a bit of fun, adjusting the two castings to look like they might be mid dive, and coming up with all the general crap to lay around the hole. I cut the bazooka and some of the details off other American figures. If only they’d release a pack of loose small arms…. The bit of foil will be a wool blanket. This is also a decent example of one way I came up with all the junk to lay about. I picked up a very large and all-inclusive book for collectors and re-enactors that had nice shots of just about every bit of anything issued to anybody in the war. With each unit, when it came time to add something distinctive, I’d just go to the section on that kind of troops and find something that looked cool and make it. In this case, you can see the special bag for the bazooka rounds.
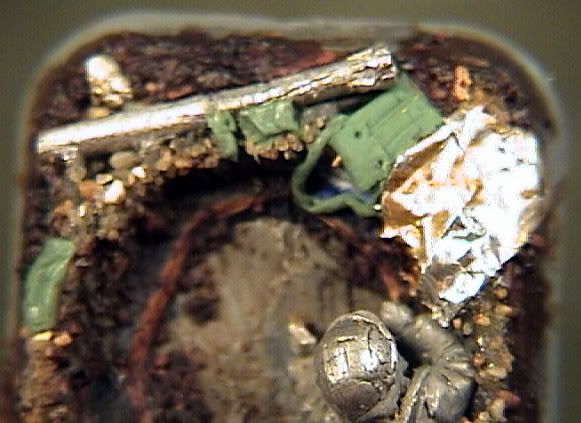
As with 3rd Platoon, I wanted to be able to see a texture difference between the bottom of the holes and the surrounding, undisturbed ground. In this case, rather than the sand I used to look like well-worn trenches, I decided to try and make these look like they were freshly dug. I used the cylindrical shape of the Dremmel’s grinding head to sculpt in what I hoped would look like shovel marks. As you can see from the piece below, this wasn’t always as successful or convincing as I would like, as it didn’t leave me much room to hides the base tabs, and some of them remained visible. You can even see this guy’s hand floating just a bit above the ground! Oh, well. It came out pretty well on some of them. Just not this one. Others ended up with sand or coffee on the bottom, anyway (often because I drilled all the way through…)
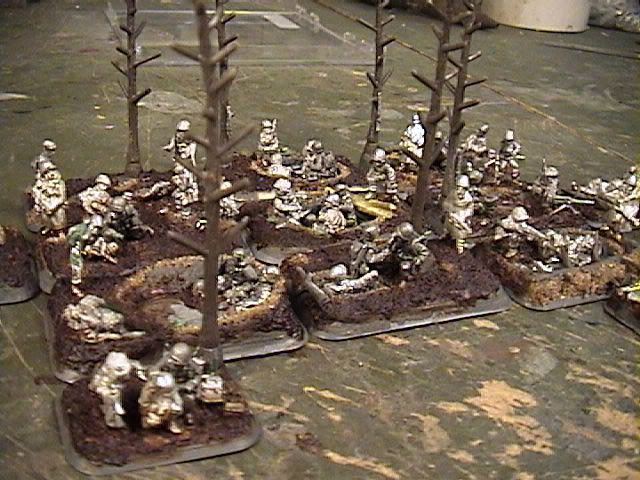
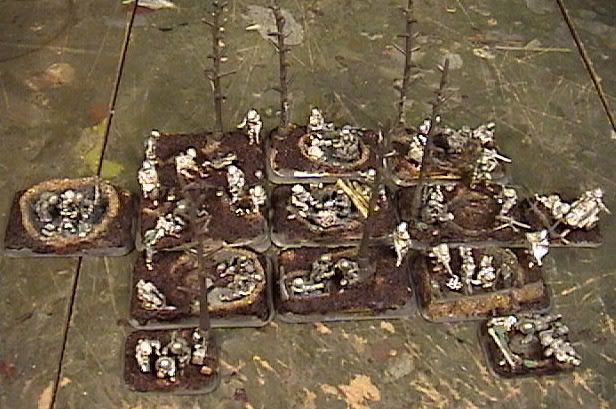
As always, I had to model every possible option for the platoon, including the little supply cart thing that BF includes with their packs even though they have no rules for it, as well as the officer for Mid War, dropped in the Late War lists. When you push the whole lot of them together, I think the effect of thiks unit is rather striking, even if they are less extravagant than 3rd Platoon. But I sort of wish I’d used more trees.

No comments:
Post a Comment