Saturday, July 7, 2007

Slave Market and Arab Villagers

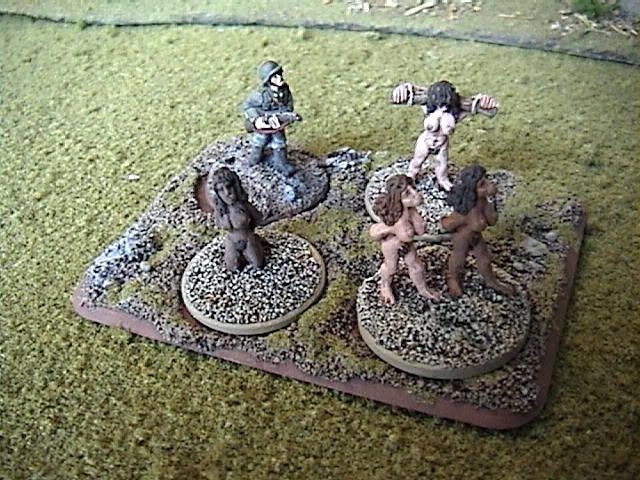
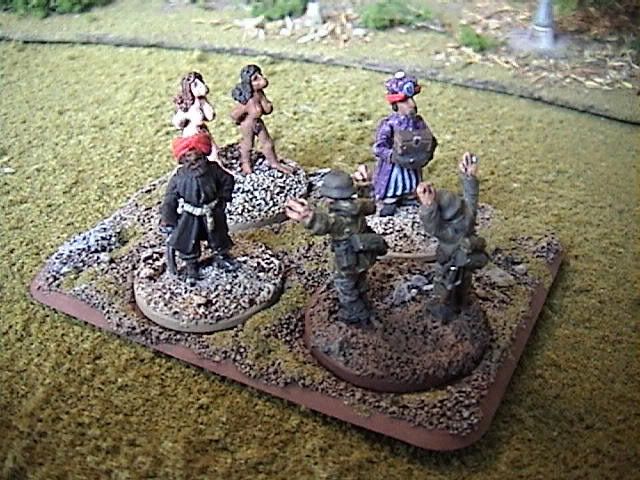
Sometimes, you just see stuff on the interwebs and buy it. That's how I ended up with these girls. Pure impulse buy, I swear. Now, getting the miniatures to make up the gang in charge of this little racket, that took a little digging....
Photo Sharing and Video Hosting at Photobucket

So, obviously we've got some slave girls up on the auction block. Without addressing what this piece says about the artist, lets just take a look at what is certainly a unique little set.

Photo Sharing and Video Hosting at Photobucket

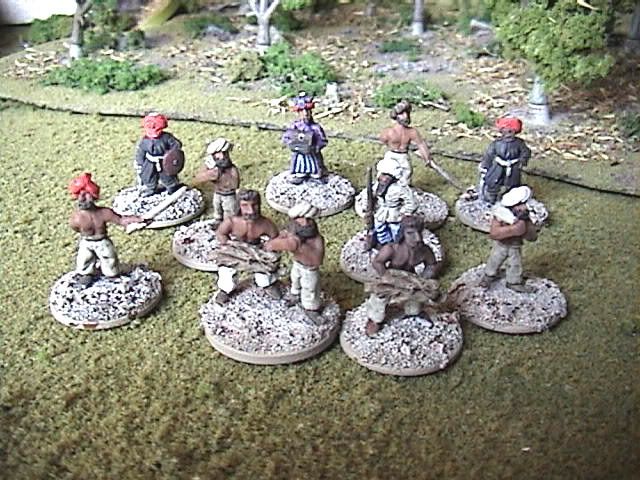
This thing sort of grew into an objective marker for Flames of War, themed to sort of match my Desert Rats army. But it started life before v2 Flames of War was published, so I did it on a 60mm round base from GW. This was enough space for the platform and a hawker out front, without eating up a lot of room should I ever try and cram this thing into some busy dessert village setting. I knew I wanted the girls, a hawker, a few thugs for crowd control, and a money man in the background somewhere. Since I was ordering up a few random arabs, I figured any extras would go towards populating said busy desert village. Discounting the ladies for just a moment, these are the rest of the miniatures I think of as part of this set:
Photo Sharing and Video Hosting at Photobucket

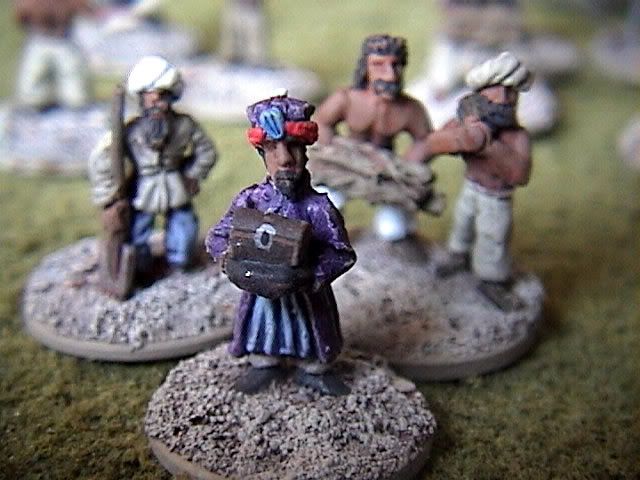
Mostly humble desert peasants, anyone wearing a slash of red is a member of the nefarious Red Turbans, the local toughs with a shadowy reputation and rumored ties to the occult. At least that's what I dreamed up about them while painting the buggers. The money man demands his close up!

Photo Sharing and Video Hosting at Photobucket

Now back to the girls! Step right up, pussy lovers!
Photo Sharing and Video Hosting at Photobucket

Photo Sharing and Video Hosting at Photobucket

The hawker is mounted into a socket on the 60mm base, so he can be removed and replaced with other penny-mounted figures or a simple plug. In this way the objective marker could be themed for any army defending it, or left in a neutral state.

Photo Sharing and Video Hosting at Photobucket

I've also got a few more of the girls, loose-mounted on pennies:
Photo Sharing and Video Hosting at Photobucket

Photo Sharing and Video Hosting at Photobucket

Photo Sharing and Video Hosting at Photobucket

The entire thing may be mounted on this adapter I made, using the same process as described in the UGO tutorial.
Photo Sharing and Video Hosting at Photobucket
Painted to match my desert bases, it could serve to make anything mounted on a 60mm round base into a tournament-legal objective.

So there it is, in all its misguided glory: my Slave Market objective with Arab Villager Set. Classy, 'eh?

Photo Sharing and Video Hosting at Photobucket

Dessert people look funny on a woodlands table, but whachagonnado?

No Mo Retro

Well, that's it for old content. I've got everything I can think of moved over from older web activities, so moving forward it's 100% fresh, asside from that one article I still need to rewrite. I have the pictures taken for several more posts, I just need to clean 'em up, write 'em up and post 'em up.

Comming Soon:
Flames of War minefields and barbed wire
Air Brushed Tank Camo
Might Air Bases
Slave Market gallery :-)
Kamfgruppe Rasputitsia Making-Of
Painting Guides (maybe...)
The continuing adventures of Easy Company

And at some point I'm gonna write a full-on Tutorial on how to make Bling-Bling infantry bases for Flames of War. But I think I'm good for right now.

US Paratroopers Army Update -8: Inspection!!

Retrocative Date: Mid-February 2007

While all the paper work was working its way through the system, the troops started to slowly drag in from sundry origins. See, I have this problem when I build new armies: I tend to buy at least twice as much as I need, just to get as many poses and cool bits as I can. That quirk was working overtime with this army.

If I’d written this part of the blog in real time, this part would be full of wailing and gnashing at various distributors. Since I’m actually writing it while I’m half way through converting the models for most of the army, I’m going to use it as a short review and brief inventory of what all went into this army. I wanted to use BattleFront’s miniatures for this project as much as possible.This goal was foundless yet substantial, as well as contradictory to my desire to see what variety I could inspire by blending brands.

In fact the only thing like a real reason I could think of to be exclusive to BattleFront product was that I get a big kick out of posting pics to that forum, and they are understandably picky about pics of competing product. As it worked out, at least from the other players I had samples of, the quality gap is generally a good bit wider for the paratrooper range of models than most that I’ve looked at. Unless you just can’t stand the new BF paratroopers.

The one bit of cryin’ that would be worth mentioning is the uproar on the BF forums and TMP.
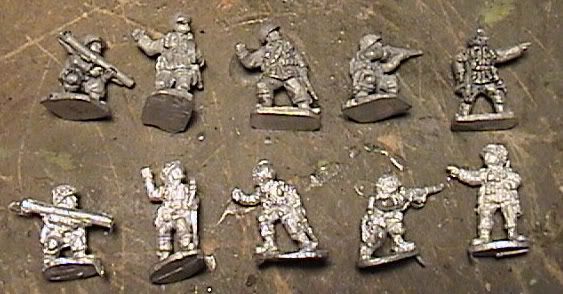
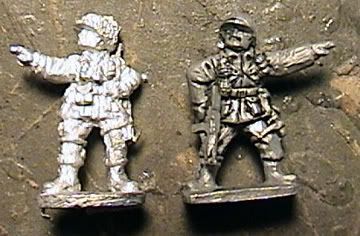
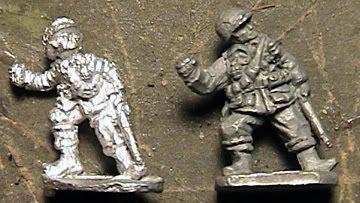
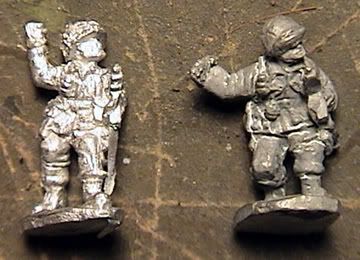
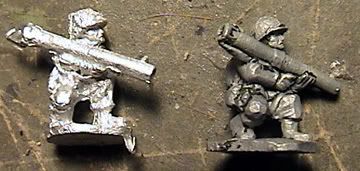
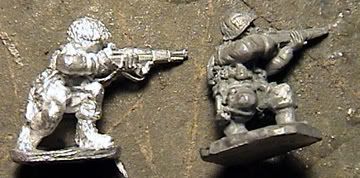
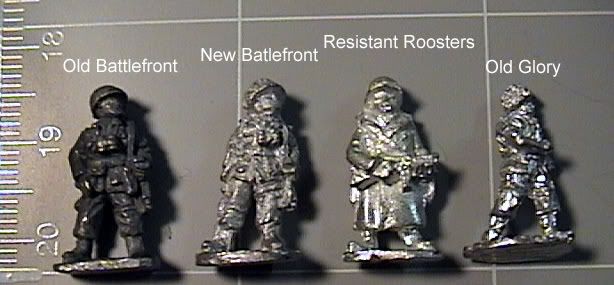
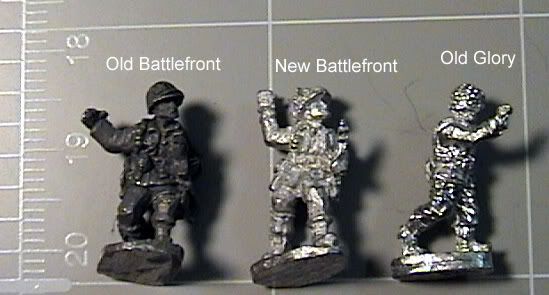
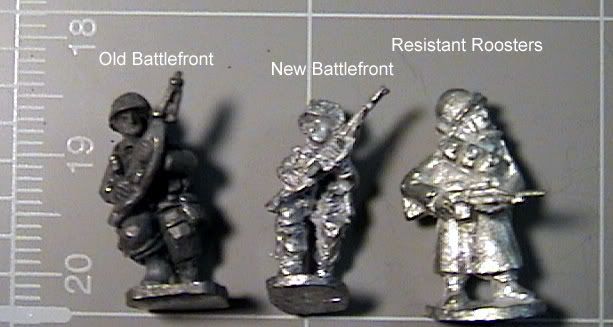
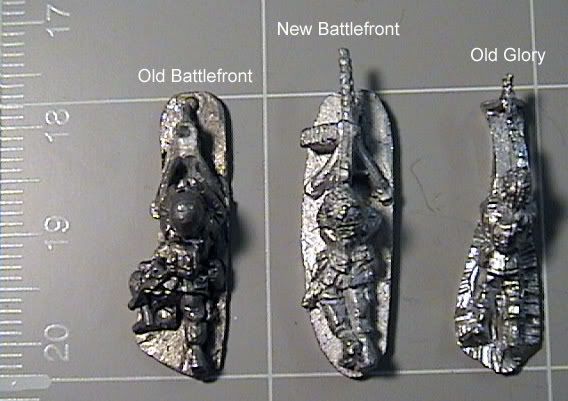
There were many who thought they figs looked grossly disproportionate, even more so than BF normally does, so much so that they wouldn’t blend well with anything and were incompatible not only with the old BF paratroopers but also with any other known miniature and possibly human life itself. As soon as I got my hands on some, I posted this picture on the forum with old and new pars side by side:

Photo Sharing and Video Hosting at Photobucket

Photo Sharing and Video Hosting at PhotobucketPhoto Sharing and Video Hosting at Photobucket

Photo Sharing and Video Hosting at Photobucket

Photo Sharing and Video Hosting at Photobucket

Photo Sharing and Video Hosting at Photobucket

Then the crying stopped.

I like the Battlefront paratroopers quite a bit, both the old ones and the new ones. Evan, their designer, even commented that they are basically just results of the old ones. I could do with less crap on the helmets, and more action poses would have been nice – Evan really, really likes to sculpt guys walking, where as I want all my soldiers shooting -- but in general I’m pretty happy with the range, and I think it is going to blend seamlessly with the old BF figures I’ve got.

Mixing with other brands, though, is going to be tricky. I got away with a lot of brand mixing in my New Zealand Rifle force, in large part because I didn’t really care if they didn’t look 100%.
That just wasn’t going to be good enough for Easy Company.

Here’s what I had to work with for each major unit I was going to play with:

3 new BattleFront rifle platoons
1 old Battlefront rifle platoon
1 old Battlefront machine gun platoon
1 new Battlefront machine gun platoon
1 new Battlefront mortar platoon
1 old Battlefront mortar platoon
1 old Battlefront pack 75 howitzer battery
2 packs new Battlefront 57mm AT guns
3 packs of new Battlefront light 105mm howitzers
1 pack of US artillery staff
2 packs (1 new, 1 used) of Battlefront Rangers
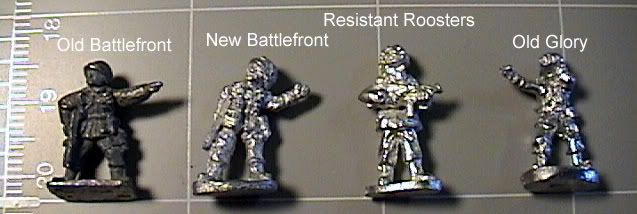
1 platoon, US Infantry in Great Coats, from Resistant Roosters
1 bag of “US Paratrooper special weapons” from Old Glory

I think that’s about it. There might be some other bits of stuff in there, but that’s most of it. About the only major company I don’t have in there is Peter Pig (no, QRF doesn’t count). I’m not sure why, but I didn’t get any Peter Pig stuff at all to mix into this army. I feel like I should have now, but its always such a pain in the ass to get Peter Pig stuff that unless you are getting a lot of it, I just don’t bother. Maybe later I’ll do a special platoon of all Peter Pig or something.
So, how do they look side by side? Take a look:

Photo Sharing and Video Hosting at Photobucket

Photo Sharing and Video Hosting at Photobucket

Photo Sharing and Video Hosting at Photobucket

Photo Sharing and Video Hosting at Photobucket

Photo Sharing and Video Hosting at Photobucket

In general, I do like Battlefront’s stuff the best. I’m not sure that the new sculpts are better than the old ones, but both are better than the other stuff out there. But sometimes you just need one in just that pose, and so I like to mix them up. Besides, you get more variety without having to convert every single miniature, and Battlefront don’t make anyone in a Great Coat, so Resistant Roosters gets in for having what the other guy doesn’t. Old Glory, well, what can I say? They look like I used to think 15mm were supposed to look. You get what you pay for I guess, but their stuff just always feels like bargain minis to me. But for this job, the special weapon pack was a good fit. It contained several other variations on “dude squatting down by crew serviced weapon,” and that is always helpful. I’d just have to file down some of that retarded helmet covering these guys have poked all over their heads!

Assault on Kiev -- Caesar's Posts


Caesar, German battlefield commander and campaign cohort par excellance, is the other German general in our 4-player Axis of Attack campaign. I wanted to link in his stuff, too, but didn't want to just rip my boy off. He's been tracking his end of things on the local wargames forrum, in this thread.

A few of his pics as a teaser (I'm sure he won't mind...):


Check out Caesar's inimitable battle reports in our local forrum, The Steel City Crucible.

Mini Shoppin' for 2007

I'm sort of trying to plan out what else I'd really like to see on my work bench for the rest of 2007. Some things have been decidedly pushed to 2008, such as a US Armoured Company. Right now, this is what I'm looking at:

Germans
Artillery Battery, 10.5 cm
Guns:
Crew: Peter Pig, 3 crew packs
staff, 1 Late War CMD pack
spotters, 1 misc. pack

British:
6 pdr Portee Platoon
Guns:
Crew:
Trucks:

Americans:
Cavalry Recon Platoon
3 x M8
3 x M60mm mortars, 9 crew
3 x Jeeps w/.30, driver
3 x Jeeps w/60mm mortar, driver, crew
Tank Destroyer Platoon
4 x M10
2 x M20
1 x Jeep w/.50, driver
9 x infantry


WarMaster Ancients
Core Rules $36
Army List Book $30
Chinese Army ??? $200ish


Mighty Empires
New Box Set $45
White Dwarf $6
Classic Rules (.pdf) free


FlashPoint: Viet Nam

Base Rule Book
Sample miniature pack

Hoards of the Things
Base Rule Book


Terrain:
Miniature Building Authority
Small Industrial Buildings
Power Plant
Russian Village?
Euro Village?


And these are some general notes about various figure packets, manufacturers, and online venders where I might get this stuff:

Battle Front
Hopefully, they will just put out a boxed set for the Tank Destroyer Platoon
They will also be the source for everything in the Cav Recon platoon, now that the scout cars are on the way.
BattleFront may or may not get my business for the 6prds. That one is gonna come down to who can do it cheep, so there is a good chance it will be Old Glory, if the packs don't stick me with a bunch of waste. But it ain't gonna be Peter Pig! My only question on the Germans is where to get the guns. I'd like BattleFront quality, but I don't want to be stuck with all their crew. Seems like a quibble, but I would just rather use other poses and let BF crew work other guns. More variety. But Peter Pig doesn't make a 10.5cm gun, and again, if I go with OG I'll have two spare guns laying about. Then again, spare artillery is an easier sell than spare crew... other countries used the 10.5.... Ya, I'll probably end up with OG guns... So basically all BF can count on from me for the rest of the year is two platoons of mechanized Americans and what ever books they release along the way.

Peter Pig:
WWII
405. 2 Goliath teams
453. LW German radio operators
456. LW German Gun crew kneeling
465. German Higher command
67 LW German SMG (NCO) Kneeling
75 Seated Germans
206. Panther G infra Red(£6.50)
208. Panther stowage includes track , wheels and commander with MG34 AA basic pack price
201. Panther G (£6.50)
319. SDKFZ 251 C Camouflaged
39.French Resistance
398. Hand cart with pusher (2 of)
397. Bicycle and wheelbarrow civilians( 6 of)
Modern:
60.Looters with tyre, chainsaw, TV
29.Civilians
31. TV/Media Crew
43. Dictator


15mm.co.uk SciFi crap
Terminators
http://www.15mm.co.uk/caaa683.htm

Aliens
http://quickreactionforce.co.uk/catalog/index.php/cPath/24_55_346


Accessories and Civilians (these come from warweb.com, under Quality Castings)
Q-5017 55 Gal Drums, Grain Sacks, Wooden Crates, Wooden A
Q-5000 Accessory Kit Allied Tools, Gas Cans, Bedrolls, Ta
Q-5018 Concreate Pillbox with removable Top so figures ca
Q-5019 European Civilians
Q-5001 Partisans Advancing
Q-5002 Partisans Defending
Q-6032 Command car, civilian
Or, also from WarWeb, under QRF:
GSV06 Steyr Staff Car
GSV02 Steyr Truck
Or, from Eurekamin.com.ua:
Three Sheep IRR-BaaBaa1
Three Goats IRR-BleatBleat4
Two Horses IRR-GeeGee14
Three Pigs IRR-GruntGrunt3
Two Cows IRR-MooMoo2
Chickens FA01
Sheep FA03
Pigs FA04
Cattle FA05
Camp (baggage, barrels, fire) 15/CS01
Squire, and 3 unarmoured horses 15/DH01

Maybe some new license plates or something? Decals.

10mm Stuff:
This is a whole new world for me, smaller than I normally go. The local group is really starting to sniff around Warmaster Ancients in 10mm, but that's just opening the door. I could really get into some very small, very whimsical gaming in this cute little scale, especially with things like Battle of Five Armies being more or less LOTR fantasy Warmaster Ancients. Its expensive, but that big box has been calling to me since its release, and if it is compatable....

Then there's the total whackyness of Hoards of the Things. I could so get into that nuttyness...

Copplestone LOTR figures are just cute!

Wonder if I'll ever go back to 28mm? I'm sure I will, but man, they are gonna feel MASSIVE!

Friday, July 6, 2007

LOTR Battle Companies Play Aids

I made up these spread sheets to track relevant campaign data for Battle Companies in GW's Lord of the Rings miniatures game. They are in Excel format. Download and print to your heart's content -- it ain't like I got any claim to the IP here!

A few Objectives

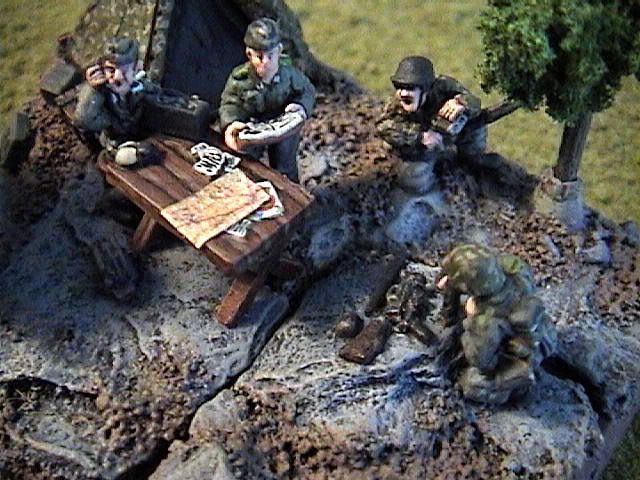
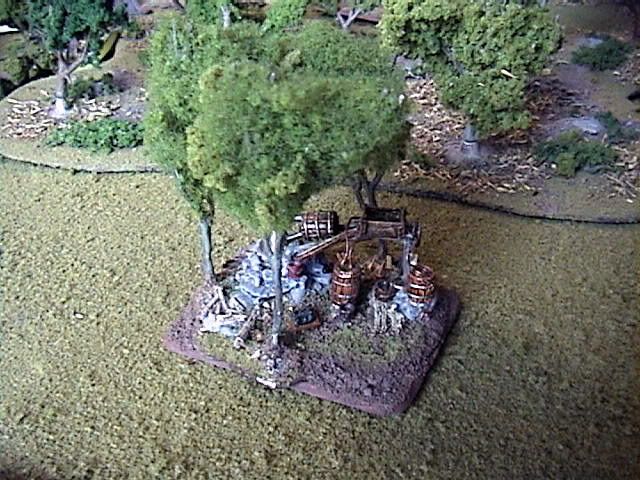
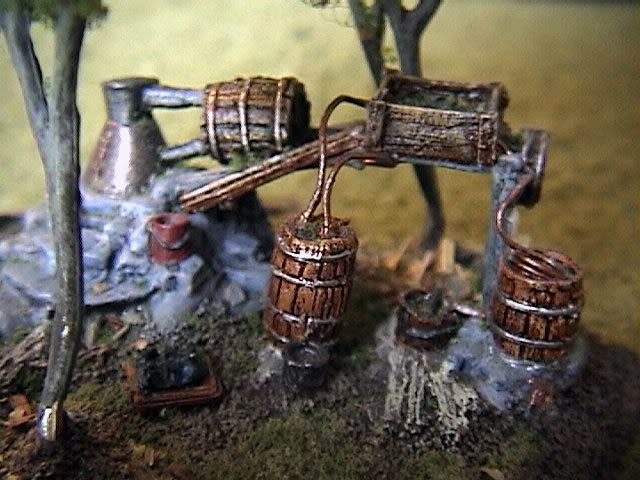
Just a few Objective Markers for use with Flames of War. This first one still needs a few finishing touches, like flock and fake water.

Photo Sharing and Video Hosting at Photobucket

Photo Sharing and Video Hosting at Photobucket

Photo Sharing and Video Hosting at Photobucket


This one was actually sold as a single kit, HO scale by Woodland Scenics.
Photo Sharing and Video Hosting at Photobucket

Photo Sharing and Video Hosting at Photobucket

Assault on Kiev GAME 4 AAR

What a glorious day for the Reich!
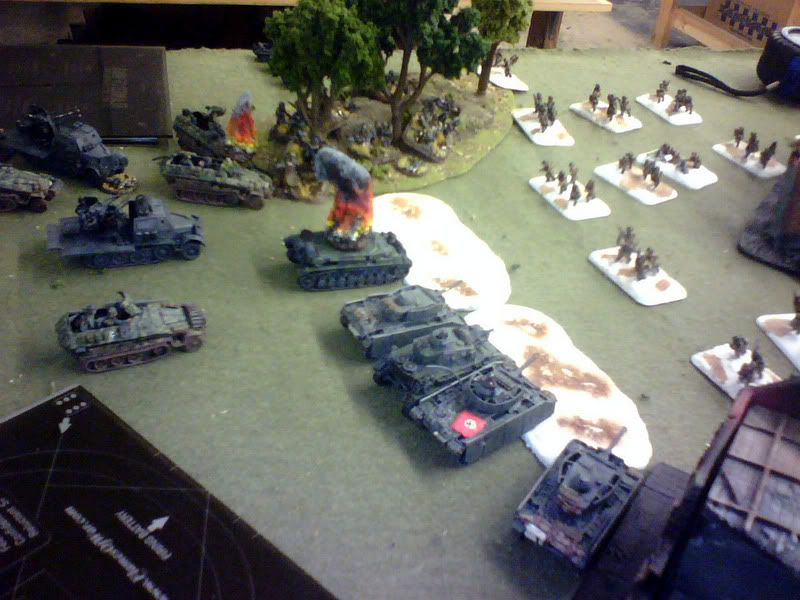
The slavs fell right into our trap. As the Division pulled back to a more strategic position from which to regroup and rejoin the attack on Kiev, it fell on my humble kamphgruppa to stoicly hold the Russians at bay. Having sent many supporting units to the rear ourselves, we were left with only our hardened core of veterans, who dug in on the Geran side of the rail line running throgh Zhitomer (as depicted with a few new packs of Russian village buildings and a snap-tight rail station. It was really nice fighting over a new town). High command also provided me with much needed relief in the form of an armored detachment -- three Panzer IIILs, and three Panthers. It was, how you Americans say, called in the cavalary. It was decided that the armoured units would push out from our lines and engage the enemy in the most annoying manner available to them -- it was their goal to draw off attacks from our objectives, rather to decicevely confront heavy Russian tanks. A pare of SdKfz 251/9s, sporting 7.5 cm guns, were kept in Ambush to play with later.

As the Russians rolled forward, the action got going quickly on my right front. A light Russian advance on this side threatened my most lightly defended, and furthest back, objective, tempting the Panthers into a more direct fight than they'ed intended. However, it turned out that the Russians were using card-board trianing mock ups of tanks, which blew over in the breeze as the Panthers turned to position themselves between the main body of the Russian force and the central objective, sort of threatened by a platoon of T-34s, led by Maria. The first shot took out her tank and killed the Soviet propaganda creation and leaving her tank smoulederig besides the tracks. The T-34s never regained their coordination or momentum, perhaps one or two more feeling our tutonic steel while the rest hid in the village.

On the left front, my Panzer IIIs were confronted with far more opposition than they'd bargained for -- three heavy-ass tanks of some slavic design, a platoon of gimpy light tanks, some scout cars. They contented themselves with careful attacks on individual targets using combined fires (two tanks shooting one) to preserve their own numbers, all the while manouvering to prevent any assault on the Grenadiers dug into the woods around the left objective. These troops could not be assaulted without drawing supporting fire from the Panzer IIIs. More over, they were well situated within a few tree stands, such that the collapse of the forward element of the platoon did not displace the rear elements who were actually within range to contest the objective. His first assault killed an infantry team but produced no strategic effect. The Panzers were widdled down in time, with two burning and the last quitting the field, but a second assault never materialized. Thus did the Russians let their one chance for victory slip through their fingers as I removed the left objective on turn 6.

The loss of platoons through withdrawl was my only real concern in this fight. I insulated my self against its affects as best I could by abusing the kamphgruppa rules (he led only the MG teams, who were useless in this fight anyway) and fielding a minimum-strength Pioneer platoon -- who came with the added bonus of a mine field, which totally gimped up the Russian advance through the village. These two units were the first to withdraw, followed by the destroyed Panzers -- they hurt me on moral, but still count as a platoon gone. It wasn't until turn 6 or 7 that I had to give up anything I'd really miss, one of the Grenadier platoons, but by then I was also removing the objective they had been assigned to protect.

As the Panthers took pot shots, vaporizing anything stupid enough to be Russian they could find (dear god is AT14 fun!), I removed the central objective. Had it remained, to take it he would have had to kill three Panthers and a platoon of dug-in Panzer Grenadiers, with the CiC, and that pair of 251/9s who had showed up. I think they even killed a T-34! No intact units remained to complete this task, with one heavy tank burning on the tracks, the others cought up in the village with the confused T-34s and the lone surviving scout car. I don't remember if his mortars ever fired a shot. After the central objective was gone, he'd have had to take those men through everything I had left and some woods to aproach the far, right-flank objective. At the start of Breakdance's turn, he shook my hand and called it a good game.

Assault on Kiev GAME 3 AAR

URGENT MESSAGE TO GERMAN HIGH COMMAND:
WE HAVE LOST LISOWKA

Game 3 on Track 1 was a bloodbath for both sides. In the end, it all came down to moral. Combat photography was lost and/or never taken -- things became muddy in our defeat. Details are sketchy, but debriefings of surviving troops give some picture of what happened.

Available German Forces:
HQ:
    A single SdKfz 250
    a panzerknacker for the 2iC
    a single 8.8 cm RW43 Puppchen

1st Zug
    Full strength Gepanzeret Panzergrenadier Platoon

2nd Zug
    Reduced strength Gepanzeret Panzergrenadier Platoon

Heavy Weapons Zug
    CMD Section, 1 x SdKfz 251/1
    2 x MG Sections, 2 x SdKfz 251/1s
    Gun Section, 2 x SdKfz 251/9s

Panzer Pioneer Zug
    Full strength
    1 x Pioneer Supply 3 Ton truck
    1 x Goliath

Motorized Anti-Tank Zug
    3 x 7.5 cm PaK 40s

Panzer Zug
    3 x Panzer IV Hs w/schurzen

Handicap: 200 points spent on unfielded halftracks


REPORTED RUSSIAN UNITS:
Never trust estemates of enemy strength as reported by fleeing troops. Still, indications are that the enemy showed up with two platoons of T-34s, a platoon of light T-70s, three Churchills (!!!), a scout group in armored cars, and a mortar platoon.


The Plan:
Being forced onto the defensive with an army suited for mobil battle, we were forced to get creative. This artistic drive saw expression in violent abuse of the Combat Attachment and Kamphgruppa rules, resulting in a big ass KG to hold the objectives, and the command elements of the PzG platoons serving as light tank hunters (7.5 cm 251/9s attached to each) with most of their rifle strength serving in the KG. These elements waited in reserve, along with my tanks. The KG, Pioneers, and ambushing PaK 40s were ordered to dig in, hold their fire (PaK 40s omit this order) and stay put. I was hopeing to take the auto-win on Turn 6, but it was not to be.


After Action Report:
This, the third consecutive battle for Lisowka, saw the town reduced from the charming hamlet we first tried to enter weeks ago to a smoldering heap of slag, rubble, and death. (Represented by all the building models being reduced to their most ruined state). The small river outside town continued to be a significant obstacle in one table quarter (far left from the German perspective). The remains of town occupied the right hand side of the table, with heavy woods between the river and town. I deployeed into these woods with the heaviest kamphgruppa I could muster (14 stands), the pioneers, and an ambushing zug of PaK 40s. It looked like the most open approach was the wide road through the woods in on my near left table quarter, so we mined it. That left only one way into my position from the near-left.

Weather was overcast. Airpower would play no part in this fight.

Random deployment on Turn 1 played well into my hands, forceing BreakDance to deploy his first platoon of T-34s and the armored cars into the woods on my near left. His mortars set up inside the town on my right. These troops were dangerously close to my pioneers. I deployed my PaK 40s from immediate ambush, covering the smaller road out of the forrest and forcing my enemy to make the uncomfortable choice between rolling into open 7.5 cm muzzels or rolling over a minefield in front of 7.5 cm muzzels. He chose the un-mined aproach, and quickly popped one of the PaK 40s. This did not unsettle the German unduely, as neither side's reserves were moving quickly (none showed up for either of us until, what, turn 5?). The PaK 40s quickly made short work of the T-34s, and soon the forrest in the near left table quarter looked like Smokey the Bear's worst nightmare. When my reserves finally started showing up, my Panzers rolled in behind the last two T-34s and destroyed same. Armored cars burned throughout the area.

Meanwhile, on my right, the dirty commie mortars were raining down ineffectual harassing fire on my exposed PaK 40, left in command but on the other side of a clump of trees to cover the expected aproach of his reserves. Sooner or later, they were going to get lucky, so before any more troops arived the Pioneers broke from The Plan. Raising from their holes, the first hit the mortar platoon with a goliath, taking it down to just three stands, before assaulting it. They never had a chance to swing back. However, while the Pioneers were on their way back to their optimal position, Russian reserve tanks started comming on to the far left quarter, forcing them to take what cover they could find where they were, just outside our peremiter. Could they hold long enough for the Panzer IVs to relieve them? Could the Panzers relieve them?

Somewhere around this time, I made Mistake #1 -- the kamphgruppa stuck too strictly to the plan. As soon as the fighting was resolved on the left side of the table, they should have been moving to counter all the damned commie tanks comming in on the right. What can I say, on a normal war-of-manouver day, we'd have been there. We took "dig in and hold on" too literally.

A slow war of attrition now began on the right side of the table, with his tanks unable to inflict significant casualties by fire, and my pioneers unable to do anything but sit and take it, or assault. One assault failed, the other produced some results, but eventually the pioneers were worn down. My last two reserve units showed up, and offered harassing fire, but they were used ineffectively. Unable to beat the clock, my attention now shifted to his T-70s -- I'd killed his company commander, so the loss of even this minor formation would have cost him the game. He knew it, too, and kept them moveing. In point of fact, his was not the only officer lost in the fighting -- to get the pioneers moveing one last time, my CiC joined the fray. We are sure his family will appreciate the posthumas decorations.

Second Mistake: I tried too hard with the light tank hunters (they are just halftracks, for god's sake). Seriously, we're talking about 5 Sd Kfz 251s, two of 'em with 7.5cms and two with 3.7cms, trying to hold off 5 T-34s, 5 T-70s, and 3 Churchills! What was I thinking? If either of these units had survived, even a token vehicle rolling, it would have made all the difference a few turns later. When one of them got down to one man, he should have been pulled back to a safe position. Alas, desperation and bravado cost these brave soldiers their lives.

My Panzer IVs had to take the long way around the table. By the time they got to the fighting, both commanders were looking at the same situation: platoons all over the table missing men, 50% of platoons already distroyed, and both CiCs dead. In other words, who ever lost the next platoon would loose the game to a company moral test they would automatically fail. My Panzers popped one more Churchill, forcing a platoon moral test, which Breakdance passed. (It would have been nice if that one bailed out Pz IV had remounted like his buddy...) He popped one more Pz IV, forcing my platoon to test. They failed. At the sight of the last tank burning, the infantry and remaining PaK 40 quit the field as well as they were able.

It was a damned close game. My whole plan had been to win on Turn 6. The game finally ended on Turn 14, and it all came down to two moral tests. He passed, I didn't.
But, did I mention that 200 point handicap? That's about what all the halftracks I didn't field would have cost. Oh, to have had just one tank more...

Final Score: 4/3, Soviet Victory in Game 3, Track 1
NEXT GAME: Germans defend Zhitomer in a Fighting Withdrawl.

CAMPAIGN NOTE: A German Defeat in Game 4, Track 1 will spell Slavic Victory!

Assault on Kiev GAME 2 AAR

From April 9th:

The Germans have once again run headlong into an unmoving slavic wall. I changed my army build a bit and altered my tactics significantly, but to no avail -- once again,
Kritikalfailure prevented my boys from crossing the center line (we're gonna go ahead and call it now, he cheated me out of the centerline by dishonorably placing his minefield forward of his deployment zone. Oh, so so low...) Unlike last time, I made every effort to come to grips with the enemy as quickly as possible -- those tanks would have been assaulting by turn 3, with infantry support available. If only we'd had, ya know, any motivation. At all. All day. The way it played out, I had a strong platoon holding my right side, with another panzergrenadier platoon, a full panzer platoon, and AA support on the left. A MG platoon was pulling slowly up the rear, hopeing to assist either side and exploit which ever got though. A band of scounts in schwimwaggons also hoped in vain to find a way of sneeking around the foot-and-a-half deep soviet formations.

The minefield again became the focal choke point of the game. Those tans just rolled right up to it and sat. For three turns they failed every attempt to get them to just move
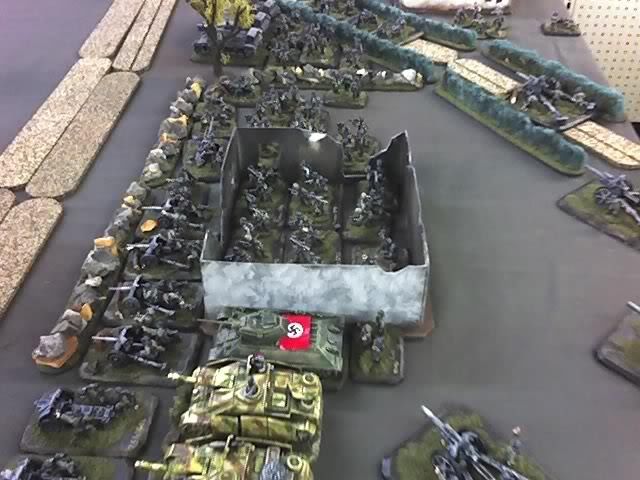
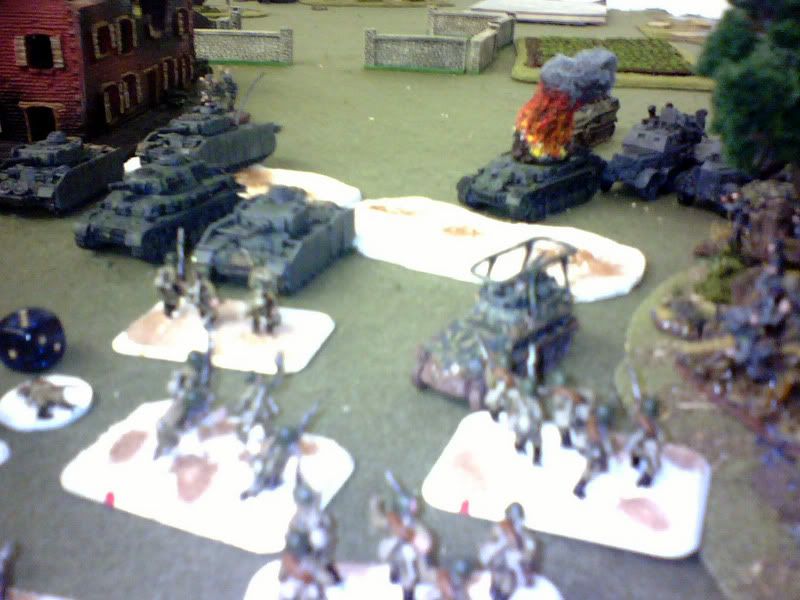
forward. Meanwhile, both platoons of panzergrenadiers moved into position on either flank while the MGs set up shop in the center of town. For some reason, those few little schwimwaggons make him all nervous on the other side of the table, but they never really did anything (mostly beause I forgot to use any of their special rules, which would really have helped since he spent all day hiding in his holes). Here's what my left flank looked like:

Photo Sharing and Video Hosting at Photobucket

The way it played out, I had a strong platoon holding my right side, with another panzergrenadier platoon, a full panzer platoon, and AA support on the left. A MG platoon was pulling slowly up the center, hopeing to assist either side and exploit which ever got though. A band of scouts in schwimwaggons also hoped in vain to find a way of sneaking around the foot-and-a-half deep soviet formations. The minefield again became the focal choke point of the game. Those tanks just rolled right up to it and sat. For three turns they failed every attempt to get them to just move forward. Meanwhile, both platoons of panzergrenadiers moved into position on either flank while the MGs set up shop in the center of town. For some reason, those few little schwimwaggons make him all nervous on the other side of the table, but they never really did anything (mostly because I forgot to use any of their special rules, which would really have helped since he spent all day hiding in his holes).

For clarity, I want to make this point explicit -- by turn 3, both platoons of PzG and the panzers were sitting within charging range of the enemy. And there they sat all freakin' afternoon. I spent 4 turns trying to someone, anyone, to just walk forward. Just cross the center line (ok, the scouts did get accross the line, only to be disintegrated by AT fire that I could have disengaged from but forgot to). He'd pinned both platoons of infantry with artillery strikes, and they just never unpinned. Ever. And the tanks just sat there, totally uninterested in crossing the minefield. So for three turns I sat within spitting distance of him, shooting at reduced rates of fire, wishing to all things remotely holey that someone would just grow a pair and go forward.

Photo Sharing and Video Hosting at Photobucket

In an act of courage bordering on insanity, by CiC made a desperate bid to rally his
troopers. Joining the panzer platoon, he lead the assault from his halftrack. That's right, with one tank down to artillery he lead from the front, pulling the Mounted Assault into the teeth of greatly superior numbers. Well, that FINALLY got someone moving. One more tank blew in the mine field, and then we started killing. For a few brief seconds, it was glorious. Then they were torn to pieces; as soon as the CiC died, it was pretty much over. And then time ran out. Like some kind of union gig, as soon as the clock rung Turn 6 my boys (3 platoons at 100%, 2 hurtin' but still ready to contribute) just packed up and went home.

This one really hurt. I don't mind loosing when I do something stupid or the other guy does something brilliant. But I can't stand to loose, to the clock, because I just couldn't make the motivation rolls to unpin. Sticks in my craw. Now, I don't think I could have taken the objective and held it, BUT if I hadn't been cheated out of the center line by the dastardly misplaced minefield I would at least have had something across the center line to keep the clock running long enough to take the victory points at least to a 5-2, if not a 4-3. I don't feel beaten by his army. I feel beaten by the scenario and the dice.

Assault on Kiev Campaign GAME 1 AAR

OK, those top two posts are there for permanent book-keeping. The rest of the thread is open for battlereports, propaganda, disinformation, and general shit talkin'.

I'm gonna blame this whole first game on faulty intelligence.

I had totally gambled on faceing Soviet tanks. I debated all mourning long on wether or not to bring my generally craptastical mortar platoon, and brought an extra Pz. IV instead. This is what I was looking at on Turn 1:
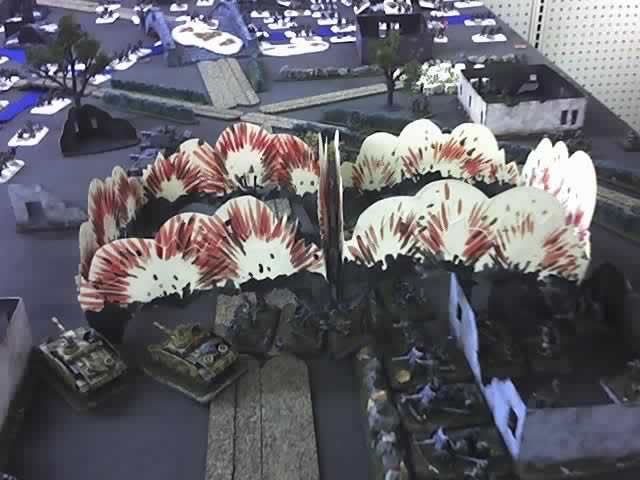
Photo Sharing and Video Hosting at Photobucket

Did I mention that I had not a single template weapon on this list?

I spent about three turns learning how to crash airplanes (never used 'em before) and shoot near dug-in Russians (shooting at would imply hitting...). He sat in his holes. Around Turn 4 we both realized this wasn't going to be a shooting game. Neither of us could do any/enough damage to the other to make any difference, and the clock was on his side. Nerves became tense on both sides, as I suffered through a bing of analysis paralysis and he tryed to anticipate what crazy nonsense I would try to pull to fight through all that infantry. Nerves were frayed, nails were bitten.

Eventually, I more or less ended up doing what you'd do if you just said the hell with it and crashed in without thinking. The only trickyness was trying not to start off a domino effect of supporting defensive fire. On both flanks, the German hammer fell on Turn 5. Later in turn 5, the German hammer ran off to crysbaby's house for vacation. First the StuGs on my left, then the PzIIIs on my right, were torn to shreads in a pair of assaults, the last tanks of each zug failing their moral checks and leaving their bailed out comrads to their doom. The infantry that should have been supporting the StuGs were pinned down, and there wasn't time to wait for them. Three tanks just ain't enough to assault strelk. The infantry trying to go through the main section of town gave it one round and failed their moral check.

The right flank came the closest - they had a few teams of kamfgruppaed infantry to sacrafice in support, and came so close to making it that both they and the strelk batallion they were facing broke (and you woulda gone first, without the CiC and a Kommisar!) and left the field when the assault finally died down. This was the last action of the game, and while I have no idea what I would have done if I'd made it accross the line and extended the clock, I don't think he really had a plan for it, either. As it played, it was a freakin' meat grinder over there, and we were both sweatin' it hard.

It was a hellova game, man. I almost hope the whole freakin' campaing isn't quite that stressful. Or not.

And now, Kritikalfailure's pics of the battlefild:
From now on I'm going to take a pic at the top of every turn so others can monitor our un-progress:

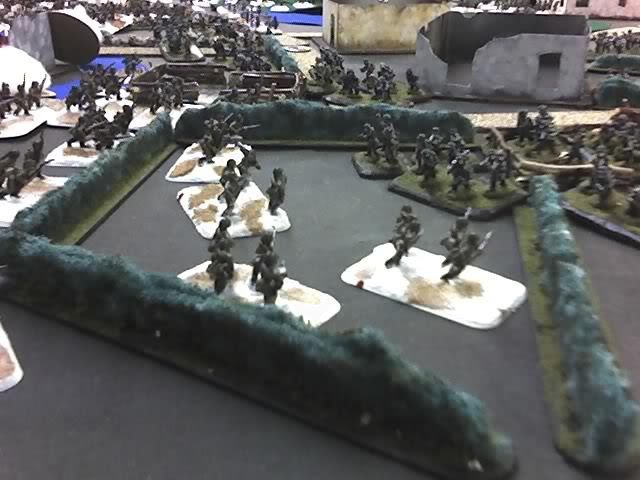
Photo Sharing and Video Hosting at Photobucket

Photo Sharing and Video Hosting at Photobucket

Photo Sharing and Video Hosting at Photobucket

First thing is first: I'm glad Utini's intelligence sections were either drunk, asleep, or out whoring with the local girls, as he was poorly equipped for this fight.

Mission selection: From what I understand, my options now are to either A. hold the village in which case my next mission is Hold the Line but standard (i.e. if I fight against another Infantry Company we have to dice off for attacker) or B. Fighting Withdrawal, in w hich case I'm automatically defender. Although the campaign doesn't spell this out, I'm assuming that I would fall back once along the track regardless if I win or lose (although winning would obviously help me take control of mission selection next go around).

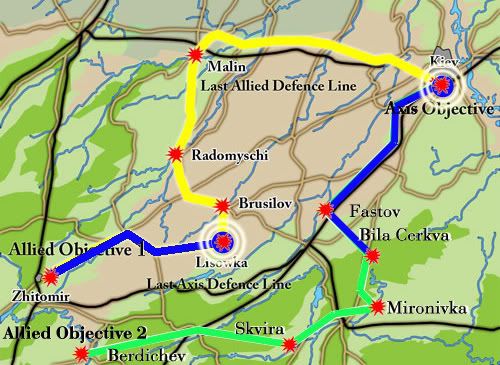
Assault on Kiev

Logistical Support

This should probably be obvious, but just to avoid any issues, let me spell this out: the two tracks are identical to eachother in every game-measurable way. We could change this if we wanted to, but that would be too much work.

Track 1 = Track 2
Zhitomir = Berdichev
Lisowka = Skvira
Brusilov = Mironivka
Radomyschi = Bila Cerkva
Malin = Fastov
Kiev = Kiev


Battlefield Surveys
In no way do I mean to suggest that we must and should refight these battles over exactly the same ground. However, knowing what each town basically looked like should be fun as we go, both to make the same places have a similar feel as we fight to retake them, but also to try and make each town different from the others.

Lisowka
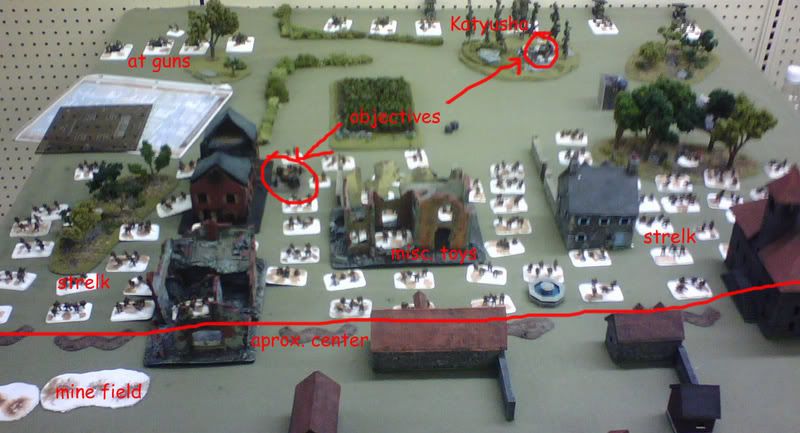
For instance, kritikalfailure and I sort of pictured Lisowka as a quiet, unsuspecting farming village.

Photo Sharing and Video Hosting at Photobucket

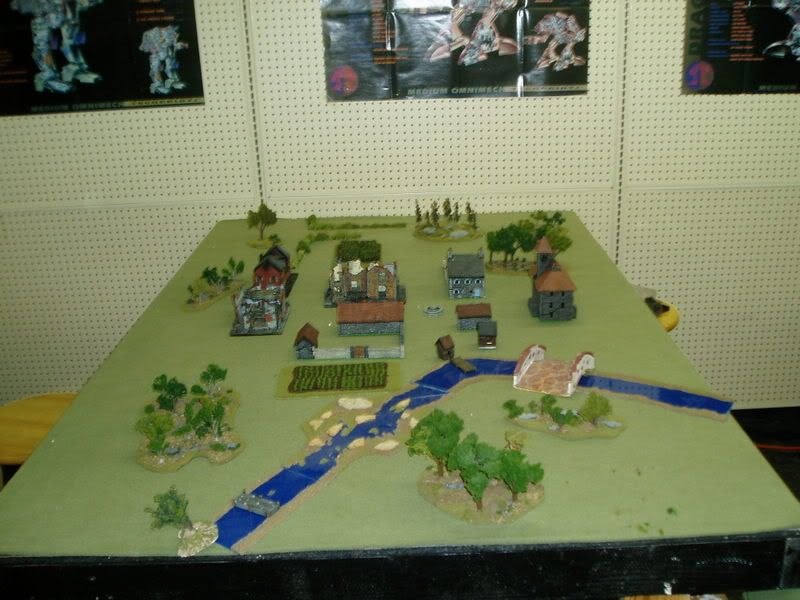
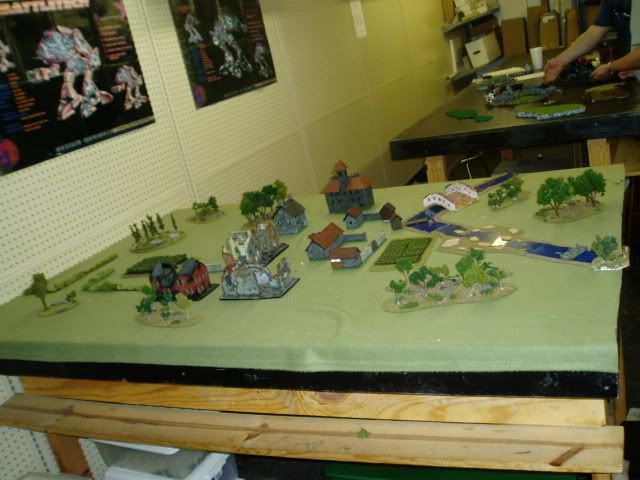
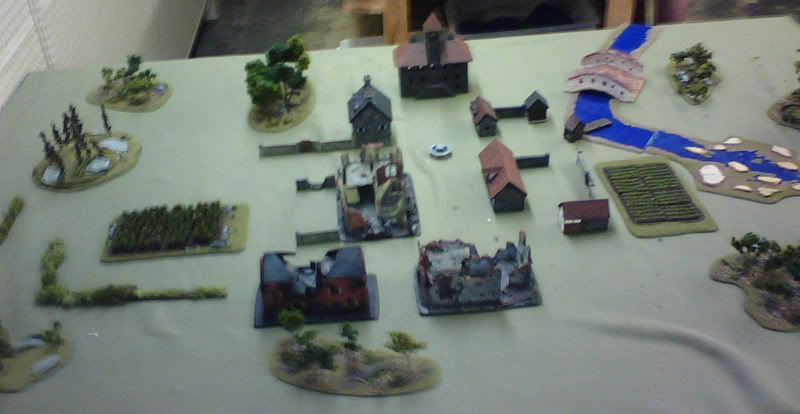
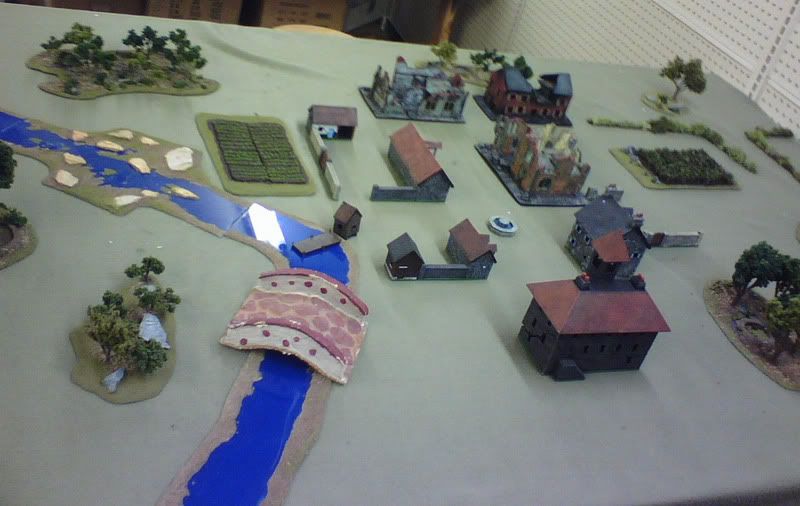
We tried to keep the buildings as intact as possible. If we find ourselves fighting here a 3rd or 4th time, they'll all be ruins. And we tried to use my villagy-looking pieces, and save all the big-city Stalingrad style ruins for Kiev. kritikalfailure took some pictures that probably look better than these, but they will do until he uploads his someplace.

Photo Sharing and Video Hosting at Photobucket

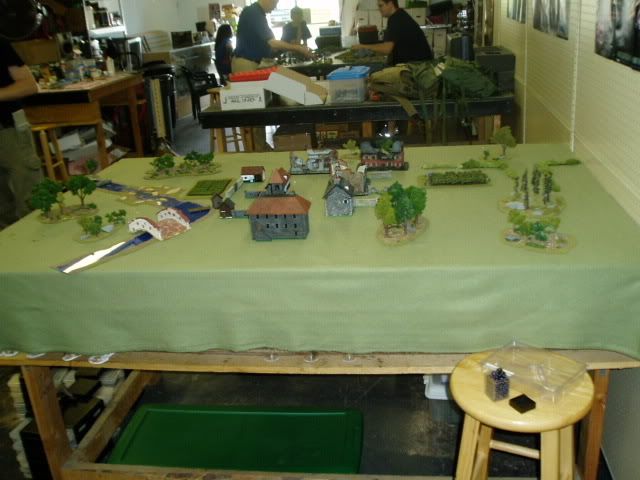
Since we ended up playing three battles in this town, each time we tore it up a little more. All the buildings were intact on the first game. Some of the roofs and floors were removed for the second, and on the third all we put out were the smouldering shells of the buildings. But they were the same building models, so the town always felt like fighting in the same place, even as we tore it down around our ears.

Photo Sharing and Video Hosting at Photobucket

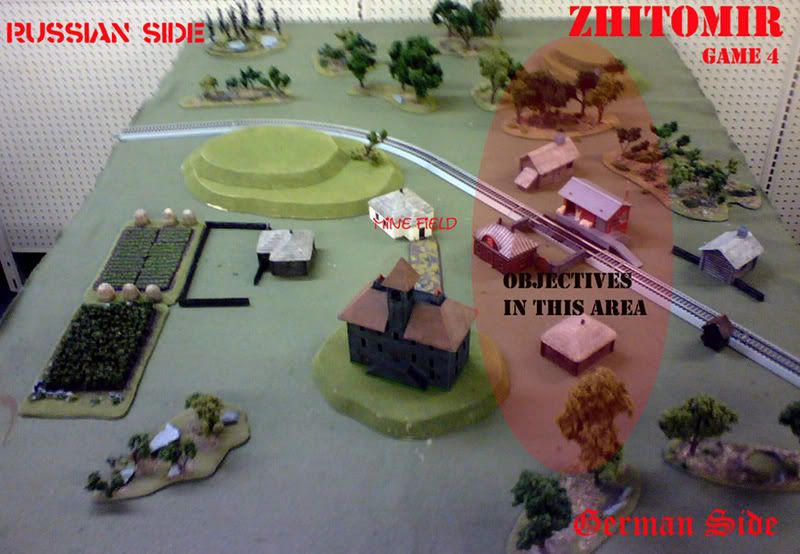
The basic lay out we used for Zhitomir -- note all the new buildings! I was kinda happy about that, I even picked up a train station and some track, because the campaign says there's a rail line through Zhitomir. These buildings don't really destroy, the roofs just come off, so hopefully we won't be fighting here long.

Assault on Kiev Campaign

Strategic Status

Photo Sharing and Video Hosting at Photobucket

The Germans have Won on Track 1!
The Germans have Won on Track 2!


Track 1(with Game 5 results)
  • Allies: 15
  • Axis 10
  • Next Mission: The Soviets will bleed men in a Fighting Withdrawl in Lisowka.

Track 2 (with Game 5 results)
  • Allies: 15
  • Axis: 15
  • Next Mission: Game 6 on Track 2 will be Not One Step Back with the Soviets defending a 4 x 4 table of the streets of Kiev.


Are the Russians on the ropes? Is Ivan Cryin'? We're getting to the line, people, and Caesar could win this on the next game. All Kritikal can do is not loose, he's not in a position to win. Breakdance might stop me from getting back on the road, but even if he wins we'll just be in Zhitomir again, and he'll need game 7 to win to win the campaign.


This should probably be obvious, but just to avoid any issues, let me spell this out: the two tracks are identical to eachother in every game-measurable way. We could change this if we wanted to, but that would be too much work.

Track 1 = Track 2
Zhitomir = Berdichev
Lisowka = Skvira
Brusilov = Mironivka
Radomyschi = Bila Cerkva
Malin = Fastov
Kiev = Kiev


Campaign Special Rules Here.


This link seems to be dead just at the moment. If any one had any questions, ask me. I'll try and dig up the copy I saved and post it up here.

Blind Jedi’s Bluff

Ultra-Fast Play Rules for Single Jedi Combat in Star Wars Miniatures

Photo Sharing and Video Hosting at Photobucket

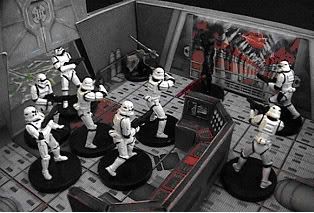
These rules were conceived as a way to play fast, small games of Star Wars Miniatures, with an emphasis on fancy terrain and a focus on Jedi duels. In fact, my original goal was to find a way to play on Elizabeth’s Freezing Chamber before I’d taken the time to build the rest of Cloud City. The idea grew from there. Nothing is going to change in the actual game mechanics, but we’re going to pick our forces a little differently today. The focus is on a single Champion, operating with very little support, against an arch Nemesis. But who’s the Champion and who’s the big baddy? Lets find out.

The Way of the Bluff

The force building portion of Blind Jedi’s Bluff starts with both players choosing sides (you could probably get away with running additional players as well, but I haven’t play tested that yet. Let me know how it turns out.). Factions don’t come in to play at this point, just Force affiliation, Light Side or Dark Side. It really doesn’t matter how you do the choosing – both players can just pick one and agree, you can flip a coin or roll for it, you could arm wrestle, it doesn’t matter. One player picks the Light side, the other takes the Dark.
Photo Sharing and Video Hosting at Photobucket
Once you know who you are fighting for, you will secretly pick your character. The only requirement for character eligibility in a game of Blind Jedi’s Bluff is a Force rating. It makes no difference if they are Force 1 or Force 5, but they must be Force sensitive. Here’s where the Bluff comes in -- do NOT reveal who you have chosen to your opponent.

Both players must pick their main man in secret. You will choose your character without knowing who you will face, how powerful they will be, or anything else.

Once you have chosen, you are locked in – you will play that character, and can not change it. I’d just handle this on the honor system, but if you feel the need to write it down or tell an impartial party, that’s your business.
Photo Sharing and Video Hosting at Photobucket
Now that you are both locked in, reveal to your opponent the point value (not his name or faction, just cost) of your chosen character. The character with the lower cost will be the Champion, while the higher cost character will play the roll of Nemesis. Now, subtract the cost of the Champion from the cost of the Nemesis – this value is the Low Ball Special.

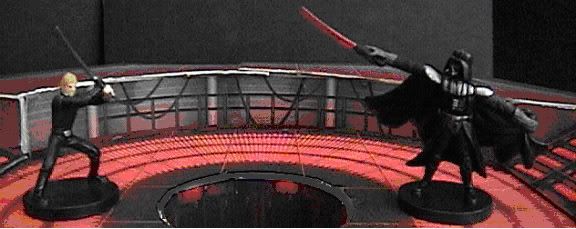
For example, lets say one player chose Darth Vader, Jedi Hunter; the other player chose Luke Skywalker, Jedi Knight. Subtracting Luke’s cost of 27 (he’s what we’re calling the Champion) from Vader’s
75 (he being the Nemesis) we get a Low Ball of 48. The Light Side player bet low, hoping to beat the odds. This is the essential gamble of Blind Jedi’s Bluff – will you take a low-cost Sith hoping to make it up with Stormtroopers? Or will you take Darth Vader, Chainsaw Juggler and just eat everything in sight? If you bet safe down the middle, will you be the Champion or the Nemesis? What will the other player do? This is the Bluff.

Evening the Field or, the Low Ball Special
Photo Sharing and Video Hosting at Photobucket
The Low Ball Special is just a goofy name for a simple concept – the player who picked the lowest cost Jedi (or Sith, whatever) may make up the difference by building a Goon Squad, of value equal to the difference between the main opponents. The Goon Squad may only contain non-unique characters whom have no Commander Effects or Force rating. They must be from the same faction as the Champion – in a Blind Jedi’s Bluff, Fringe characters will only goon up for Fringe Champions. Within these restrictions, you are free to choose your squad normally.
Photo Sharing and Video Hosting at Photobucket
That’s it, that’s your force – either a Champion and his Goon Squad, or the Nemesis. That’s all – this should go quickly.

To continue our previous Luke vs. Vader example, the Light Side player would find themselves with a Low Ball Special of 48 points for their Goon Squad. Luke might choose to spend those points on two Elite Hoth Troopers and three Hoth troopers, totaling 45 points. This leaves a few points left over that could have gone to an Officer instead of an Elite, but his Commander Effect renders him ineligible. Other combinations are also certainly acceptable, so long as they conform to the Goon Squad restrictions.

Show me Your Hold Card

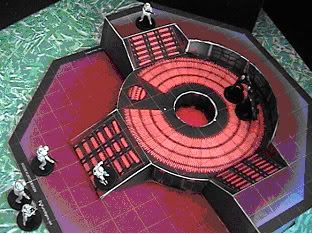
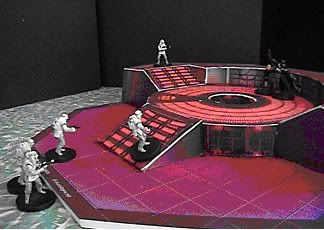
Once both forces are finished, reveal to your opponent what character you choose – remember, up through the Goon Squad selection you only know the cost of your opponent’s character, not their name. Once everyone gets acquainted, you are ready to set up the game. Blind Jedi’s Bluff was conceived as a way to use very nice, large, single terrain pieces. The Hanger Bay on the Death Star or the Carbon Freezing Chamber are obvious choices, but any decent-sized are will do – you don’t want your Champion confronting his arch Nemesis in the closet, do you? Pick your battlefield however you and your opponent see fit.

The first roll of the game determines set-up. Each player should roll a dice, and the winner may choose who will set up first, and on what side of the board/terrain they will set up on. The first player to set up should then place their Character on the edge of the board. Up to two Goon Squad members may be deployed with them at the start of the game. Any additional Goon Squad members will be left off-board for now. Once this is done the other player may place their character(s) on the board along the opposite edge.

From this point on, play continues normally – Roll for initiative and play the game the way you always would. This is going to go very, very fast – when you got less than half a dozen characters in play turns don’t last very long.

The winner is the last man standing. Rinse, repeat. That’s the Blind Jedi’s Bluff

Extra Goons Join the Fray

If the Goon Squad contained more than two characters, the extra characters start the game off board. Each turn, after all your other characters have activated, roll a die for each Goon left off board. On a roll of 11+ they enter the fray. Place the model on the first row of squares on the edge of the board. Entering the board costs their entire Move action for this activation, but they may use their Attach phase normally, by moving, attacking, or using a Special Ability. These extra Goons fight normally for the remainder of the game.
Photo Sharing and Video Hosting at Photobucket

Special Rules and Force Powers

There you have it – the basic set up for a Blind Jedi’s Bluff. It’s a lot of fun, and because it plays so fast you can get in many games with several people in a single evening, preferable talking mad trash in between. But because the Bluff is so small, it’s a great time to use optional rules you’ve been looking to try. Or not, you can play it as basic as you like. But my crew, we turn it up to 11. Every last special rule and Force power we can lay our hands on (mostly in the Ultimate Mission books) is fair game in a Blind Jedi Bluff. Any other special rules you find or come up with, like the advanced terrain effect rules we’ve been kicking around the forums, will probably also work just fine in the Bluff.

Fan-made rule sets like this are all the same – they suffer from a lack of play testing. If you’ve got something to add or discuss, bring it up in the forums. If you’ve got a question, feel free to ask, and if you think you can do better, knock your self out. Just be sure and post it!


The terrain used in this article is available for free to download from SWMiniatures.

Universal Generic Objective Tutorial

I love objectives.

Seriously, they were one of the things that really drew me to Flames of War to begin with. I like the idea of fighting over a place/thing instead of just killing every man standing, and they look cool. I love that the game mechanics require you to make something, which can be anything at all but must be something, that will not fight or be destroyed. It just sits there, looking pretty.

I can come up with ideas for my own objectives all day. Really the only thing that keeps that end of the hobby in check is the need to build actual troops! But I do love me a themed objective... and it drives me to such distraction when my opponent doesn't have one, or worse, has one that makes no sense, like Desert Rats defending a blown up T-34. I'd love to have something to let them use, but it would be really nice if it matched, and I don't wanna make stuff for armies I'm not running. On the other hand, I've got a lot of strange little miniatures that arn't part of units, but I'd like to do something with. I could make them into an objective, but then they would only be part of that one objective, and never anything else.

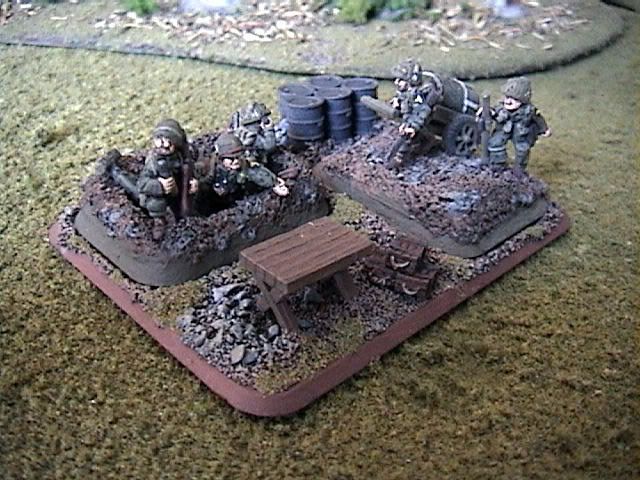
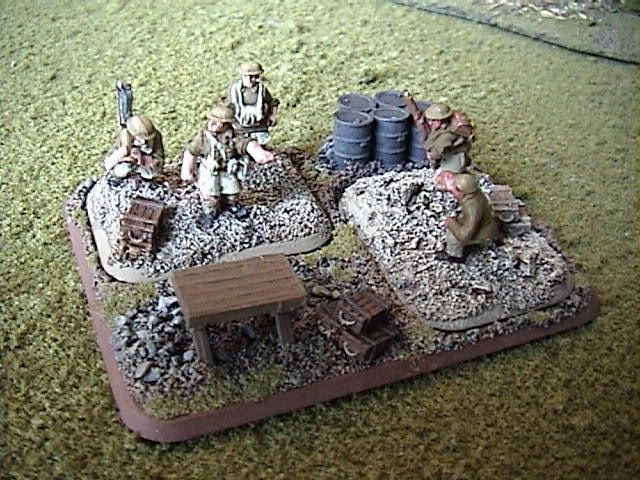
Between these lines, I hatched the idea for a Universal Generic Objective, an UGO. It looks like this:
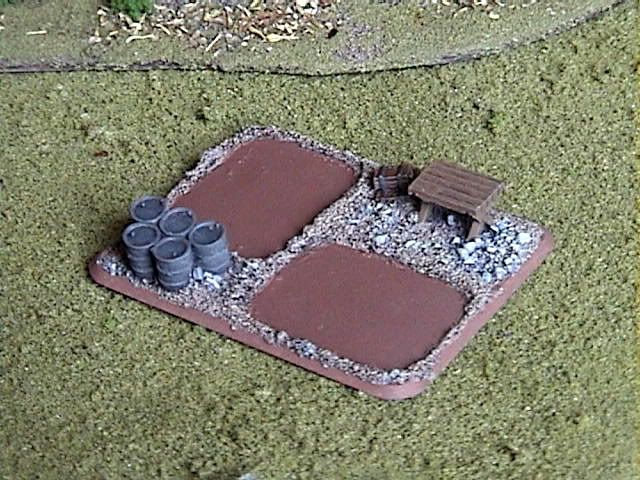
Photo Sharing and Video Hosting at Photobucket

Basically, we've boiled the military objective down to its basic gamer essence, and added in the idea of Socketing. Look at all the really generic objectives out there, you know, retail? You've basically got dead tanks, staff offices, and supply dumps. So, here I've got a table and some barrels. What could be more generic? Now, for the theme!

Look! Ze Germans!
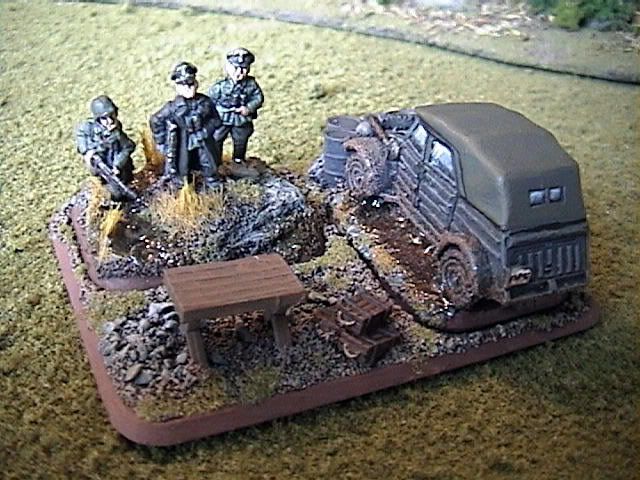
Photo Sharing and Video Hosting at Photobucket

Now here come the Yanks!
Photo Sharing and Video Hosting at Photobucket

But what if they're British?
Photo Sharing and Video Hosting at Photobucket

Basically, you take out your UGO, hand it to the other guy, and if he has two spare small stands in his box you will now fight over a matching, themed objective. Beautiful! Simple! Generic! Modular! By this point, I'm sure you're dieing to make your own. You must first assemble these rare, exhotic elements:

Materials:
  1. Large base (or same size piece of something flat)
  2. two Spare small bases (you can reuse them later)
  3. a few bits (I went with a staff table and barrels because I had pleanty)
  4. Super Glue
  5. Sand
  6. marker
  7. scraping tool (I like bent paper clips for this job)
  8. dirt shades of paint
  9. fake grass of your preference
Making the Sockets
The only real trick to this whole thing is making a decent socket. And its not much of a trick.
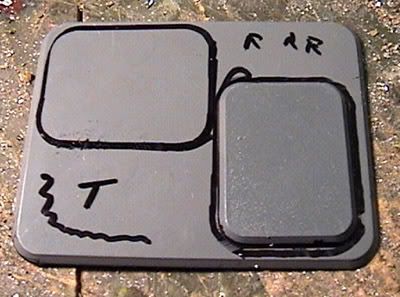
Photo Sharing and Video Hosting at Photobucket

Lay down your large base and set the two small bases on top. Arange them so things will fit well later, no matter what those things were. I went with the perpendicular arangement because I thought it would make two command teams standing there look like they were having a meeting. Now outline the bases with the marker, being careful that they don't slip and ruin your trace. Set the small bases asside, and maybe make a note or two about where you'll place your bits of junk later.

Now we're going to lay the edges of the sockets. This is the only remotely tricky part.
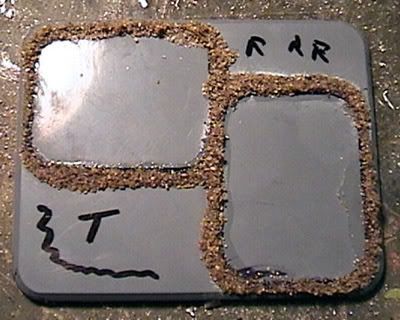
Photo Sharing and Video Hosting at Photobucket

Lay a bead of superglue just outside the mark, running all the way around the line you made by the small base, and dump sand onto it. You should lay this line of glue just outside the width of the marker's ink, it is going to spread a bit. Scrape up anything that slid over the line too much with you bent paper clip, and test fit with the small base to get a good fit. You will want to do this quickly, but you've got a few seconds. You will be scraping up sand to get a good fit. Actually, for a really tight fit, you can let one or two drops of super glue cross over the line and then use the edge of the small base to shovel it out of the way.

After this has dried, you should have a decently tight fitting socket. It may be desirable to touch up the rim of the socket with another pass of glue and sand, it will all depend on how it feels. Normally this isn't necessairy or desirable.

Photo Sharing and Video Hosting at Photobucket

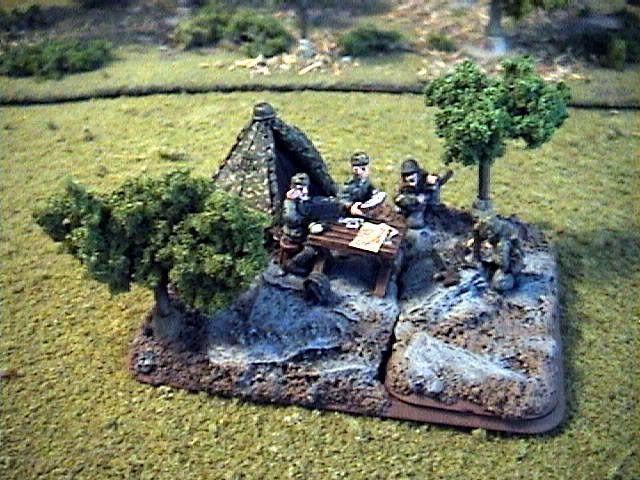
Now just take your bits and glue them on. As you can see, I really didn't put much on there, just a table, some oil drums and an ammo box, but it will be pleanty. After all, there's going to be a half dozen people showing up! Just don't set items so closly to the sockets that they could get in the way when you try and add other miniatures later.

The fine details of the base work -- patches of rock that over lap, contour lines accross both pieces, etc. -- are what really sell an UGO, though. I don't think this would work if you just set down a piece of card board with some flock glued to it and called it an objective. Once you've glued down a few bits, fill in the rest of the smooth are with either sand (you'll have it handy) or whatever you like to finish your bases with.

Painting and Finishing
I'm not going to spend much time talking about painting dirt. You know how to paint infantry stands. I will say that to my eye, natural objects require at least 3 color, not including the primer, to look alive and organic. In other words, I dry brush my dirt with three shades of brown, and my rocks with three shades of grey. Do this to your taste. I finished the base edges to match my German army; this is one point where you won't be able to predict how your oponent will paint their troops. It might look silly to see snow-covered Russians standing in a Tunisian UGO, but hay, its generic! That's why I painted mine in nice, neutral woodland colors.
Photo Sharing and Video Hosting at Photobucket
The same holds true for flock, static grass, and other artifical foliage. You'll probably want a little of it, but keep it to a minimum. I suspect the grasses and plants could look more off setting than the wrong color of dirt. Besides, how much time do you want to spend on makig an adapter? I just dabbed on a little bit of my basic flock color and called it a day. Obviously, you'll have to paint the bits you glued on, too.

Other Ideas for Sockets
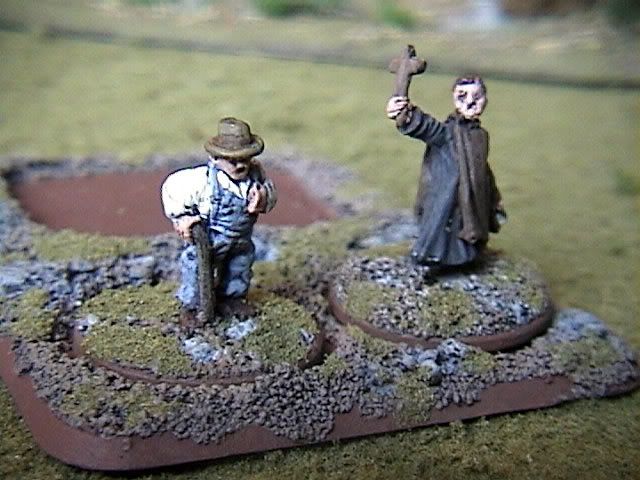
Once you've got the idea in your head for Sockets and Adapters, all kinds of ideas might come to you. Now, the other end of any socket is the plug, and you'll need things to fit into them. We've all got small bases, but chances are good that in your group other things have become semi-standard. For instance, folks around here like to base bailed out tank crews on pennies and nickles. For my self, I use pennies and nickles all the time to base single and double non-combatant miniatures, like villagers and refugies and stuff. A few random little odd ball characters can spice up a table nicely. But would you want them based alone like little table trinkets, or would you like to base them together, effectivly makeing civilian teams? Again, I'm thinking UGO.
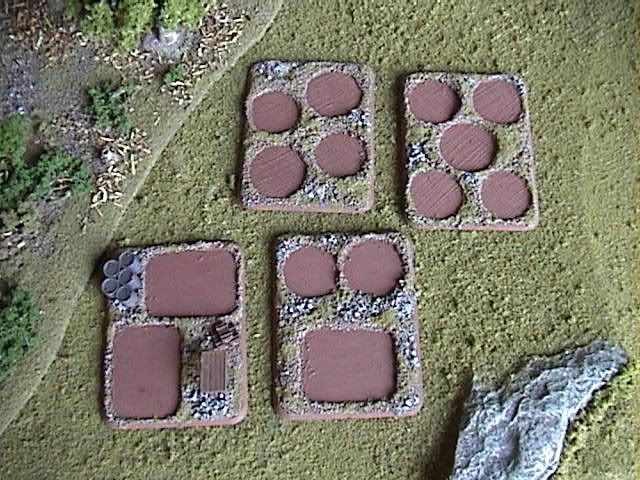
Photo Sharing and Video Hosting at Photobucket

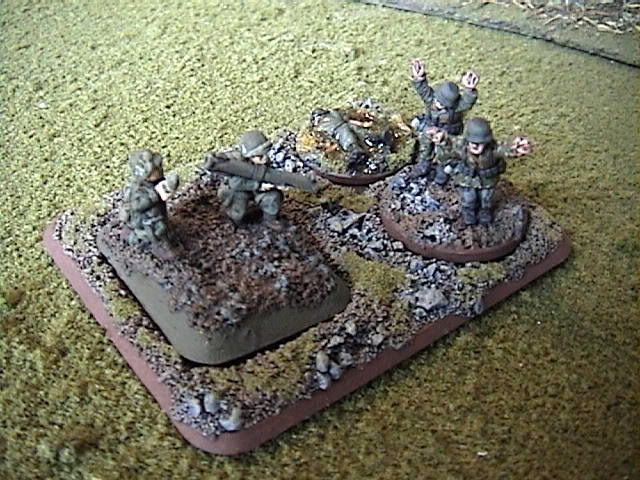
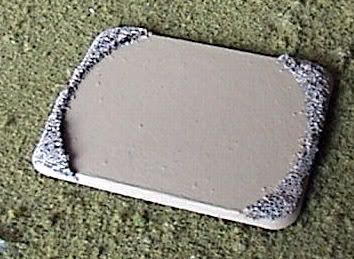
Using the same method as the standard UGO, I cranked out a few other little adapter plates in combinations I thought might be useful. I've got one with a sockets for a small base, a pennie and a nickle; one with two pennies and two nickles; and one with two nickles and three pennies. I painted them all up together. Now just drop combinations of individually based miniatures and anything on small bases, and you could have a different objective every game! To this end, I've taken a few "guy just standing there" poses left over from each of my armies and based them on pennies just to use them in UGOs (normally I put two bailed crew men on a nickle and use pennies for pin markers, but they work, too.)
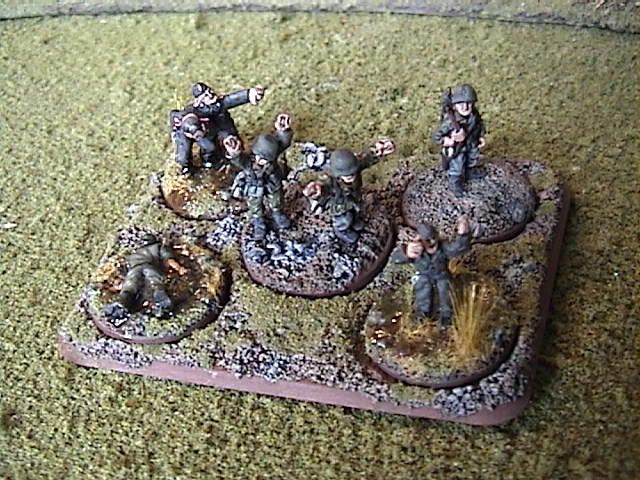
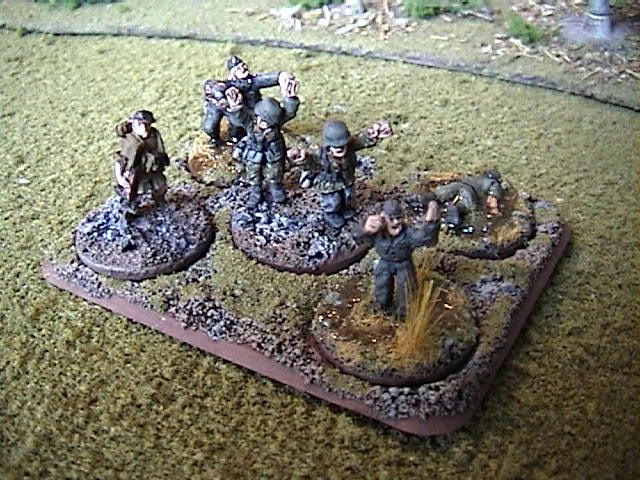
Photo Sharing and Video Hosting at Photobucket

Photo Sharing and Video Hosting at Photobucket

Photo Sharing and Video Hosting at Photobucket

Photo Sharing and Video Hosting at Photobucket

Photo Sharing and Video Hosting at Photobucket

Photo Sharing and Video Hosting at Photobucket

Photo Sharing and Video Hosting at Photobucket

Photo Sharing and Video Hosting at Photobucket