Thursday, August 9, 2007

Mighty (Empires) Distraction

OK, I knew this was comming... all the work I've been doing on the paratroopers, I knew, would come to a screaching halt for God knows how long when the new stuff got here. Well, Might Empires showed up last Thursday. And now we'll have an example of why I should post things closer to real-time, instead of my standard retroactive postings.

Thursday the game came in. I dropped everything and started cleaning hex tiles. Let the distraction commence.

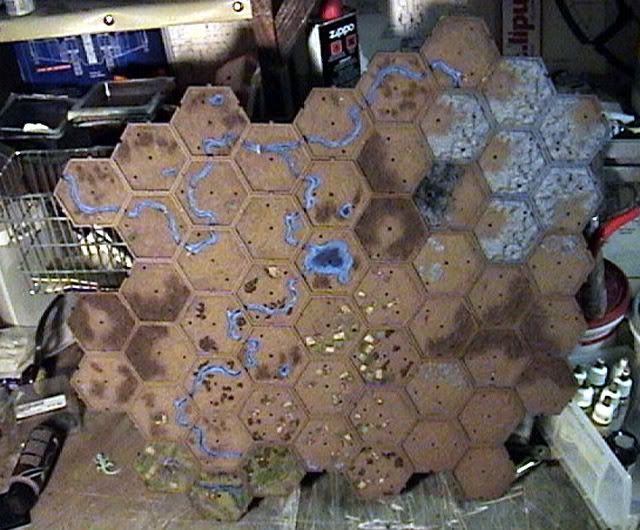
Friday, Geoff saw the map -- no painting, just assembeled plastic. Immediatly, he had to have one. This was good, for it would doble the size of the rhelm over which we would fight. However, he needed me to drive him to the mall. And when we got there, he'd forgotten his wallet. Fucker. Anyway, we got him a map, and stayed up until 2 playing with the air brush to get them painted. We got both maps knocked out in the night -- maybe this wouldn't be such a distraction after all? I painted the mountains and rivers on both maps, but other than that Geoff painted his own. At the end of the night, this is what my map looked like:

Photo Sharing and Video Hosting at Photobucket

By the next morning, the borders of the hexes were painted and the river had a coat of thick clearness on it.

The weekend was kind of general stuff, a bit of details and kung fu. I was starting to paint up all the little markers, and think about all the additional markers I'd need to play the game with the old rules... this was going to take a good while...

Then I got laid off on Monday. Fuckers. 10 years with the company, and new management shows me the door. Fuck 'em.

So I had a bit of free time on my hands.... Now all the markers with the game are painted, the map is all edged and clear coated. I need to do more markers, paint 'em, and flock the map. Geoff also needs flock, so we'll probably do that together. Its comming along nicely.

And I should take delivery of my Chinese today or tomarrow. Things are good in game land.

Now, if any one knows about a good job opening for a server monkey...

Friday, August 3, 2007

US Paratroopers Army Update –5: 2nd Platoon, Fall In!

Retro-Dated: Spring 2007

Of all the platoons in this force, 2nd platoon is the most literally accurate, in the sense that I didn’t need to do any event-shifting. People were still swapped about, giving real actions to real people who simply didn’t perform said action, so that I could use all the cool elements from the mini-series and keep my roster accurate. But the theme for this project is “The first night of snow in Bastogne,” and on that night, Easy Company was in their fox holes. So is 2nd Platoon.

I just realized that I don’t think I’d mentioned the theme in any of the previous posts.

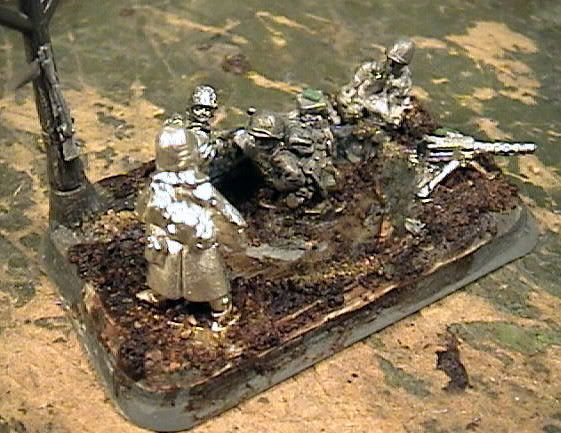
Anyway, what scenic elements might I include to make these guys look like they are dug in under the trees overlooking Foy? I always try to have certain elements (like the mud or snow) that match across the entire army and unify the force, with other elements that match across a given platoon but distinguish that platoon from all the others. That way I know which platoon just lost its bazooka, for instance. Hum… dug in over Foy… maybe fox holes and trees? These two elements would be my “platoon unifiers” for 2nd Platoon, and every team would have either a tree, a hole, or both. Trees would be easy. I never like it when folks permanently mount trees to their infantry bases – its just too much, too tall, and looks wonkers when they go to a city fight, dragging part of a forest with them. I would resolve this problem by using Woodland Scenics brand trees. These are modeled with a separate tree and base part, so that the trunks could be kept removable. When not in place, I’m left with a stump. I probably won’t ever play with these guys with the trees in place, but it is a nice element when they are on display.

Photo Sharing and Video Hosting at Photobucket

The fox holes would be just a bit more work. I toyed around with a few designs before settling on a technique that I thought looked good enough, wasn’t too much work, and that didn’t suck. I’ve tried something similar with one platoon of my Germans, using Old Glory pieces meant to be in fox holes. Basically, they were just cut off at the waist. That never really satisfied me. I mean, it works, but leaves you with the guy just sort of disappearing, and no real representation of the inside of the fox hole. I also tried simply sculpting the rim of the fox hole on top of the base, but that made everyone look like they were inside personal volcanoes.
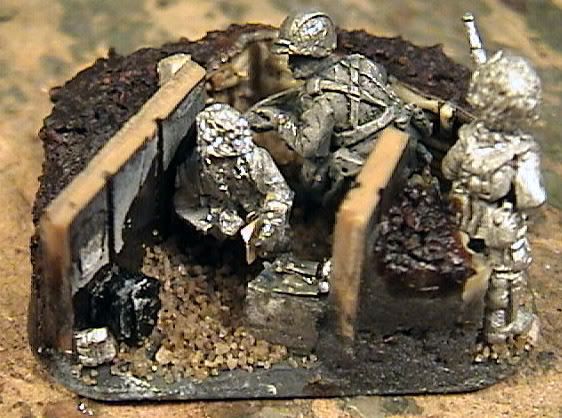
In the end, I settled on a layered approach. I would cut pieces of thick card to the size of the bases and draw the rim of the fox hole onto them. I could then stack these on an infantry base to thicken it – depending on how deep I wanted to go, it would usually take 2 to 4 layers of card. I’d cut out the hold in the top card, and trace the outline of that hole onto the next card down. Repeating this process dug out most of the hold, and depending on which side of the tracing line I cut on varied the slope of the inside of the hole – that is, if the marker I used drew a 1mm wide line, if I cut on the “inside” of the line I would get a more gradual slope than if I cut on the “outside.” Using layers of card, in addition to my normal ground paste, gave me an extra little bit of depth to the fox holes. The other nice benefit to using card in addition to some kind of ground smear is that I could cut a hole in the top layer for any base tab, just like the fancy cast resin bases from Battle Front. One layer of card was about half the depth of each tab. I used this trick all over the place, particularly with castings that I couldn't quite get to set down on the bottom of their fox holes. It gave me a wonderful cheat, and when mixed with things like cutting off half the base, setting one foot up on something, and smearing coffee over the end result, the base tabs often just went away.

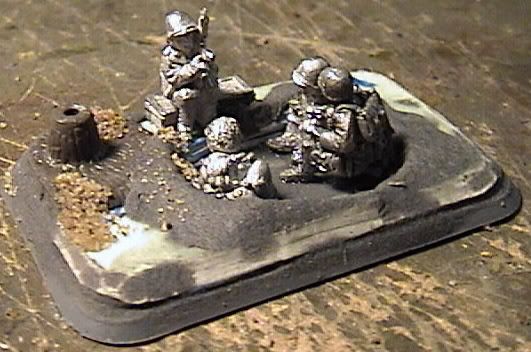
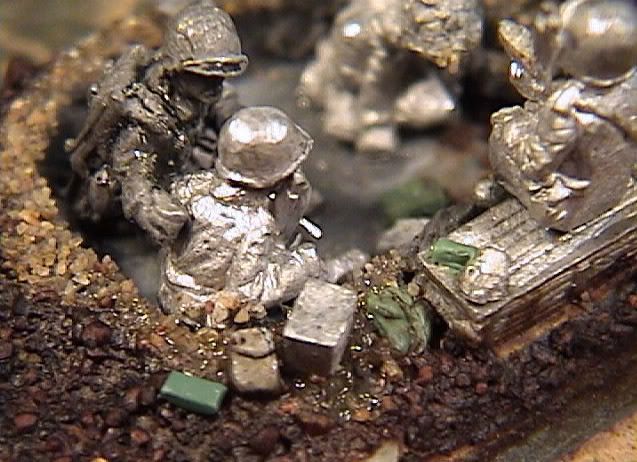
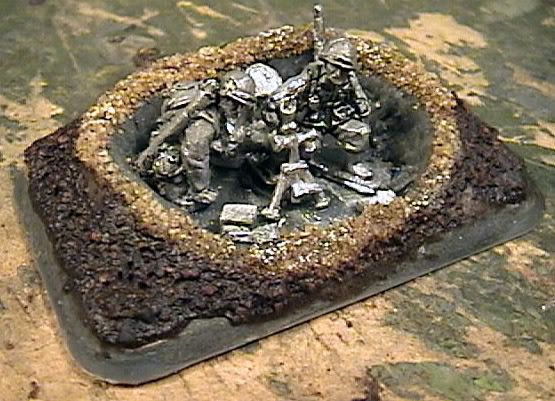
Once I’d cut all the cards I could set the last one on the base itself, trace its outline onto the base, and sink the final hole into the base itself. Using a Dremmel tool, I carefully ground out the bottoms of the foxholes, trying to remove as much plastic as I could without going all the way through – I slipped a few times, but for the most part it worked pretty well. This gave me most of the fox hole depth, but I would still need something of a lip around the rim to really get it too look deep. I made this lip with the same epoxy paste I’d used on 3rd Platoon. I also evened up the edges and smoothed over the roughly cut card layers. It was during this stage, which turned out to take a lot longer than I’d expected, that I did all the figure conversion work and added the big details like ammo boxes and the like. The results looked something like this:

Photo Sharing and Video Hosting at Photobucket

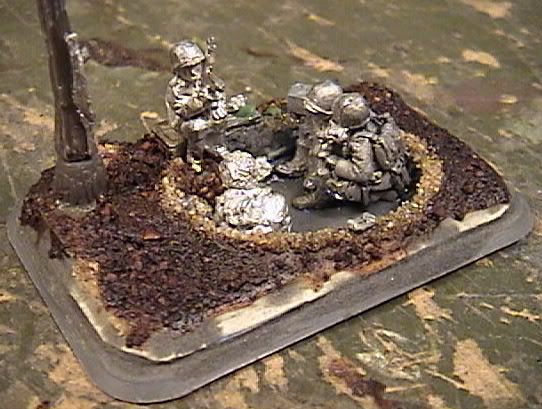
Most of the conversion work for this platoon wasn’t very exciting, just making every body sit down! There were a lot of arm adjustments to get models to interact with each other, and quite a few repositioned legs. Anyone even close to seated had potential to become seated. Just like 3rd Platoon, when they were done every team got my standard coating of coffee/mud.

Photo Sharing and Video Hosting at Photobucket

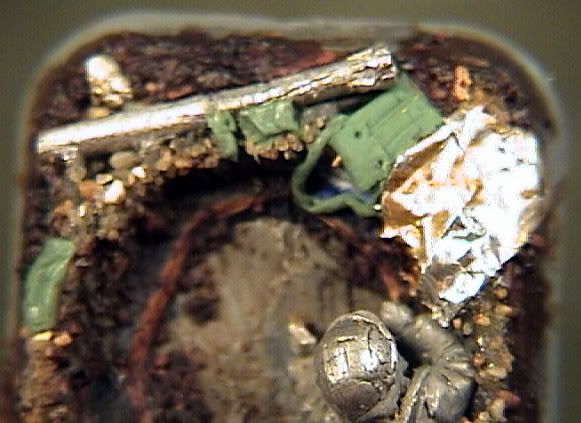
When this was dry I went back through with green stuff and added all the little custom details like rations or cigarette packs. It was the little details that really made this platoon work for me. I didn’t want clean fox holes, I wanted fox holes filled to the brim with crap!

Photo Sharing and Video Hosting at Photobucket

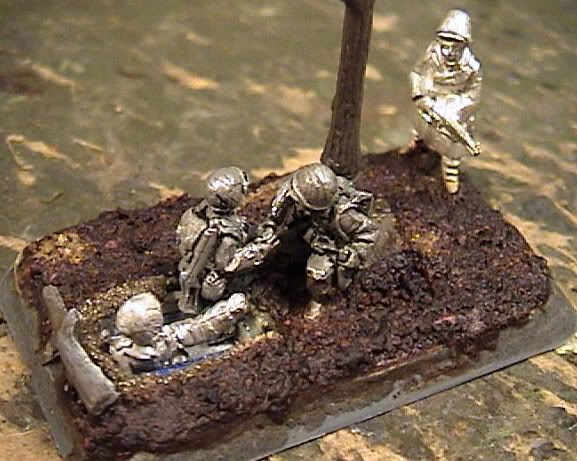
The rest of the platoon was modeled using the same techniques – cards were cut to the size of the base, the fox hole was drawn onto the top and cut out to make the pattern for the next layer down, and so on, with putty used to form a lip and smooth over the seams. The hardest part of doing this platoon was matching the teams to scenes in the mini-series. I mean, its one thing to make the moment of tossing a grenade down a gun barrel exciting, dynamic, and recognizable. It is something else entirely to make one group of guys sitting around a hole look different than the other scenes of guys sitting around a hole. For example, this team is very similar to the one we were just looking at:

Photo Sharing and Video Hosting at Photobucket

They are both basically guys sitting around a hole next to a tree, but if you look closely several details are different, and they both represent different scenes. I’d thought about doing a side-by-side with my models and shots from the mini-series, but I think I’ll save that until the army is painted. Maybe you can guess some of them from these “making of” shots.
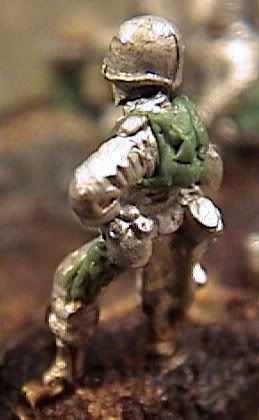
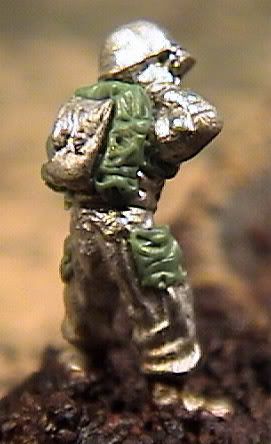
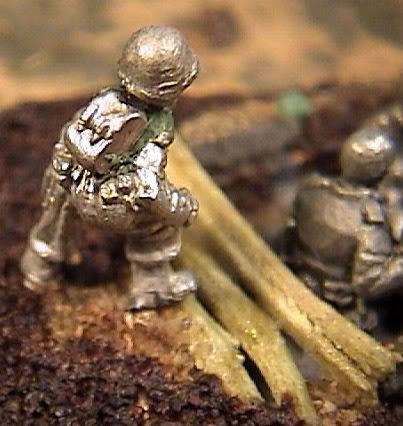
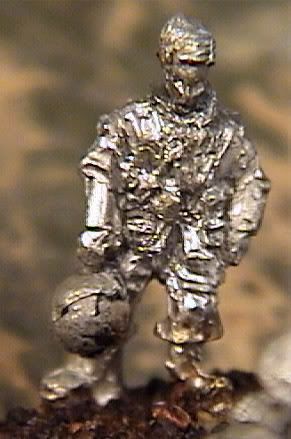
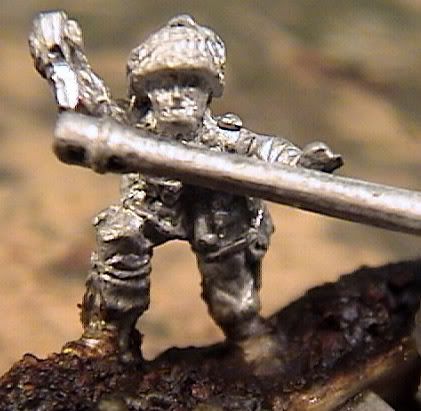
It was a constant challenge to find or make enough miniatures that looked like they could be in or around their fox holes. To get by, and for variety, I ended up making paratroopers out of lots of castings that used to be standard infantrymen. As I worked, I realized that, at least in 15mm, there are really only a few things that clue in the eye that the miniature is a paratrooper – lots of webbing and kit, a backpack, and big leg pockets. Take these two guys, for instance. Both got green stuff pockets. One also got a green stuff back pack, while the other got a backpack cut from a paratrooper. In other instances, I used the backpacks from the Battle Front vehicle stowage pack.


This guy also shows one of my classic base tab hiding methods, the half-cut & prop.

Photo Sharing and Video Hosting at Photobucket
The base tab was cut away from the front foot with a razor saw, then clipped in half with a wire cutter. I bent his rear ankle just slightly to increase the height of the lead foot, and glued him down so that his foot would rest on the log. While this guy is just chillin’, this technique can really add a bit of dynamic action when used on an advancing team.
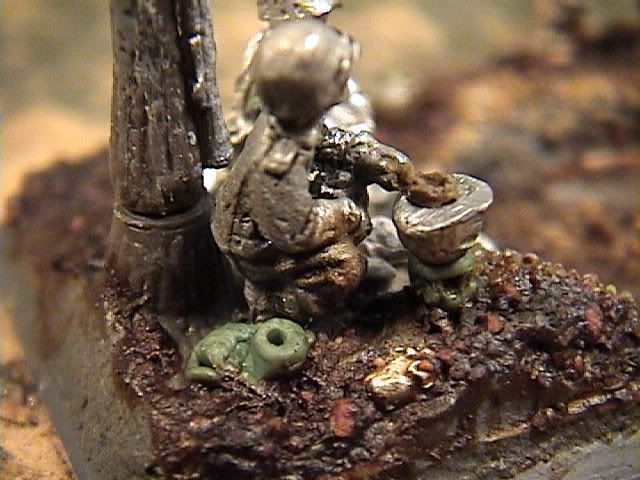
I really had a lot of fun with the small details on this platoon. Some of theme were just random junk thrown around, but many of the details were inspired by shots in the mini-series, like this one, the classic “dude cooking in his helmet”:

Photo Sharing and Video Hosting at Photobucket

On a technical note, in a few instances such as this you may notice a brown putty, in addition to the green stuff. This is basically the same stuff, but I don’t like it as well. I generally buy Reaper branded green stuff, just because it is easier to get locally than anything else – I can pick it up within 2 minutes walk of my office. The brown stuff is also reaper branded, but it cures a good bit faster, and doesn’t take detail at all as well as the green stuff. For the most part, I’ll be using it just for bulk crap, nothing with any kind of detail, from here on. It makes a good enough gap filler, but I won’t be getting any more.

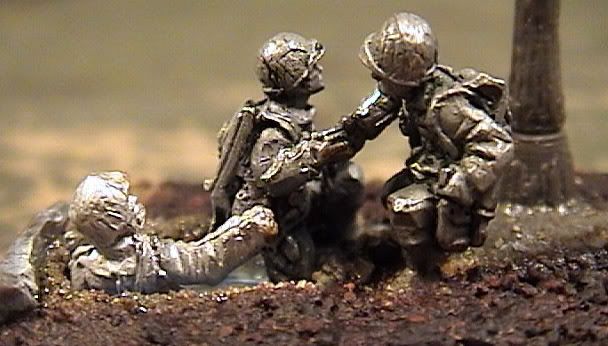
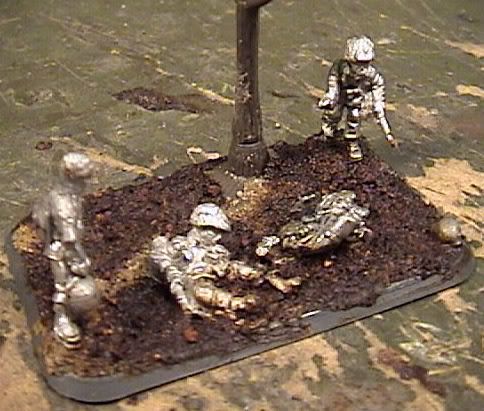
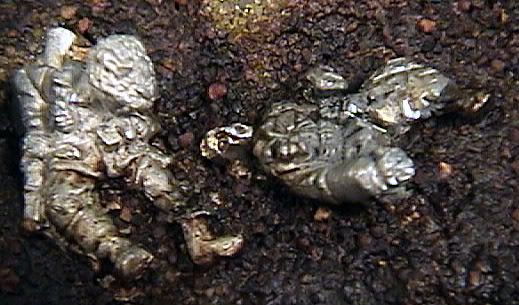
One of the first scenes I thought of when I decided to mimic the mini-series was the scene of Joe Toy and Bill Guarnere being wounded in the shelling. Some might see it as a touchy subject, and some others might do it for shock. To me, this one is all about respect. I also wanted to include Lt. Compton’s reaction to the incident. In his memoirs, Dick Winters described what he called a universal gesture: when a soldier checked out he took off his helmet, ran his fingers through his hair, and dropped his helmet. After that he was done. According to Winters, this action was a universal sign of combat fatigue. So in this piece you can see both the war’s wounds, both physical and psychological.

Photo Sharing and Video Hosting at Photobucket

Photo Sharing and Video Hosting at Photobucket

Photo Sharing and Video Hosting at Photobucket

But 2nd Platoon wasn’t all about pain and suffering. There are a few lighter moments included, such as the famous encounter with “Hinkel.”

Photo Sharing and Video Hosting at Photobucket

The basic process was the same for this hole as all the others, but to get the German down deep enough I did resort to cutting his legs off. That’s fine, this guys is going to be half buried in the snow when it’s all said and done, anyway.

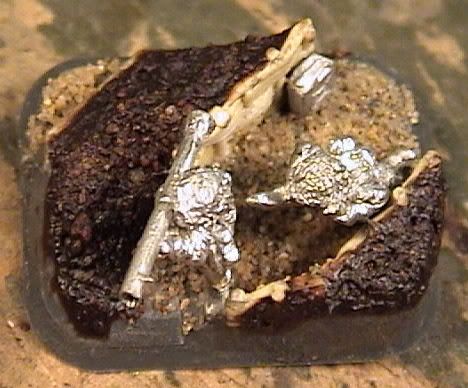
By the time this platoon was getting close to the end, maybe I was getting uncreative, or bored, or whimsical. Or maybe I’d just dug too many holes. But I was tired of making guys sit down, I needed just a bit of action, so the bazooka team for this platoon seems to be in a bit of a hurry:

Photo Sharing and Video Hosting at Photobucket

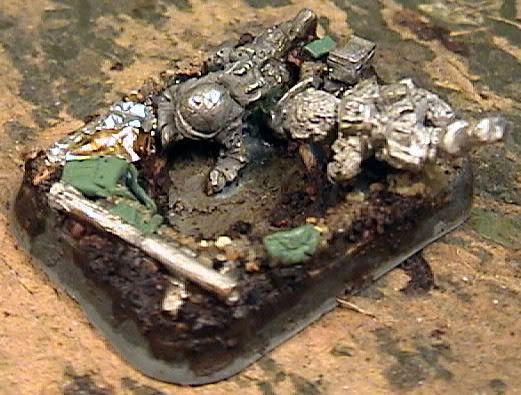
There must be shells on their way in. This one was just a bit of fun, adjusting the two castings to look like they might be mid dive, and coming up with all the general crap to lay around the hole. I cut the bazooka and some of the details off other American figures. If only they’d release a pack of loose small arms…. The bit of foil will be a wool blanket. This is also a decent example of one way I came up with all the junk to lay about. I picked up a very large and all-inclusive book for collectors and re-enactors that had nice shots of just about every bit of anything issued to anybody in the war. With each unit, when it came time to add something distinctive, I’d just go to the section on that kind of troops and find something that looked cool and make it. In this case, you can see the special bag for the bazooka rounds.

Photo Sharing and Video Hosting at Photobucket

As with 3rd Platoon, I wanted to be able to see a texture difference between the bottom of the holes and the surrounding, undisturbed ground. In this case, rather than the sand I used to look like well-worn trenches, I decided to try and make these look like they were freshly dug. I used the cylindrical shape of the Dremmel’s grinding head to sculpt in what I hoped would look like shovel marks. As you can see from the piece below, this wasn’t always as successful or convincing as I would like, as it didn’t leave me much room to hides the base tabs, and some of them remained visible. You can even see this guy’s hand floating just a bit above the ground! Oh, well. It came out pretty well on some of them. Just not this one. Others ended up with sand or coffee on the bottom, anyway (often because I drilled all the way through…)

Photo Sharing and Video Hosting at Photobucket

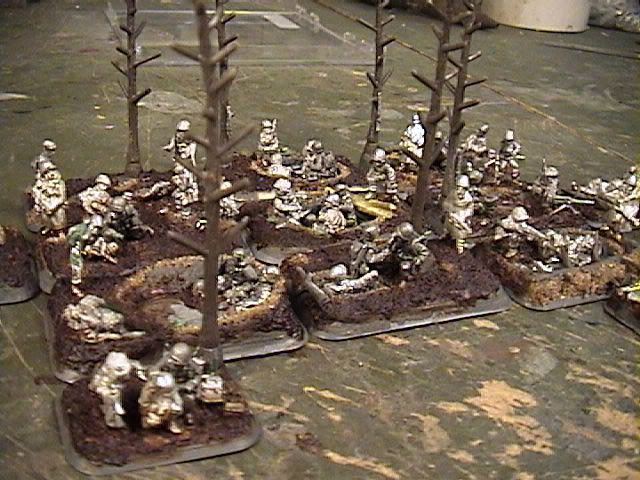
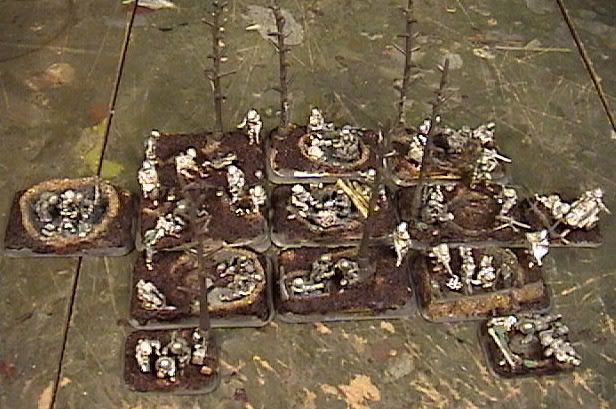
As always, I had to model every possible option for the platoon, including the little supply cart thing that BF includes with their packs even though they have no rules for it, as well as the officer for Mid War, dropped in the Late War lists. When you push the whole lot of them together, I think the effect of thiks unit is rather striking, even if they are less extravagant than 3rd Platoon. But I sort of wish I’d used more trees.

Photo Sharing and Video Hosting at Photobucket

Qin Chinese - 2nd Wave Arives

Yesterday, the second delivery of Chinese troops was delivered to his magesty. This was the 2nd Order from Eureka. Came in their standard little postal box, wrapped up in bubble wrap. I gave the minis a quick glance, and they seem good enough -- not quite as nice as the Magister stuff, but more than servicable. I'm not sure how much they will fit the army, though -- some of them are just wearing too much armour for the period. Still, any of them that don't match will just end up as skirmishers or impressed troops or something.

Man, when the final, big ass lot gets here from Great Hall, the Paratrooper Project is gonna get so distracted...

Tuesday, July 31, 2007

US Paratroopers Army Update –6: 3rd Platoon, Take Point!

Spring 2007

Since I am writing all this long after the fact, I have a certain luxury in deciding how I will present things. If I’d written it at the time it would have been chronological, with all the units
done in stages (for instance, everyone got their mud smeared on as a group, all in one stage). As it is, I get to go back over the entire process platoon by platoon. This first article is going to be rather long. Perhaps this won’t be the case by the time I get down to the machine gunners.
The first unit I built for this force was, logically, 3rd platoon. Given what I wanted to do with them, it seemed like a decent choice to start with the platoon that I expected would take the most work. They’d be out of the way, and would set the bar for the rest of the army. While it may have made a certain kind of sense to start with 1st platoon, I knew from the beginning that I wanted to model a unit assaulting a German gun position, preferably in some way that all the stands could be put together to form a min-diorama. Based on the roster, it had to be 3rd platoon.

This was the start of my event-shifting. I wanted the theme of Brecourt Manner to be represented in my army, but that fight was in the French summer, not the Belgian Winter, so I was going to have to take some artistic liberties with history. I also realized that I would have to down-size the guns. In real life, the Germans had been servicing a battery of 10.5cm howitzers, but have you ever tried to fit a howitzer on a medium base? It just doesn’t work. In the end, I decided to go with PaK 75 AT guns – the casual observer probably wouldn’t notice, and the seasoned gamer would realize that using the actual guns wouldn’t have worked. Shoot, even if they’d fit, that would have been a lot of scenery to drag around the table. So the guns shrank in the wash. Once someone saw the paratrooper stuffing a potatoe masher down the barrel, they’d know what I was doing.

I also had to accept a certain amount of event-shifting in terms of characters. For instance, the shot in the miniseries involving the grenade and the gun barrel depicted Cpt. Winters doing the deed, but I was obviously going to want to use him for a command element. So in the end I gave this action to Sgt. Taylor, to perform on a down-sized gun, in a different country, at the wrong time of year. But man, it was gonna be cool!

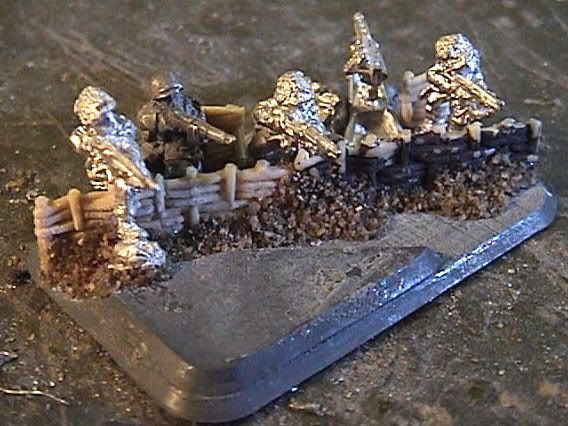
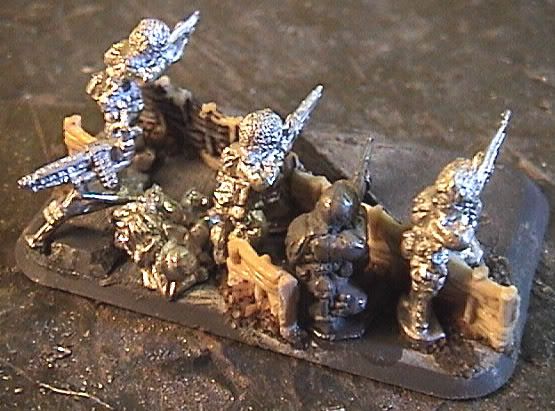
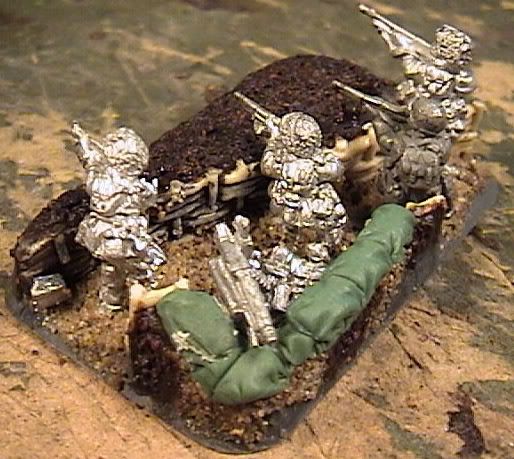
You may have noticed by now that I like to plan things out. In this instance, I needed to envision the entire German gun battery, keeping in mind how I would actually model it, and I needed to come up with a way to cut the scene into small, medium base sized pieces. After a few sketches, I hit on the idea of not depicting the entire battery, which would have required far too much scenery and just wouldn’t have been very interesting, but rather showing just enough of the battery to give that impression. As I started thinking about materials, I remembered these old whicker-siding sort of things I had left over from an old model kit. They look surprising like the German-style woven-stick trench reinforcements. I knew I’d come up with a use for them some day! But, alas, I didn’t have enough to put trenches like that on every stand. I also wanted to put the guns down in pits, but I didn’t want to model a small hill for the entire platoon. I finally hit upon the idea of depicting part of the trench system, as if it were a ring around the gun pit, but not worry about showing every little bit of everything. If a trench line extended further than the edge of a base, I’d just let it.

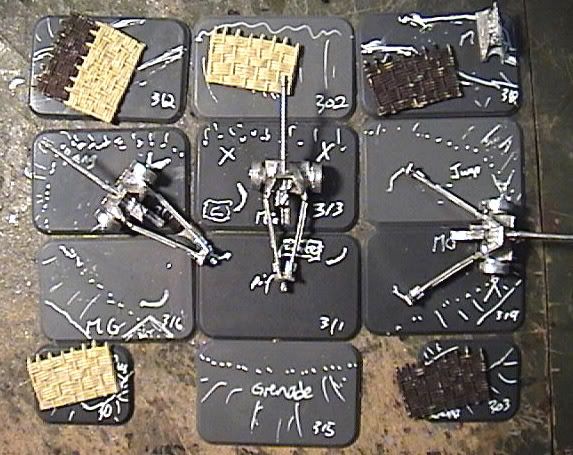
As the idea got tighter, I needed to see how all the elements would fit together. I’d also need a guide as I started cutting and gluing things. This is what I came up with:

Photo Sharing and Video Hosting at Photobucket

I laid out the empty bases, with some of the scenic pieces I knew I’d be using, and just sketched out the foot print of the battery, including where the guns would go. All the marks were made with a Sharpie poster paint pen so they would just scratch off later with a finger nail. Once I knew more or less how all the pieces were going to fit together, I could start working on individual teams in stages – the first pass would get the basic arrangement and the actual conversion work; the second pass would be with putty to build up the contours, then any fine details would be added, and finally everything would get a coating of my patented mud sauce.
Anyway, enough on the philosophy of modeling, let get out the glue! I actually started with team 312, but since I neglected to take a 1st stage picture of them, we’ll just start with 318.

Photo Sharing and Video Hosting at Photobucket

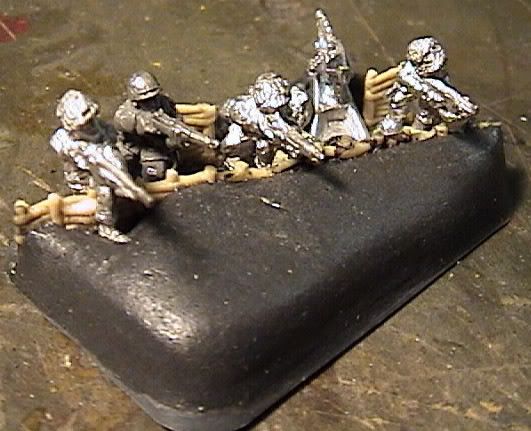
While this was a pretty basic team in terms of figure conversions – which is too bad, that’s probably my favorite part of modeling – it does illustrate my process pretty well. First, all the elements – miniatures, scenic elements, plastic and metal bits, etc. – are arranged on the base as per the plan shown above. Any digging that needs to happen on the plastic base is done first – in this case, I cut a notch into the surface of the base for the plastic wicker bits to slot into. They would still need to be glued, but this would help them stand. A bit of sand was sprinkled along the seam, mostly to form a kind of concrete and strengthen the bond. It also makes the glue dry faster. Rough cut bits of plastic were used to raise up the level along the front. You can also see some of my favorite tricks to help hide the base tab on the figures.

Photo Sharing and Video Hosting at Photobucket

Seriously, I can’t stand to see the base tabs on miniatures, particularly when they are based as teams like they are for Flames of War. I never ever want to see that tab! But something I’ve noticed along the way is that every one assumes it is there. If you can get the finished result to do something that is “obviously impossible,” or at least assumed to be based on things everyone knows and forgets about miniatures, like they all have a base tab, then you can get some impressive results. Going down the line in the picture above from left to right, the first soldier’s tab has been filed down until it was very thin. Actually, most of the time when I go for the “very very thin” base tab, I slice the tab in half horizontally with a razor saw and then file that down, just because it goes more quickly. The German casualty didn’t have much of a base tab; the next American in line simply had his tab cut off with a razor saw – since he was going to be touching the side of the trench, I figured I could glue him to the wall to make up the missing stability. The next, who looks slightly darker than the rest in this picture, also had his base sliced and filed, while the last guy had his tab filed down some, then cut in half vertically and his legs spread slightly with pliers. Now I could position his feet on either side of the trench line for a more dynamic pose.

Photo Sharing and Video Hosting at Photobucket

Once the first stage was completed (not just for this team, but for several platoons) putty was used to bulk out the contours. I used some kind of cheep 2-part epoxy putty for this –actually, the label calls it an epoxy paste, which seems accurate – it is much softer than most epoxy putties, and feels almost like wood filler while workable. I’ll include a brand name in a future post. While some models needed some work at this stage, in this instance it was really just a matter of getting it on the model and smoothing the sides.

Photo Sharing and Video Hosting at Photobucket

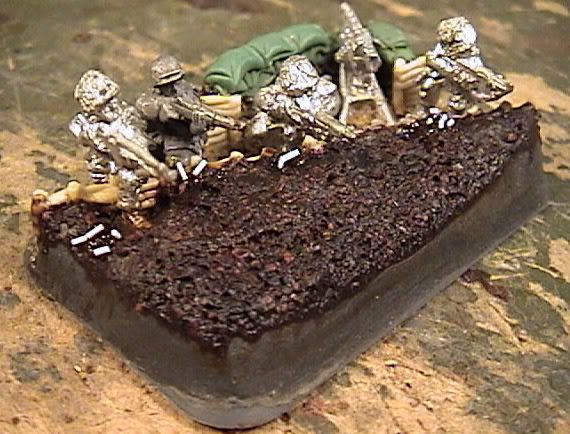
Once the putty had set it was time for the really fun part, the mud coat and final details. The surface texture, my “mud coat,” is a simple mix of white glue, water, and coffee. I like to use home-ground, un-brewed coffee for this, and it actually works best if you mix up a large batch and let it sit for a while, maybe even over night, before you use it. The beauty of this method is the irregular particle size – some of the coffee will still be little chunks, and some will be powder. The powder will completely dissolve in the water/glue mix, only to be deposited evenly over the surface as it dries. Meanwhile, the chunks keep the texture interesting, and sometimes end up painted as small rocks. It is also a joy to apply, because you can just slop it all over everything and clean it up with a wet brush, even off the miniatures themselves.

Photo Sharing and Video Hosting at Photobucket

Somewhere around this time all the final details are added. In this case I used green stuff to model the sand bags around the machine gun – itself a clever way to save limited wicker. A few bits were added like empty ammo boxes and spent ammo made from cut down plastic rod. I love spent brass on the ground. Also notice the sand applied to the bottom of the trench. To better sell the idea that some areas were dug into the ground while other surfaces were not, I wanted to give them distinct textures. I used a simple water/white glue mix brushed onto the base, sprinkled with sand, to create this effect.

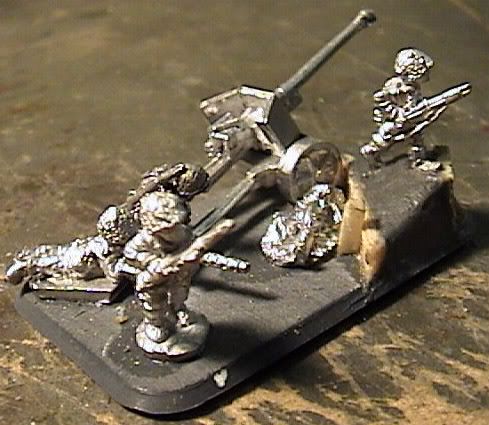
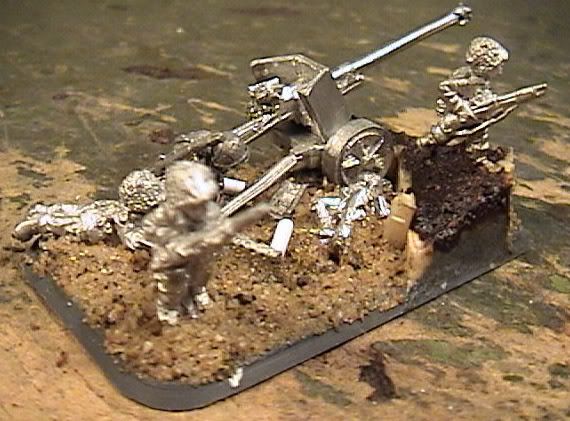
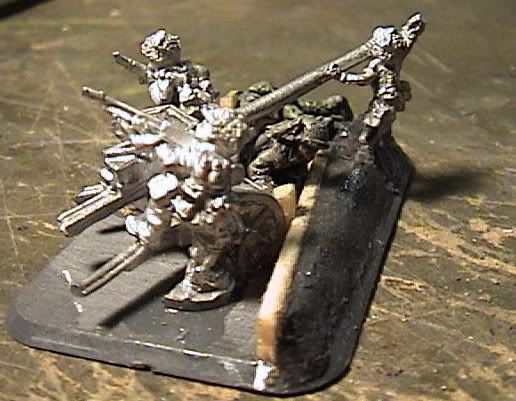
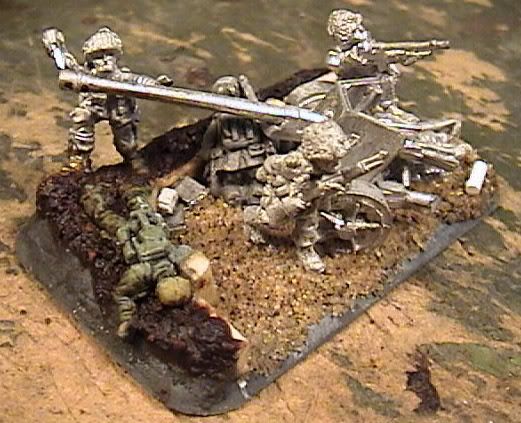
Wow, all that for one team. Lets take a look at some other interesting details in this platoon. This sequence shows the same team in the three main stages of construction, and illustrates a few other techniques I would use through out the platoon. The first and most obvious should be what I’ve done to the gun. There was no way to work the full-size AT guns, centered on the bases, with at least four paratroopers and probably a dead German, and maybe some trench works, all on a medium base.

Photo Sharing and Video Hosting at Photobucket

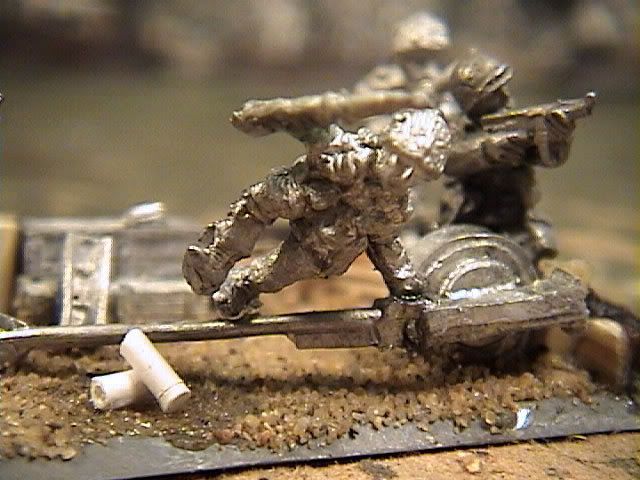
My solution was to cut the gun limbers and put half on each of two bases. If the limber arms extended base a base, I just cut them off and put them on another base. This really let me spread the guns over a far greater number of bases, so that none of the bases were totally over powered by the gun. I think it also helped the bases that otherwise would have been without any significant German bits – by giving them all parts of the guns I could tie the platoon together.

Photo Sharing and Video Hosting at Photobucket

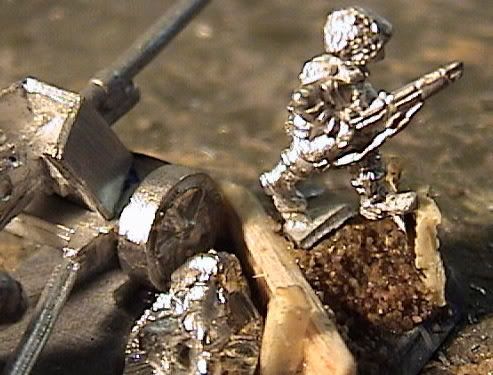
You can also see my old base tab hiding tricks at work. After hacking most of the base tab away with a razor saw and a wire clipper, I used some rough plastic to hold what remains of his base tab up at the correct height and then hid it under sand and putty. The other foot was glued to the edge of the trench.

Photo Sharing and Video Hosting at Photobucket

Balsa wood strips were used to make the wooden sides of the gun pit. I’m not 100% sure if that’s more or less historically accurate, but it didn’t matter – I didn’t have enough fake wicker to go around. Much like the coffee and the sand, this also made the gun pit look different than the trenches. Once again, I used sand to make the floor of the gun pit look different from the undisturbed soil, and added various German bits and other flavor – a dead gunner, spent shells for the gun, spent brass for the small arms. A pin vice, knife, and pliers were used to distress the gun and give it the appearance that the paratroopers had disabled it just before the viewer arrived.

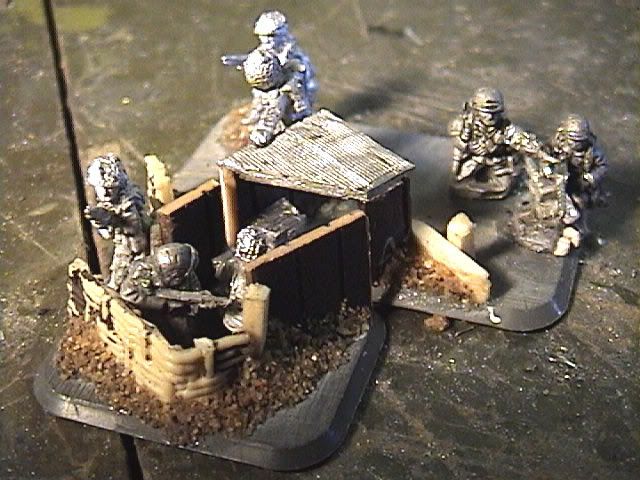
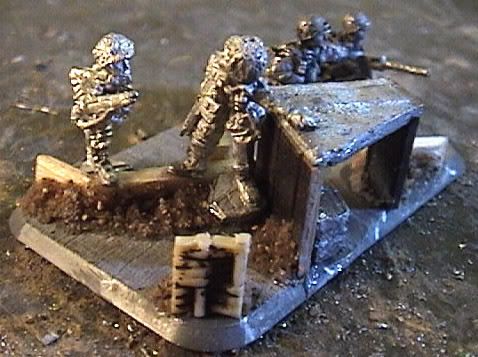
Using the same ideas of spreading a single scenic feature over several bases, somewhere along the way I decided to model a command bunker into the gun position. It would look cool, would show off the concentric rings of the gun pit, and would give me some place to have Winters finding the map with “every Krout gun in Normandy.” I even found a little scrap of miniature corrugated aluminum to use as the roof.

Photo Sharing and Video Hosting at Photobucket

As you can see, I left the roof removable on one of the stands, so that I could get in there and paint the soldier inside the bunker. This is the second instance in this platoon along of a “not-Winters;” I’m giving this action to Lt. Shaymes. On the medium base you can see the feet from one of the guns, extended onto this base. Pretty much all elements of the gun position come together between these two teams, with bits of wicker trench, wooden gun put, and wood-sided bunker all visible together. These followed the same construction pattern as the other teams in this platoon, with some elements actually free-standing before they were backfilled. You can also see that I’ve been up to my old base tab hiding tricks.


Photo Sharing and Video Hosting at Photobucket

The bunker was detailed with various odds and ends that seemed appropriate. Small bits of foil were used to make loose paperwork. The desk was a pair of ammo cases cast together that I cut in half, one piece for each end of the bunker.

Photo Sharing and Video Hosting at Photobucket

Finally these teams got the same mud treatment as anyone else, with sand on the floor of the trench work. At this point, my process should be getting pretty clear, so I’m just going to use the rest of this post to highlight various “under the hood,” details. Basically, I want to show off all the work I did before I cover it all in paint!

Photo Sharing and Video Hosting at Photobucket

Photo Sharing and Video Hosting at Photobucket

Photo Sharing and Video Hosting at Photobucket

Photo Sharing and Video Hosting at Photobucket

Photo Sharing and Video Hosting at Photobucket

Finally, this is what the platoon looked like all together:

Photo Sharing and Video Hosting at Photobucket

Jesus…. I got how many platoons in this army?
Friday, July 27, 2007

US Paratroopers Army Update -7: Scrubbed Down and Stacked Up

This wasn’t a particularly glamorous phase of the army, but it was a critical one – cleaning all the castings. I’d decided to do this project in a very orderly, assembly-line sort of a way, which meant that I wouldn’t move on to the next step until everything was finished in a current step, with some limited exceptions. I got as much painting done on my New Zealand army as I could while I waited for the paratrooper miniatures to arrive, and once they were all in hand, I set in to clean them up.

Miniatures are dirty. Flash, mild lines, casting problems… to say nothing of resin. I spent a hugh amount of time just cleaning and organizing all the castings. All flash and mold likes of any kind were removed, and the base tabs on the infantry figures were given a quick filing down. Nothing drastic, not enough to hide the base tab or anything, just smoothing it over so the guy would stand up. Anything made of resin got special attention. They got the same clean-up as every thing else, but special attention was paid to the bottom of anything with a cast resin base. Using a steel file, I sanded down the bottoms until they were smooth, then sanded the edges and blended it all together. Is this necessary? Not really, but it sure feels nice in the fingers when the bottoms are smooth. Given that I planned to do a good bit of writing on the bottom of the bases, it would actually turn out to be a requirement, but at this stage it was just a cosmetic decision. After all the sanding, all the resin pieces were washed with soapy water.
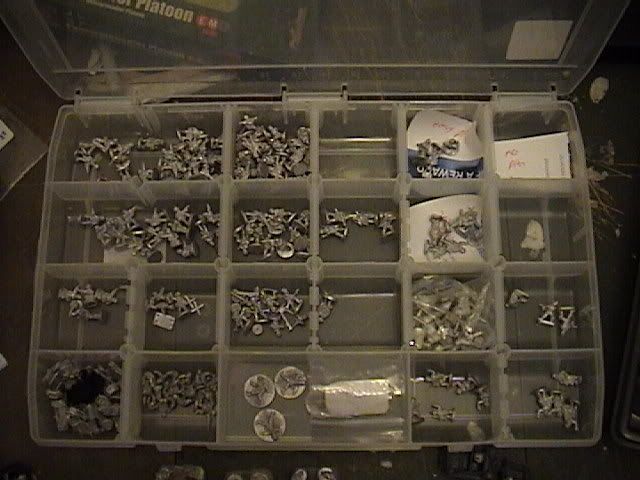
It had been my intention all along to mix up the various packs of miniatures as much as possible – gun crews mixed into rifle platoons, rifle platoon figures mixed in with the mortars, etc. The only way I could see to do that and keep everything straight was with a two-stage organization system. I use matching plastic cases for bits storage – I keep one for each army I run, so that I don’t have to pick through teller mines and bazookas to find a PIAT. Now I would have a few extras. Pictured here is the case used for my German forces, but it’s the same idea and a matching case.

Photo Sharing and Video Hosting at Photobucket

Before they were cleaned and filed I just kept everything in its original packaging. As I cleaned each casting it went into the main storage case, organized by weapons, pose, and special equipment but without regard for its intended platoon. All my standing officers were in one cell, all my crouching officers were in another – and the only thing that made them officers was some kind of special kit, like binoculars or a Thompson. I broke my rifle men up into standing, prone, and advancing. Everybody was broken up like this, with special attention paid to standing/advancing poses versus prone positions.

Then once everything was cleaned up and the company plan was finished (I was working on both at the same time) I got out two more cases, and started to select the castings that would be used for each platoon. If there were castings that I really wanted to use in a particular platoon they were sorted out at this stage, along with enough basic troop figures to fill out the roster for that unit. I did this for every platoon in the army, just to make sure that I wouldn’t get excited and use a particular casting on one model, only to regret it when I needed that casting later. There was a lot of swapping around of castings and trying to imagine what each one might look like together and how I might use them with the scenic elements I was starting to think about. At this point I also picked out castings that I wanted to use for particular hero characters, like Winters or Spears. In some cases I wasn’t sure which figure to use, so I often just set them both aside.

After each platoon had been basically selected, I would go over each platoon in detail. Using a third sorting case, each team in the platoon was planned out to a man. Many castings were swapped and replaced at this point, but in the end I more or less knew what parts would go into any given model. Special scenic items were included in the sort at this stage, such as tree stumps or German guns.

This is the point when I finally stopped working on the army as a whole in massive swathes and started to really look at individual platoons. I only did the detailed team-by-team break outs for one or two platoons at a time. Once I had the teams planned, it was time to get serious.

It was time to quit screwing around.

It was time to convert miniatures.

Thursday, July 26, 2007

I love Starbucks

This started out as a silly response to a forum comment, but I decided to post it here. ..


I love Starbucks.
Partly, I get a kick out of not hating a company so many others have a gut reaction to (don't get me wrong, normally I'm all kinds of visceral, anti-corporate froth). And I've no illusions about a good cup of coffee vs. what you get at Starbucks. But I love what they did to the US beverage market.

See, I hate carbonation. With a passion. As in, I will not drink it. Ever. For any reason. The last two times I did, I threw up. I do not understand why anybody would ever want their beverage to react in that way. And growing up, its was pretty much Coke or Water, kid. Occasionally there was orange juice available, but after college I can't drink the stuff without feeling an involuntary vodka twitch. Anyway, ever since I was a kid, if I couldn't find a milk shake it was pretty much trips back and forth to the water fountain.

As a teenager things started to change, mostly because I hung out at Waffle House and chugged coffee until 4 am. But again, at other times of day or anywhere other than a yellow booth (because who in the hell gets Waffle House coffee to go?) it was back to Coke-or-water. Until these silly little coffee shops started popping up all over the place. At first, they were mad elitist with the whole Seattle, grunge, French poetry and pretension vibe, and I guess Starbucks still tries to remind you of that with their decor and product placement, but no one buys it. I don't remember the last time anyone tried to explain their existential angst while my espresso brewed.

But anywhere I go in America, I've got an easy, convenient option beyond Coke and Water.

Wednesday, July 18, 2007

Mini Shoppin' 2007

15mm WWII

Germans:
10.5 cm Howitzer Battery
There are two ways I could do this:
1. BF Boxed Set: $60
2. Crew from PeterPig
With guns from OldGlory

British: (probably from BattleFront)
6lb Portee Platoon
4 x 6pdr guns
4 x CMP trucks
19 men for crews and CMD

Americans: (from Battlefront)
Cavalry Recon Platoon
3 x M8
3 x Jeep w/60mm mortar
3 x Jeep w/.30 cal
infantry teams?
Tank Destroyer Platoon
4 x M10
2 x M20
1 x Jeep w/.50
CMD


Peter Pig:
405. 2 Goliath teams
453. LW German radio operators
456. LW German Gun crew kneeling
465. German Higher command
67 LW German SMG (NCO) Kneeling
75 Seated Germans
206. Panther G infra Red(£6.50)
208. Panther stowage includes track , wheels and commander with MG34 AA basic pack price
201. Panther G (£6.50)
319. SDKFZ 251 C Camouflaged
39.French Resistance
398. Hand cart with pusher (2 of)
397. Bicycle and wheelbarrow civilians( 6 of)
Modern:
60.Looters with tyre, chainsaw, TV
29.Civilians
31. TV/Media Crew
43. Dictator

Old Glory:
2 x 10.5cm Guns (that would be 6 guns….)

15mm.co.uk SciFi crap
Terminators
http://www.15mm.co.uk/caaa683.htm

Aliens
http://quickreactionforce.co.uk/catalog/index.php/cPath/24_55_346

Accessories and Civilians (these come from warweb.com, under Quality Castings)
Q-5017 55 Gal Drums, Grain Sacks, Wooden Crates, Wooden A
Q-5000 Accessory Kit Allied Tools, Gas Cans, Bedrolls, Ta
Q-5018 Concreate Pillbox with removable Top so figures ca
Q-5019 European Civilians
Q-5001 Partisans Advancing
Q-5002 Partisans Defending
Q-6032 Command car, civilian
Or, also from WarWeb, under QRF:
GSV06 Steyr Staff Car
GSV02 Steyr Truck
Or, from Eurekamin.com.ua:
Three Sheep IRR-BaaBaa1
Three Goats IRR-BleatBleat4
Two Horses IRR-GeeGee14
Three Pigs IRR-GruntGrunt3
Two Cows IRR-MooMoo2
Chickens FA01
Sheep FA03
Pigs FA04
Cattle FA05
Camp (baggage, barrels, fire) 15/CS01
Squire, and 3 unarmoured horses 15/DH01


Maybe some new license plates or something? Decals.

Terrain:
New Stuff from The Miniature Building Authority:
Power Plant: $49.95
Small Industrial Buildings: $39.95
Russian Pesant Village: $64.95
Townhouses?
Warehouse/Appartment?
Maybe some of the other stuff, I mean, it will be at DragonCon….


10mm Ancients

Warmaster Ancients:
via Great Hall Games:
·Warmaster Ancients rule book
·Warmaster Ancient Armies book
·1 x ADW61 Qin Chinese Army, 1000 Points
·4 x QIN02 Halberdiers
·4 x QIN03 Spearmen
·2 x QIN05 Archers
·6 x QIN04 Impressed Troops
·3 x QIN09 Wu Hu Cavalry
·1 x QIN10 Four Horse Heavy Chariot
·2 x QIN11 Command with Chariot
·1 x SAM009 Ninja
·1 x NWK011 Elite Archer, shaven head
·1 x VIG004 10mm Egyptian Scribe and Soldier
·1 x VIG009 Samurai Commander with attendants
·5 x packs of metal bases
All that only comes to about $340.....

Irregular Miniatures via Eureka Miniatures
1 x Peasant pack (10 figures) AU$6.00
1 x Chickens AU$3.00
1 x Pigs AU$3.00
1 x Sung Chinese/Mongol Rocket Launcher AU$2.25
1 x Sung Chinese/Mongol Subject Infantry Standard Bearer AU$0.70
1 x Sung Chinese Cavalry Standard Bearer AU$0.70
1 x Sung Chinese/Mongol Subject Infantry Officer AU$0.70
1 x Sung Chinese Cavalry Officer AU$0.70
1 x Mongol Cavalry Standard Bearer AU$0.70
1 x Mongol Cavalry Officer AU$0.70
1 x Halfling Personality AU$0.70
1 x Mongol Light Cavalry, holding sabre AU$0.70
1 x Wizard AU$0.70
Sub-Total: AU$20.55
Zone Based Shipping (Air Mail - North America): AU$15.61
Total: AU$36.16
Total in AUD: $36.16

I’ll also be needing a few books from Osprey on the topic. We’ll see what they’ve got.


Other:

Mighty Empires
Old Rules – Free .pdf
New Box Set --- $45.00
White Dwarf Tiles: $6.00


FlashPoint: VietNam
Basic Rules
Sample miniatures pack