Showing posts with label Modeling. Show all posts

Tuesday, August 26, 2008

Mesh Schurzen -- painted

OK, its been a while on these, but I finally got around to painting them up. These shots don't show all the little details, I'm really just trying to show you how the mesh gunked up during painting, but how that wasn't the end of the world. Take a look.

Photobucket

Photobucket

In these few, painted with just an air-brushed basecoat (and maybe a little highlighting), you can see how bad some of it looked. Here's a closeup:

Photobucket

Basically, what you are looking at is superglue from when I mounted them. The paint didn't fill in the mesh, but the glue sure did. It just wasn't really visible before the primer went on. I'm not sure how this could have been reduced, you have to glue them on, right? This glue may also have come from when I first made them, which would make sense. Some places came out worse than others.

I figured I'd make the best of it, and just go ahead and paint them up. It doesn't really come accross very will in these pics, but I used the camo patern to down-play the filled-in mesh. You can still see through most of it, as these other shots show. And spraying the darkest brown right over the glue-filled bits just made them much harder to notice.

Photobucket

Photobucket

And finally, an on table shot from our last game:

Photobucket

Friday, January 25, 2008

How To: Mesh Schurzen

Intro:

As part of their efforts to not get blown up in Russia, the German army in WWII mounted all manner of stand-off armour to the sides of their tanks. Called schurzen, these plates were never intended to stop cold incoming AT rounds, but rather to cause shaped-charge AT explosives to blow up several inches away from the armour. While they didn't do anything to high-velocity munitions, they were of at least limited effectiveness against light HEAT weapons. This armour most often took the form of large, thin sheet metal plates suspended from a bracket running the length of the vehicle, and this is by far the type most often depicted in miniature. But other materials were, in fact, used. I've seen pictures of wood (both cut planks and raw logs) and mattress springs (there is some debate over this -- were they reused mattress springs, or purpose built items that just looked like mattress springs?) used in this manner. However, what really caught my eye were some pictures of mesh schurzen, like this one:

Photobucket

Apparently, the mesh was enough to detonate HEAT rounds but light enough that it didn't affect the tank's performance to mount them. Whatever, they look cool! Thus began another modeling project...

Materials:
wire mesh
thick paperclip or wire
thin paperclip or wire
super glue

This project sat on the drawing board for a while, until I found the right kind of mesh. I'm sure you could get it done with other stuff, like window screens or something from the hardware store, but I found this stuff at the local Hobby Lobby:

It has a very fine weave to the wires, is very flexible, and fairly strong. Just what I needed! It comes in a single large sheet, so I'll be using this stuff for quite a while -- I've also come up with a way to use it to quickly model canvass tents, but that's for later.)

You can use whatever kind of wire you like for the frame, but it will look better if you have wire of two different thicknesses. I like to use paper clips (bent back to straight) for these kinds of things -- they are handy and very strong for their size, especially the older steel ones.

Step 1: The Frame
First you'll need to make the frames for your schurzen. For this, I recommend bending the wire around a template. I used a metal schurzen from Battle Front as a template, but you could just eye ball it if you wanted to -- schurzen do not appear to have been any kind of standardized. You could cut a template from plastic or something else, but for me the metal schurzen was the obvious choice.

Take a thick paperclip and bend it around the edge of the schurzen template. I wish I had a picture of this step, but didn't think to start taking pictures until further in. You won't be bending the wire around the surface of the template, but along its edge.

Once you have it bent into the proper shape glue the ends together so that you have a loop of metal in the shape of the schurzen profile. I cut the ends of my paperclips off at an angle to that the joint would fit better. Go ahead and make up two of these for each tank you are outfitting with mesh schurzen. That way the glue on the first one will be good and dry by the time you get done with the rest.

Step 2: The Mesh
Take out a section of wire mesh at least a bit larger than the schurzen frames, lay it on the table, and glue the paperclip frames down to the mesh. Be careful that you don't glue the mesh down to the table. You will probably have to push the mesh into position against the wire and bend out any twist the frame may have in it. That really doesn't matter much, but you do want a nice firm bond between the mesh and the frame. Again, do the whole batch together, allowing them to dry before returning to the first.

Photobucket

Cut lengths of the thin paperclip to make the supports of the frame. I didn't measure and precut these, since there is some variance from one frame to another and you want a tight fit. You might get things more standardized than I did, but I pretty much cut each support wire to fit. Glue these supports into the frame and to the mesh.

Photobucket

By this point, if you work like I do, you'll have a nice messy pile of glue and wire. Let all this dry thoroughly, you don't want to have to redo it.

Step 3: The Cut-Out
Using a sharp hobby knife, cut each finished schurzen from the mesh sheet. Don't worry about getting a clean cut, just get it off the sheet, then go back and clean up the edges. Your mileage may vary, but between the steel paperclip from and soft copper mesh, I was able to use the knife to shave off all the mesh outside the frame, using the paperclip as a guide for the blade.

Photobucket

You can see through it! I hope you can still do that after I paint it...
Photobucket


Step 4: The Mount
This step is really complicated -- glue the schurzen to the tank. There might be a fancier way to do this, but I went for simple and sturdy. I ran a bead of super glue along the top of the track and the side of the fender and just glued the schurzen right onto the side of the tank. This picture shows the supports added in the next step, but you get the idea.

Photobucket

Step 5: The Supports
Using your thin wire, cut out length about an inch to an inch and a half long. Bend a nice, tight 90-degree corner about 2/3 of the way down the wire. I used three per schurzen, so you'll need a total of six per tank.

Once they are all roughly cut and bent you can trim up the first end. Holding them against the tank with the bend set into the joint between the schurzen and the tank fender, mark the spot on the short end where you want the support to stop. I didn't get to technical about the placement of the supports, they just need to look good and be sturdy. I tried to line them up so that I could glue each support to another wire on the schurzen, not the mesh, with the other end up against some logical mounting point, like the end of the armoured crew compartment or some other hull detail. Once you find your mark, cut off that end of the support wire and glue it into place.

Photobucket

Let them dry completely, then cut off the excess wire sticking up above the schurzen. At this stage I added little decorative supports at the front of each schurzen, down by the track front fenders. These don't actually lend any strength, but they look like they might.

Photobucket

And that's about it -- not too difficult, and I cranked out enough for this platoon in an evening's work. They could be better -- if I had one of those fancy tools for precision bending wire parts the frames would be straighter. What would really be nice is a set of these mounted on Battle Front's new plastic schurzen supports, but I used those on the Panzer IVs they came with. Maybe I'll do some more, after they make the plastic sprews available for special order.

Photobucket

Photobucket

Photobucket

Tuesday, October 23, 2007

US Paratroopers Army Update –2: Fire for Effect!

OK, its time to roll out some big guns. Artillery support was never actually shown in Band of Brothers, so I had a lot of liberty with this platoon. The only models based on shots from the miniseries are the staff, command, and forward observer teams, but I had fun with them. For the guns, I just tried to keep them in line with the style I'd been working towards for the rest of the army, and worked in a few details I've wanted to do with gun teams for a while.

I also started thinking about what I'd do with the other gun teams that would eventually make up the entire collection, namely the glider-crewed short 105s and the big 105s of the ground-pounders. I decided that it would look cool to model their bases to represent the sort of terrain that gun might have been positioned in. More on this later, but what that boiled down to was making the bases for the Pak 75s the most rugged, the heavy 105s the most permanently emplaced, and the light 105s sort of in the open, as if their jeeps had just dropped them off. For this platoon, a semi-rugged firing position is suggested by modeling the guns pushed up to the edge of a low ridge.

Photo Sharing and Video Hosting at Photobucket

I don't have any shots of this platoon before I put the coffee on them, but I still used my old trick of cutting out a few layers of card and covering about 1/2 of the top of each base with it. The front edge of this card layer formed a bit of a miniature cliff face towards the front of each base, which I faced with small pieces of rock. I tried to glue them onto the base at a slight angle to create a small overhanging shelf. That way, when I put the snow on at the very end there would be a small clear area and you'd be able to see under the rock shelf and it wouldn't just look like a snow drift. I used super glue and sand to hide the joint between the rock and the card board and then went about adding the guns and crew. This profile shot gives about the best view of this as I've got:

Photo Sharing and Video Hosting at Photobucket

Most of the figures were just glued down to the top layer of card, unless I'd thought up a clever way to model yet another soldier with one foot up on top of something. I wanted to get a lot of interaction around the guns, with men standing on the trails, loading shells, removing shell casings, and anything else I could think up. I got a good bit of millage out of working a crew member up against the wheels of the gun carriage or up onto the exposed lip of rock.

Photo Sharing and Video Hosting at Photobucket

To visually link all the teams together, everyone got a large storage crate of ammo, and plenty of spent shells. I made the shells for this platoon from plastic rod, roughly to scale for a 75mm shell. I cut small lengths of rod for each shell, and used an xacto blade of lightly score a ring around the rear end of each. Then I used a pin vice to hollow out the center of the rod, leaving an empty canister. This was, let me assure you, a pain in the ass, especially since each gun would need four or five shells.

Photo Sharing and Video Hosting at Photobucket

The gun crews are a mix of just about every gun crew type of American Battle Front make: paratrooper artillery and mortar crew figures were used for most, but there are a good helping of basic American artillery and anti-tank gun crew figures, as well as a few intended for basic infantry duties.

Photo Sharing and Video Hosting at Photobucket

Photo Sharing and Video Hosting at Photobucket

Photo Sharing and Video Hosting at Photobucket

The command team for this unit is based on a scene of Winters trying to explain the plan of attack to Dyke. It didn't have anything to do with artillery, but it did make for a decent scene to model. I made the map board out of a small piece of plastic card, with lead foil from a whine bottle glued on and folded back to look like a wrinkled map. Their heads were slightly rotated so the two officers would be looking at each other, and a little bit of green stuff cleaned up the seams after I repositioned their arms to hold the map board. The base got the same "lip of rock" treatment as the guns, with a spent shell (hidden in this view) to tie it into its platoon.

Photo Sharing and Video Hosting at Photobucket

The staff team for this battery was a lot of fun to do. Based on a scene in the HQ tent just before a mission, with officers going over a map, it seamed like a good place to put a little more rear-echelon detail into this force.

Photo Sharing and Video Hosting at Photobucket

There were some arm and head position adjustments to make everyone look at each other funny, as well as some table details, like the extra papers made of foil, and a sidearm shaved off of a model. Both that and the pack of smokes on the table are details right from the show -- I love that kind of thing.

Photo Sharing and Video Hosting at Photobucket

I went nuts with the details around the table on this one. I set lower rocks onto the base without any cardboard, trying to make it look like the staff team was just down the hill from the guns. Some of the items are pretty generic, like packs and ration boxes:

Photo Sharing and Video Hosting at Photobucket

But others are more specific. Resting on the platoon's standard matching ammo box is my representation of an electric signaling light used by observation teams during the war:

Photo Sharing and Video Hosting at Photobucket

Speaking of observation teams, I based this platoon's Observer on the scenes in the forward OP bunker in Band of Brothers. Covered in logs and down in a deep fox hole (made from layers of card and sand, smoothed on the outside with epoxy paste) this would really match well with 2nd Platoon:

Photo Sharing and Video Hosting at Photobucket

And the top comes off to reveal the team inside... along with Joe Toye's boots drying on the back edge.

Photo Sharing and Video Hosting at Photobucket

Finishing off the artillery battery is their supply container. Rather than use another cart, I made these two guys drag the parapack along the ground. Besides the green-stuff pack, there was just a bit of arm repositioning and a few straps to model. I also added a batter-powered beacon on the ground, with just a hint of the rock lip. You can see a real pic of the beacon at Trigger Time.

Photo Sharing and Video Hosting at Photobucket


Monday, October 15, 2007

US Paratroopers Army Update –3: I Want a Base of Fire in those Trees!

Moving on down the line, and applying what I'd learned with some of the earlier 
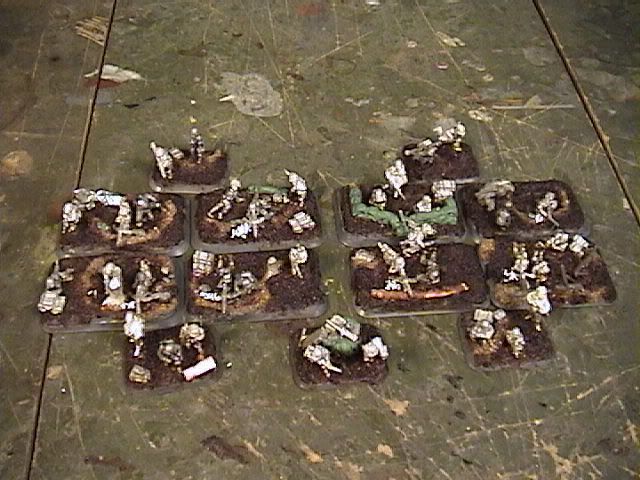
platoons, I got to work digging in the weapons platoons supporting Easy Company. At this stage of things, I wanted to keep things very consistent in terms of the look and feel of the army, but I didn't have as much work with in terms of theming the individual teams -- the further you get from the rifle platoons, the less is seen in Band of Brothers. The mortar teams, if shown at all, are given only the briefest glimpses, while it is pretty hard to tell the .30 light MGs of the machine gun platoon apart from those of the rifle platoons. I also had much less to go on in terms of historical information -- in all my reading, I could only find a hand-full of names from the Battalion weapons platoons. As such, the Machine Gun and Mortar platoons are a bit more stylistic in nature, and don't conform quite as rigidly to my historical and design specifications as does the core of my force. On the other hand, the more static nature of the emplaced weapons meant that I could be some what more lavish in terms of the added details on each team, and I had fun coming up with small details to link each team in a platoon.

Machine Gun Platoon:

Photo Sharing and Video Hosting at Photobucket

By this time, I'd come up with a few ways to work that figure castings into the base work, with building it up for that little extra depth I needed for he fox holes. The simplest was to lay on about 4 pieces of card (I went a little deeper than with second platoon, so the guys would really get down in the holes) with the holes cut in the card and just glue the miniature on top of the whole thing, sometimes cutting one foot free of the base tab and gluing it on top of something else. Another interesting method (very useful for prone poses) was to cut a hole in the top piece of card for the base tab to fit into, they lowering it relative to the top level of card. I mixed and matched my way through the platoon, using each trick as seemed right and improvising along the way.

Photo Sharing and Video Hosting at Photobucket

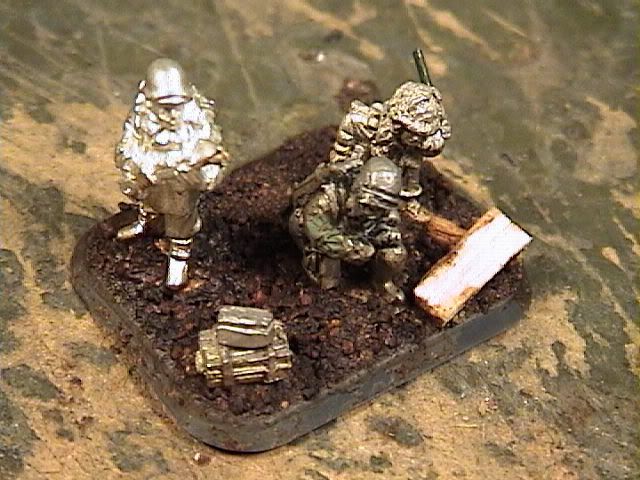
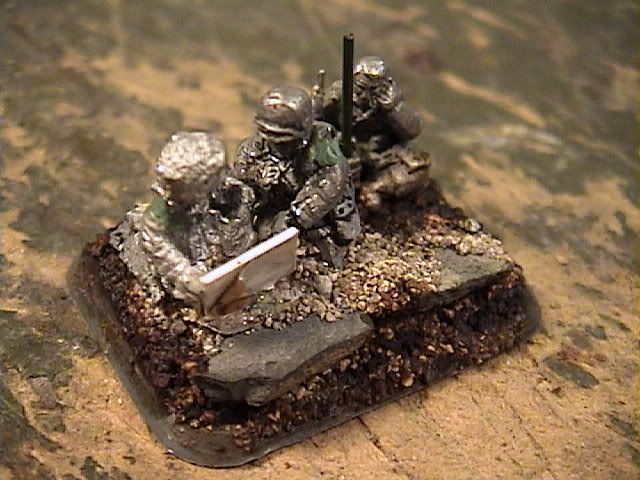
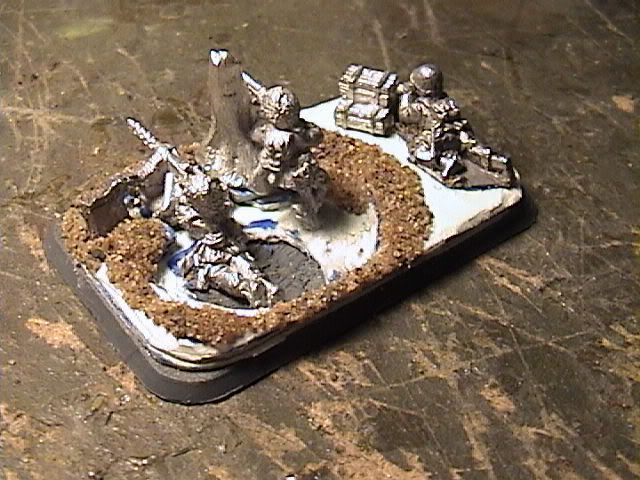
The command team didn't require too much extra work, just a bit of greenstuff and a wire for the antenna, plus one of the large storage crates that would be the identifying item of this platoon -- I needed something to distinguish these guys in holes on the edge of a wood from the guys in second platoon, also in holes in the woods. Other than the wooden crate, there would also be the number of men per base, three instead of five.

Photo Sharing and Video Hosting at Photobucket

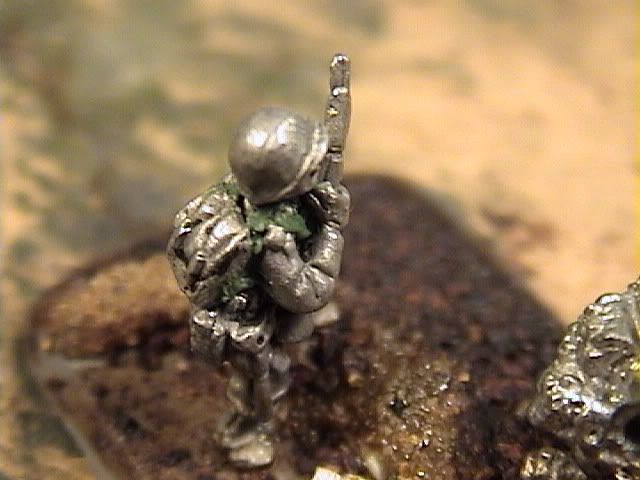
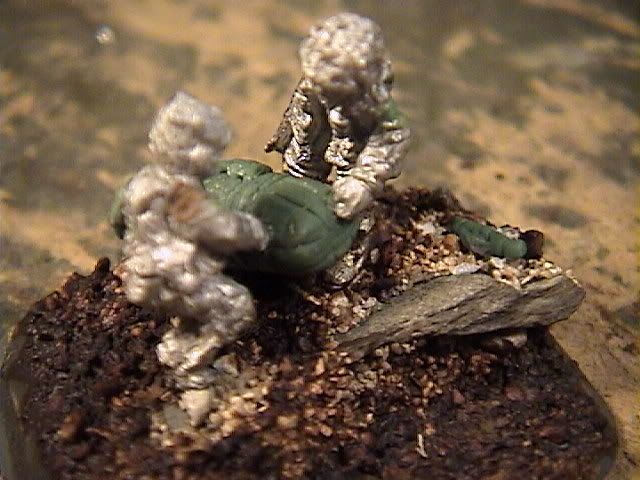
The bazooka men did get a few interesting details, like pockets and straps for the backpacks added to make normal US infantry look more like paratroops. I rather like this running guy:

Photo Sharing and Video Hosting at Photobucket

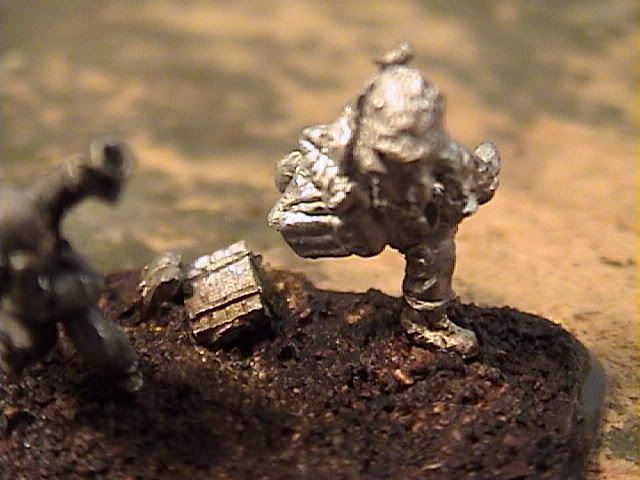
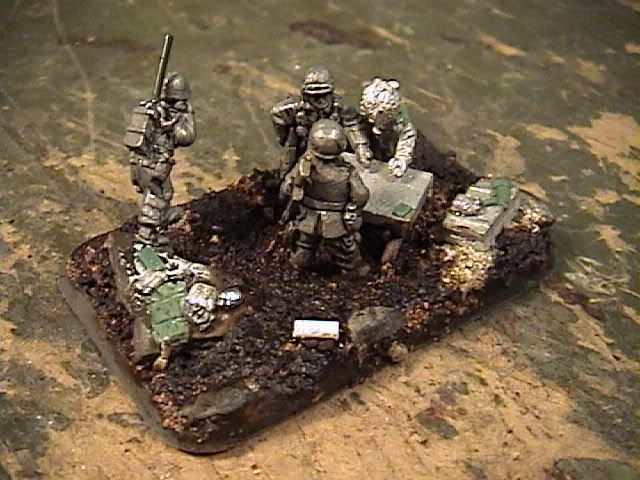
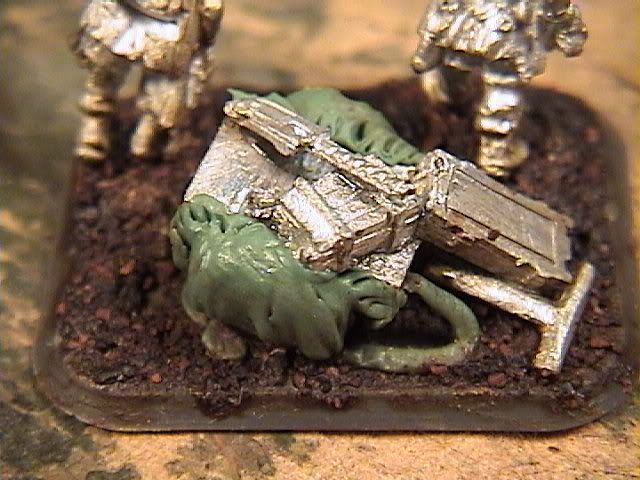
Even though it has no real game-play value, I decided to get a little creative about this platoons equipment cart. Rather than show them brining it up to the men or something, I decided to open it up and show the contents being distributed.

Photo Sharing and Video Hosting at Photobucket


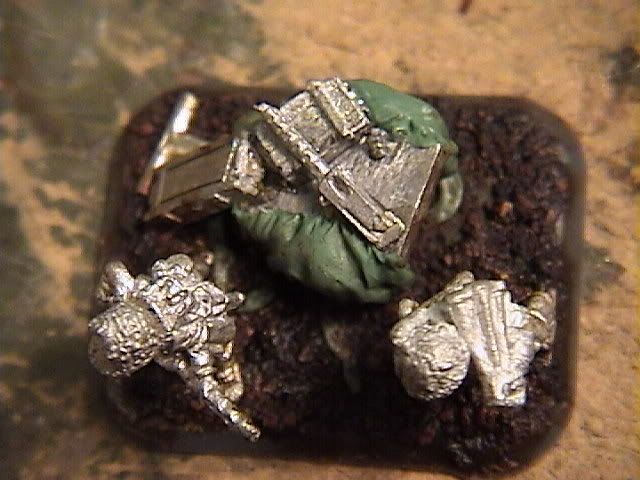
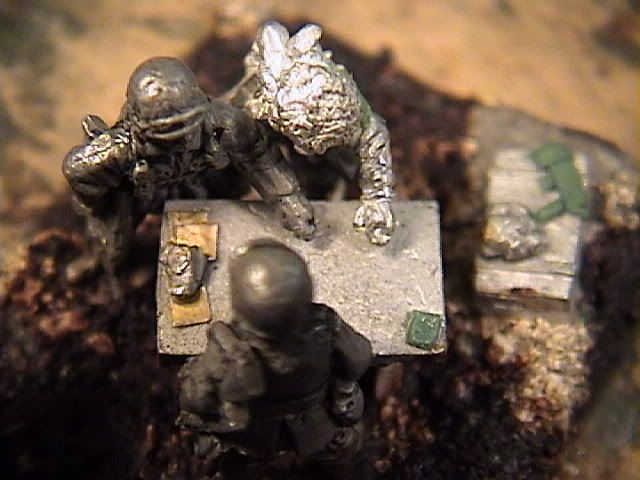
First I cut off the closed pack with a razor saw, then I made new open pack sides in green stuff before adding all the little bits of weapons and ammo, including the wooden crate of the MG platoon.


Photo Sharing and Video Hosting at Photobucket

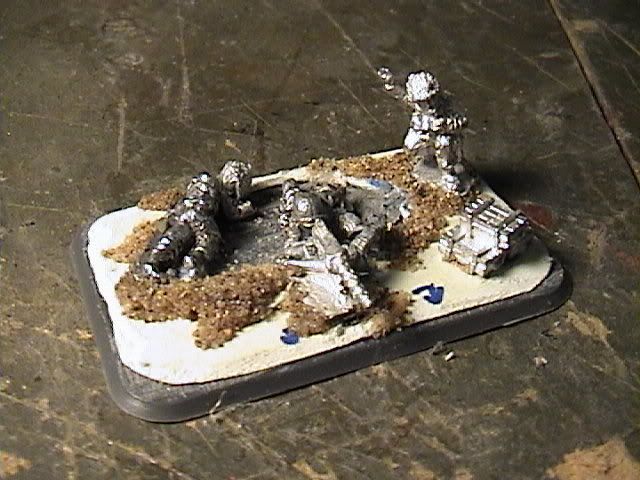
Now lets get onto the machine gunners. These guys are mostly from Battlefront, but I didn't limit myself to just the paratrooper gunners. I've actually got new and old paratrooper machine gunners (the poses are ever so slightly different) mixed together with normal US infantry guns with .30s. Most of the standard infantry gunners would require a bit of conversion to make them fit in with the paras -- just the usual stuff like back packs and cargo pockets. At this scale, those seem to be the big details that catch the eye and tell the view that they are looking at a jumper. This first shot of team 411, taken before the coffee mud was added, gives a good view of the card board layers adding the depth:

Photo Sharing and Video Hosting at Photobucket

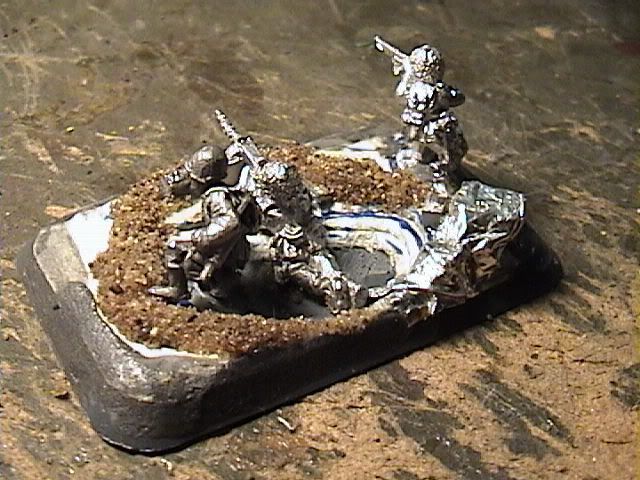
The edges are smoothed over with a two-part epoxy paste, and a ring of sand and superglue makes the raised lip of the fox hole. It looks pretty rough in this picture, but after it is covered in coffee it looks pretty good:

Photo Sharing and Video Hosting at Photobucket

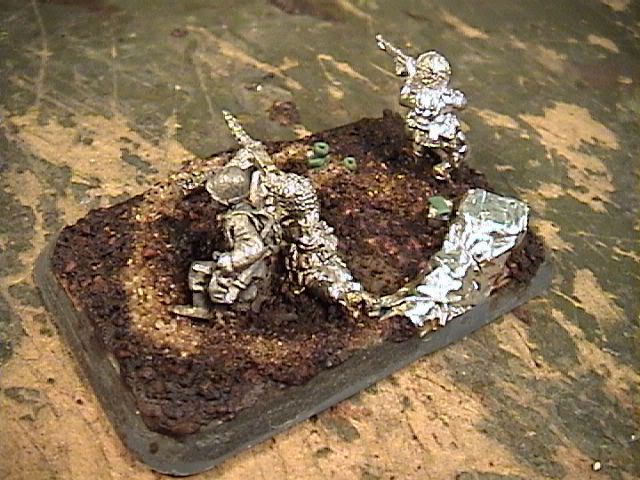
You can also see one of the details that would link this team to a shot from the miniseries, as in one sequence you could make out a large pile of supplies mostly covered with an army blanket, made here with a piece of aluminum foil. I've also added lots of green stuff details that hopefully, when painted, will look like ration packs and coffee cups on cooking burners. I hope I remembered to add some spent shell cases before I primered these...


Photo Sharing and Video Hosting at Photobucket

This next one, team 412, also shows the layers of card board well, plus some of the things I'd do to work the figures into it: the bottom of the hole actually extends down into the plastic base, cut in with a dremmel tool. I removed as much of the base from the legs of the gunner as I could, then bent him pretty sharply in the middle. His MG is resting on the edge of the hole, with the lip of glue and sand coming to meet it, while his feet are down in the bottom of the hole.

Photo Sharing and Video Hosting at Photobucket

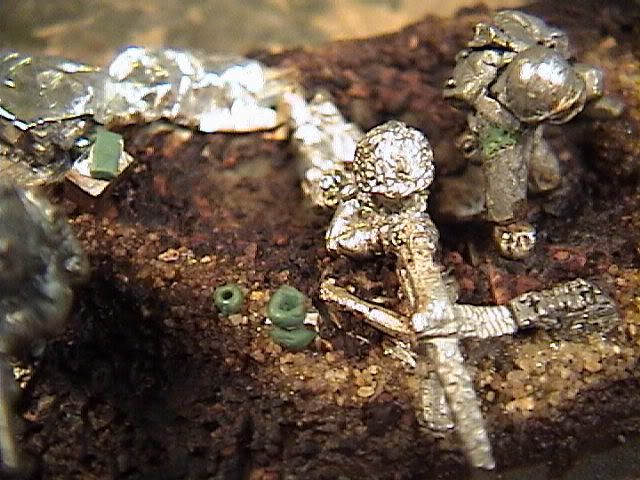
The miniature in the middle had had its base completely removed. He is mostly glued to the tree stump casting for stability. Its pretty easy to make the base tab disappear when it just isn't there! The casting on the far right of the piece has its tab down in its own little hole. This makes him look like he's laying flat on the ground in the finished piece. The casting actually started life as a gunner, but at some point I took his weapon away for some other use. Rather than waste the model, I just worked him in behind a stack of crates and gave him new hands:

Photo Sharing and Video Hosting at Photobucket

Ah, here are some of those shell casings I was looking for! This also shows one of my converted gunners. You can see the green stuff cargo pockets added in the second picture. The base tab on the standing figure was, again, hidden by cutting a hole in the top layer of card board to level it with the stand.

Photo Sharing and Video Hosting at Photobucket

This hole isn't as deep as some of the others. The depth of the hole was really one of the few things I had to play with on this platoon, since so much of the base elements are sort of dictated by their combat role.

Photo Sharing and Video Hosting at Photobucket

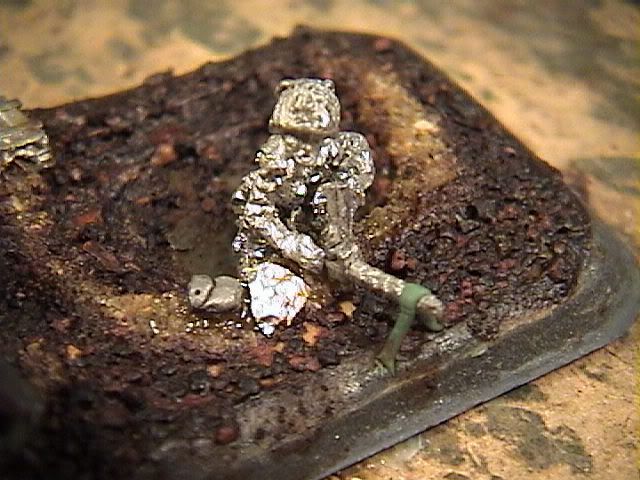
Since the gunners are all pretty much doing the same thing, I had to look to the other men to provide some of the variety and try and tie the teams into various shots from the miniseries. One scene that caught my eye involved someone crawling up the back of the hole:

Photo Sharing and Video Hosting at Photobucket

You may notice in this and the previous picture that I'd sometimes place the back packs on the ground instead of the figure. As long as there is a back pack on hand I think the effect works to make the men look like paratroopers -- they couldn't have worn all their gear all the time! There are a few other details on the pile for this one, such as the big rolled up tarp, some ammo boxes, and of course the spent shells. Team 413's gunner has spent a few rounds...

Photo Sharing and Video Hosting at Photobucket

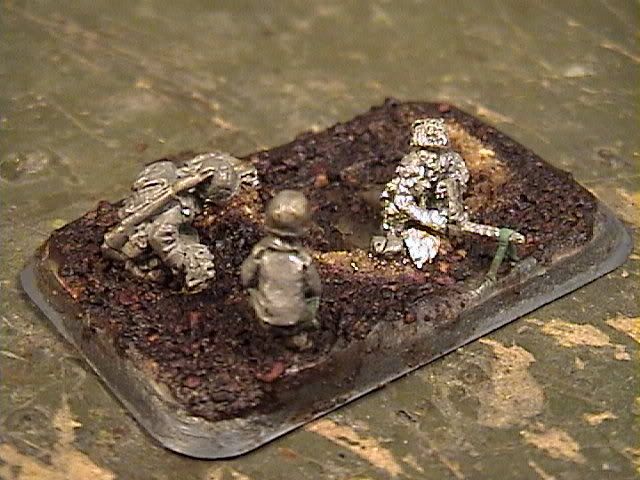
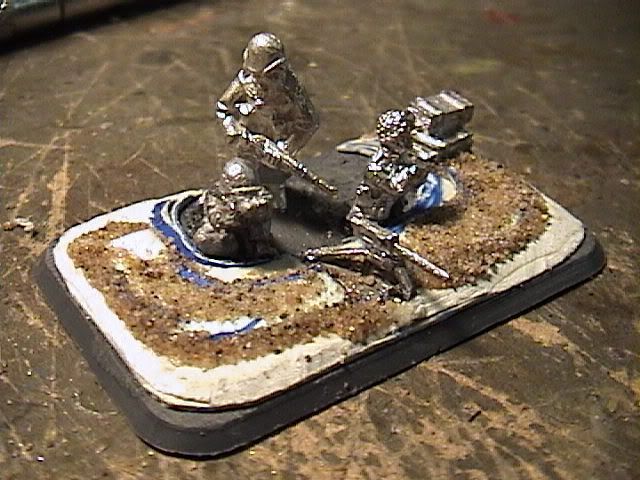
The four teams in the first MG section all natch each other really nicely, but by the time I got to the second section, and had made all the MG teams in the rifle platoons, I was running low on ideas. I was also running low on un-used scenes that prominently featured machine guns. There were still ideas I wanted to use, they just didn't go together quite as nicely as the stuff in first section did. One idea I'd wanted to use from the beginning was someone servicing their rifle, and that idea ended up in team 421.

Photo Sharing and Video Hosting at Photobucket

The guy in the hole has had his base completely removed, along with his knees, and about half the thickness of his lower legs -- they are still there when viewed from above, but it you could see him from the side he'd look pretty messed up. But its pretty hard to get a good view from that angle, and it was the only way to bring him down enough for his gun to be near the ground without everything else being awkward.

Photo Sharing and Video Hosting at Photobucket

I carefully cut open the breach on the machine gun and opened it up, bending his arms in to look like he's doing something with it. I also added a green-stuff bipod, as it looked like one was present in the scene that inspired this piece. The other two castings are worked low into the ground with a pair of holes in the top layer of card board, and the edges are smoothed over with epoxy paste before the the coffee covers everything up. They are hard to see, but the artillery crew man with his back to us has cargo pockets added with green stuff to make him look more like a paratrooper -- I'd have given him a back pack, but the guy wasn't wearing one in Band of Brothers.

Photo Sharing and Video Hosting at Photobucket

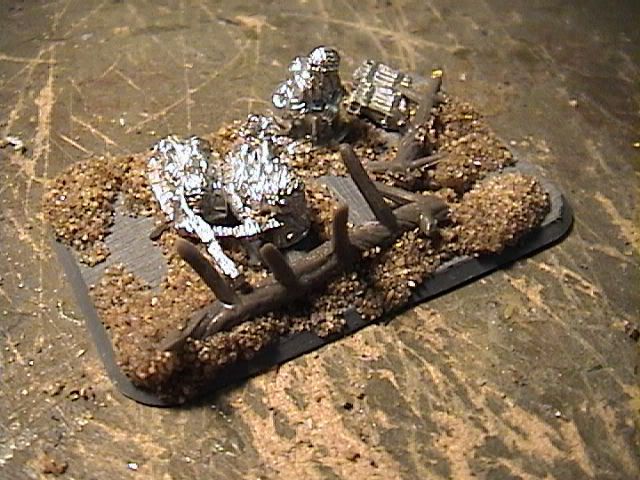
I'm pretty sure that in the context of the mini series they were supposed to be members of the rifle platoons, not part of the MG platoon, but hay -- I'm running out of ideas here! So I've got two guys taking cover behind fallen logs, one with a read wooden stick, the other with a plastic model tree trunk:

Photo Sharing and Video Hosting at Photobucket

With the real stick I again cut small holes to fit the base tabs into, and then built up sand and superglue to blend things together. I didn't have to worry about that as much with the plastic tree, since I used Old Glory machine gunners, and the base tabs on them were actually pretty thing:

Photo Sharing and Video Hosting at Photobucket

As always, green stuff, spent shells, sand and coffee to taste:

Photo Sharing and Video Hosting at Photobucket

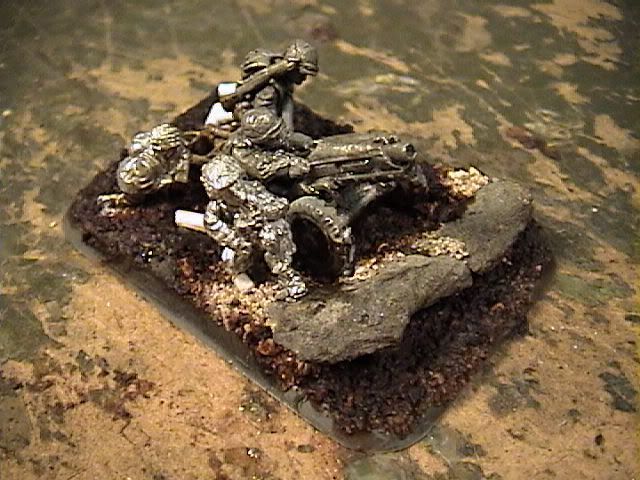
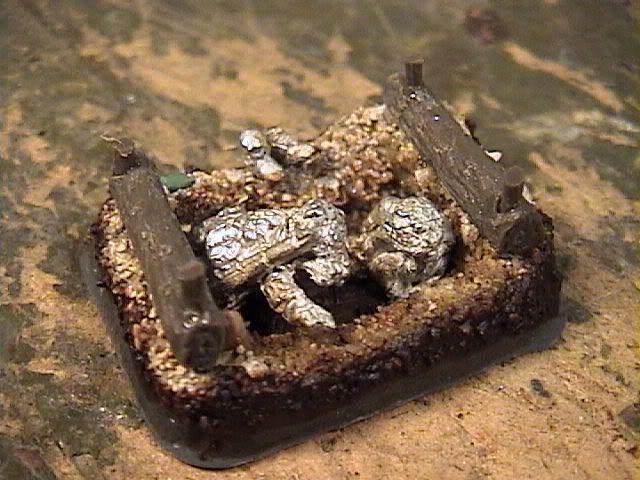
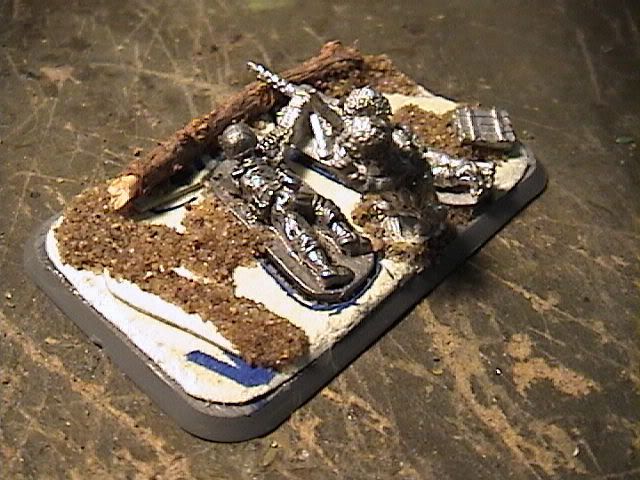
This last team doesn't really match the platoon, but I liked the scene in the miniseries and wanted to include it. It doesn't look like much in this first picture...


Photo Sharing and Video Hosting at Photobucket

... but it comes into its own with the addition of all the green-stuff sand bags. I also really like the loose hand grenade on top of the low wall. You can actually see the grenade better in the small picture at the top of this post.

Photo Sharing and Video Hosting at Photobucket

Mortar Platoon

The mini-series really didn't give me much to go on with the mortar platoon. Aside from a few shots of individual 60mm mortars going off, I think there are a total of two shots in the entire miniseries were they briefly cut over to several mortars firing as a unit. I'm not even sure if they are showing 60mm tubes or 81mm. But, hay, ya do what you can:

Photo Sharing and Video Hosting at Photobucket

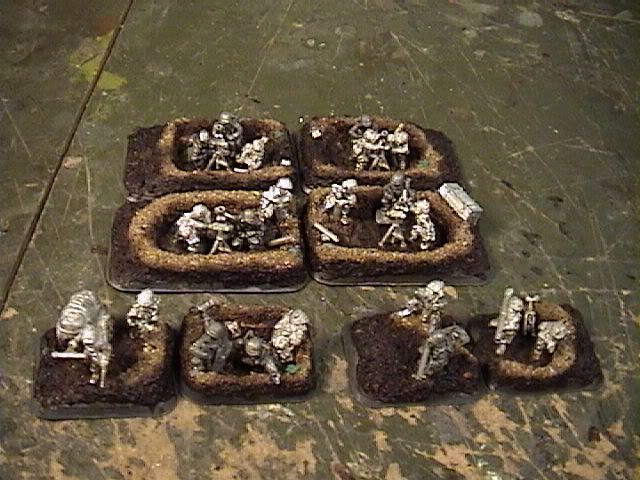
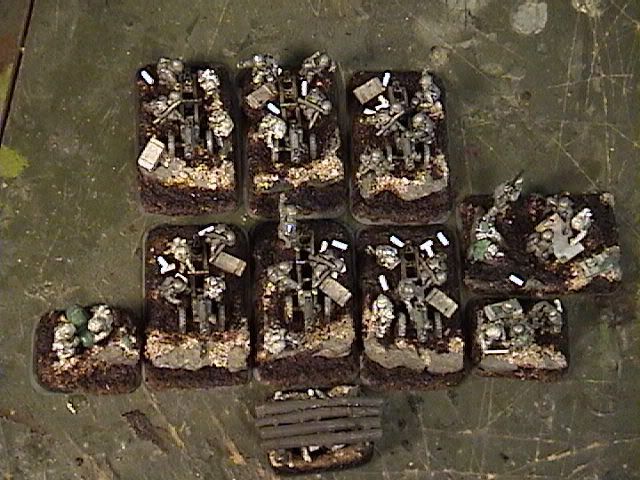
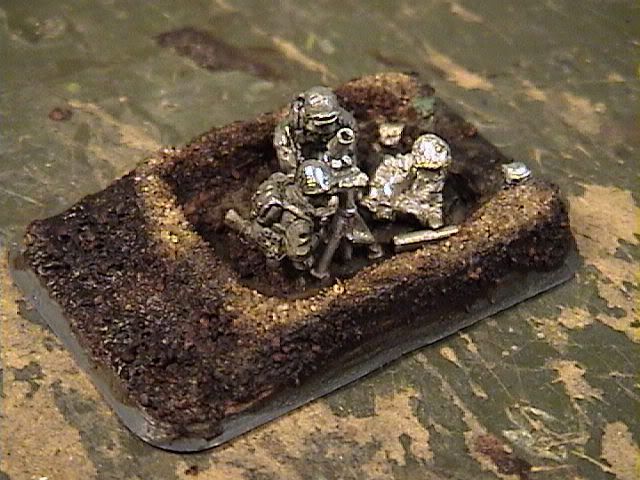
Based on one of the better shots of mortars in the show, I decided to dig them in all together in a semi-diorama style. Would this be smart to do on the game table or real life? Nope -- one good artillery barrage and you loose the whole crew. But it does sort of look good, so what the hell. As you can see, I did it as if the mortars each had their own hole, but pairs of gun crews sort of worked together, with the officer using his own hole, and the bazookas splitting one.

Photo Sharing and Video Hosting at Photobucket

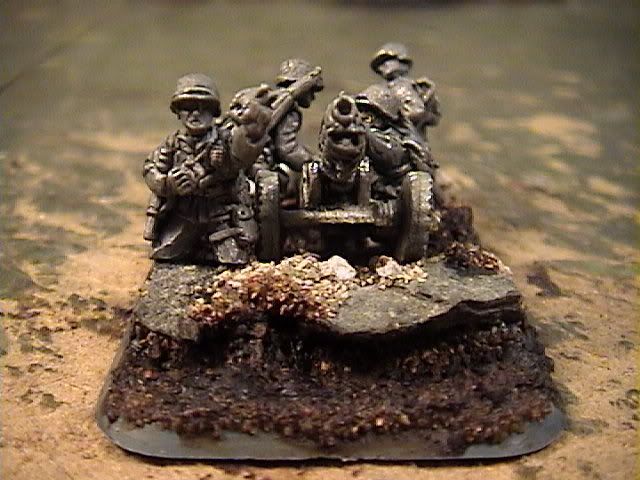
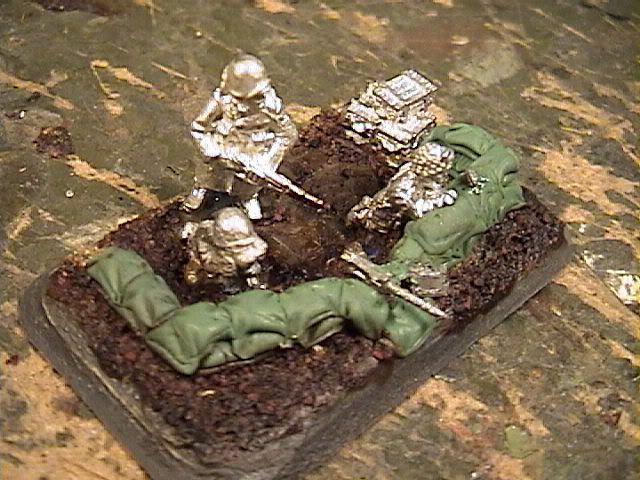
In these two shots of the command team, you can see some of the details I used to link all the teams in the mortar platoon. The extra mortar bipod is pretty obvious, but there is also that little piece of greenstuff on the edge of the foxhole. Its a representation of the special leather pouch used to store and transport the sites for the 81mm mortar. I added on of these to each team.

Photo Sharing and Video Hosting at Photobucket

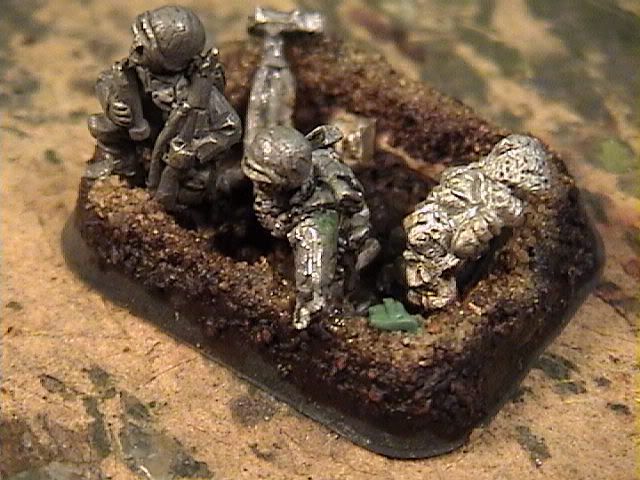
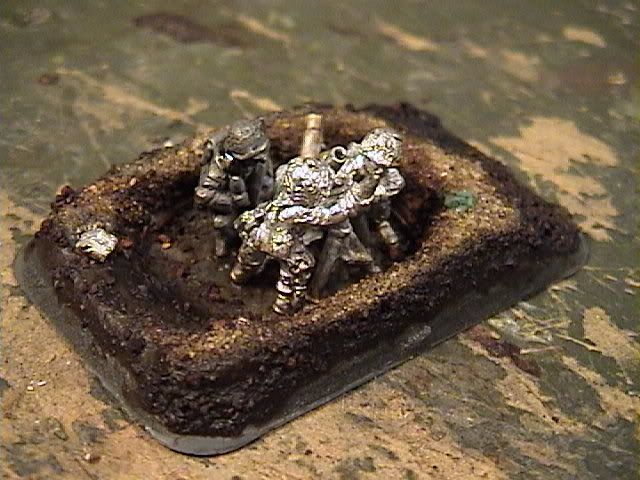
The hold itself is fairly simple, just a ring made up of a few layers of card board, smoothed over on the outside with epoxy paste and topped with a bit of superglue and sand. All three miniatures have had their base tabs completely removed to better fit down inside the hole, and are glued to both the bottom and the sides for stability.

Photo Sharing and Video Hosting at Photobucket

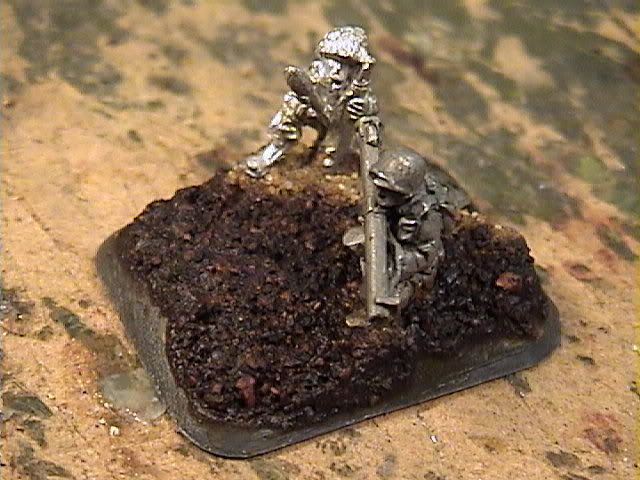
The two bazooka teams were done the same way, and the two stands push together into a single hole. For the first team, I left the base tabs intact, with the miniature in front getting a hole in the top layer of card board to sit down flush into, while the other is standing on top of the whole thing. They got a mortar baseplate (not really visible in this picture, its down in the hole) to link them into the platoon.

Photo Sharing and Video Hosting at Photobucket

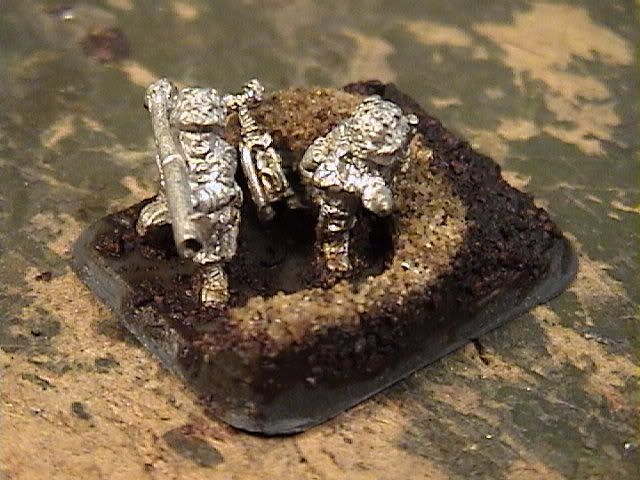
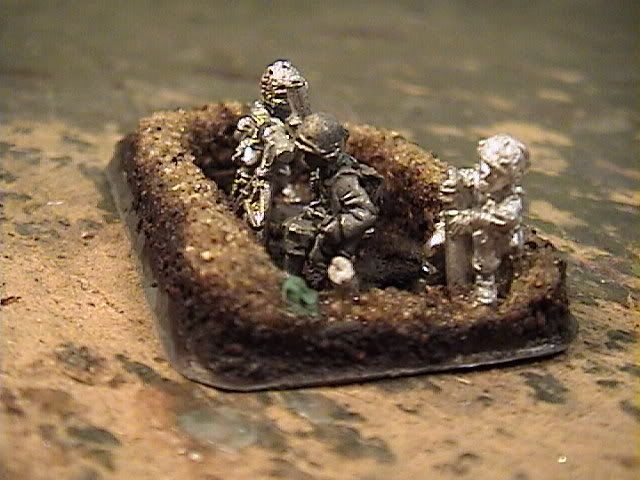
The second bazooka team is down lower in their hole -- base tabs were completely removed for this effect. They got another extra mortar bipod, so you'd quickly be able to tell what platoon the team is a member of.

Photo Sharing and Video Hosting at Photobucket

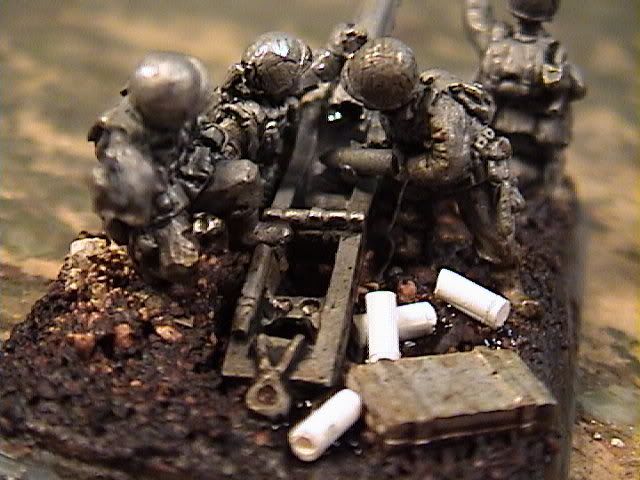
By now, the technique I used to make all these holes should be getting pretty routine, so there isn't much to really say about the mortar teams themselves. Each team got one of the fancy leather site cases, as well as a tube of mortar ammunition and a few random spare bits of kit in their holes.

Photo Sharing and Video Hosting at Photobucket

The lips of the fox holes were built up on three sides with super glue and sand, but I left one side a bit lower, as if each pair of mortar teams were working together to dig their holes.

Photo Sharing and Video Hosting at Photobucket

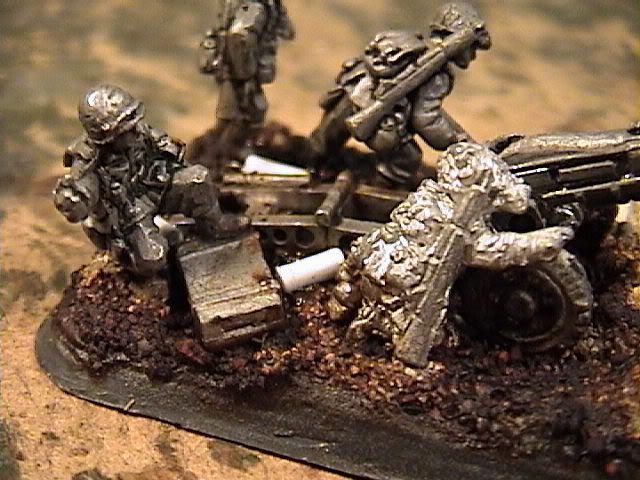
Most of the base tabs were completely removed, but some of the miniatures were set so that one foot was up on the side of the hole. Many of the crew miniatures were used unchanged, but several were converted slightly -- mostly bent arms -- to make them a bit more dynamic. I like the look of a shell about to be dropped into the tube.

Photo Sharing and Video Hosting at Photobucket

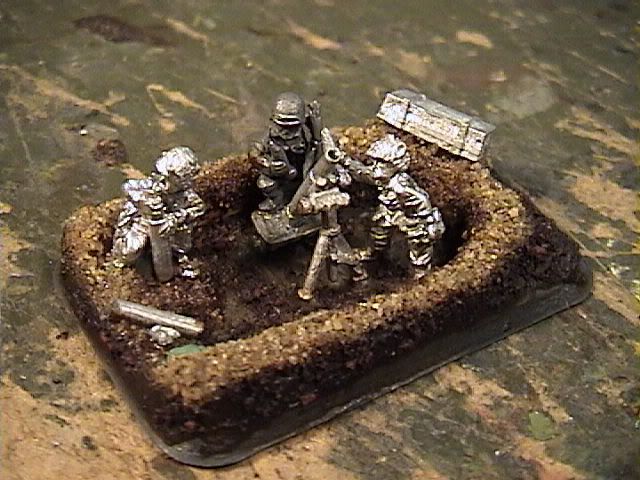
As was the case through most of this force, I had enough packs to do some mixing. The mortar platoon was no exception, as I mixed in the old and new versions from Battlefront, as well as a few other anti-tank and artillery gun crew figures.