
This is the cheeseiest thing I’ve ever made. But it sure was a crowd pleaser!
I don’t have a cool name made up for this or anything like that, it just seemed to make something tongue in cheek seem too serious. I originally came up with the idea to do this for a few reasons:
1. I wanted to test the vinyl contact paper over lager, flatter surfaces
2. I like the idea of making every day item look less lame
3. I hoped to kick start a few friends of mine into doing something, anything, more interesting than downloadable content.
On all counts, I think this was a success: the contact paper worked about as well as I figured it would (re: good enough, but it won’t fool anyone at arm’s length); it definitely looks less boring than the stock XPlorer controller; and the friend I barrowed the controller is currently trying to make an old SuperSoaker look like an anti-tank rifle. And when we brought it out at a recent get together everyone seemed amused, which was nicely gratifying. So, what are we looking at here?
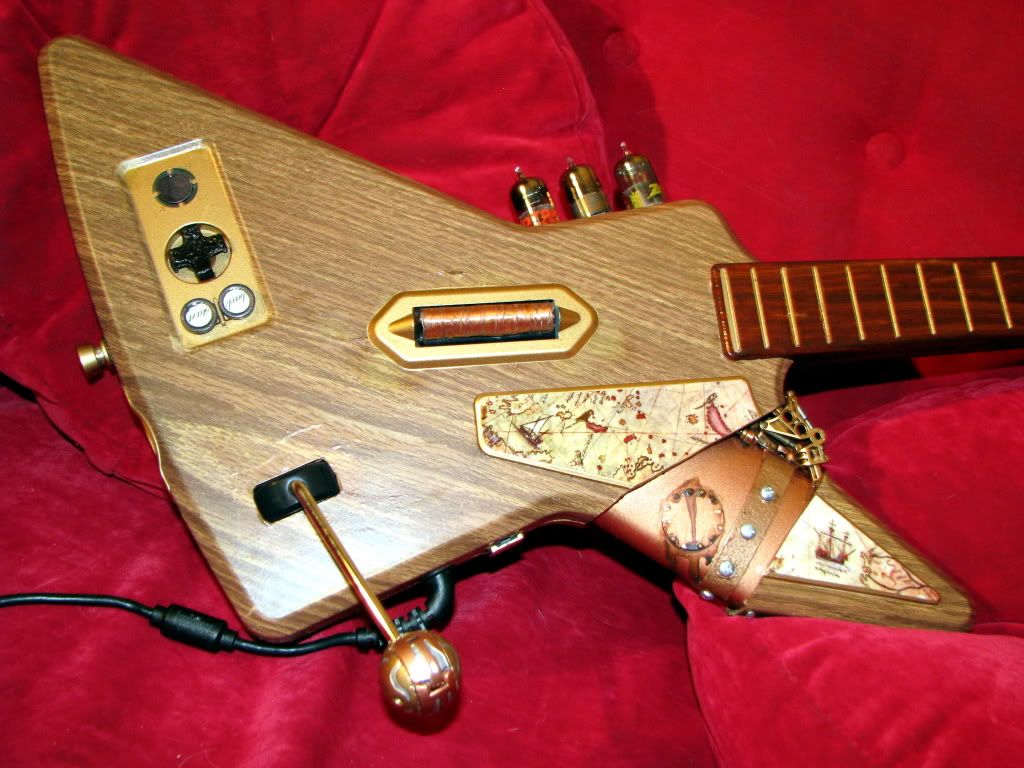
I didn’t do much on the inside. I considered some of the strum bar modifications I’ve read about online, but in the end I decided I was doing too much work making it look pretty to chance ruining it on the inside, so in the end all I did was pad the fret buttons for firmer contacts.
I don’t want to go on at length about design philosophies and artistic inspirations, so I’ll just say this: in researching this project I looked at a lot of SteamPunk and CyberPunk themed guitars. Like, real guitars. On trend that stood out was a general desire to make them look as little like actual musical instruments as possible, while retaining musical functionalist. Since I was starting out with a fake musical instrument, it seemed kind of redundant to make it look less like one. Thus, I went the other direction with it and did everything I could to style this fake musical instrument after a real one. What if there was Guitar Hero, but no plastic? Hence, wood grain.
The big structural change is obviously the exposed steam tank. After disassembling the controller I cut off one of the flying wedges and played with various shapes that might fit in there, eventually settling on an old stand-by, the stick deodorant dispenser. This one came from a recently depleted Old Spice product, with holes hacked into it so the controller’s supports could pass through the deodorant can. The can itself was fancied up with a reinforcing band cut from plastic and screwed into place. The little boiler plate was fun – I cut three circles from scrap plastic, one slightly smaller than the other two. I glued them together like a sandwich with the smaller circle in the middle, creating a thin seam that would be more visible than just sticking the plastic together. I then drilled holes all around the edge and glued in little brass nails. The small mechanical parts are just some Lego Bionicle parts added for flavor.
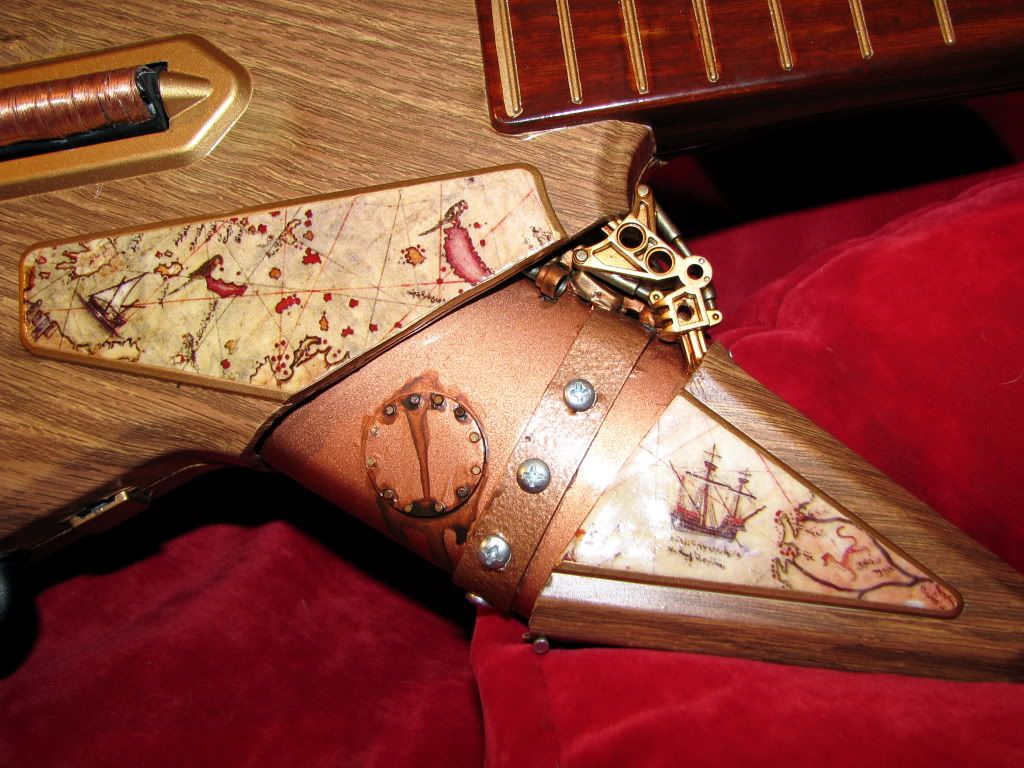
The whole subassembly was spray-painted copper, then masked to show just the reinforcing band (with its screws removed) which was spray-painted with a “hammered finish” copper. The Lego stuff was brush painted in accenting colors and the whole thing was gloss coated. When dry, I scraped the paint off the nail heads then soaked the boiler plate with several coats of thin ink to build up the stain. During the final assembly of the guitar I ran several nails through hole’s I’d drilled in the deodorant can and the body of the guitar to hold it in place.
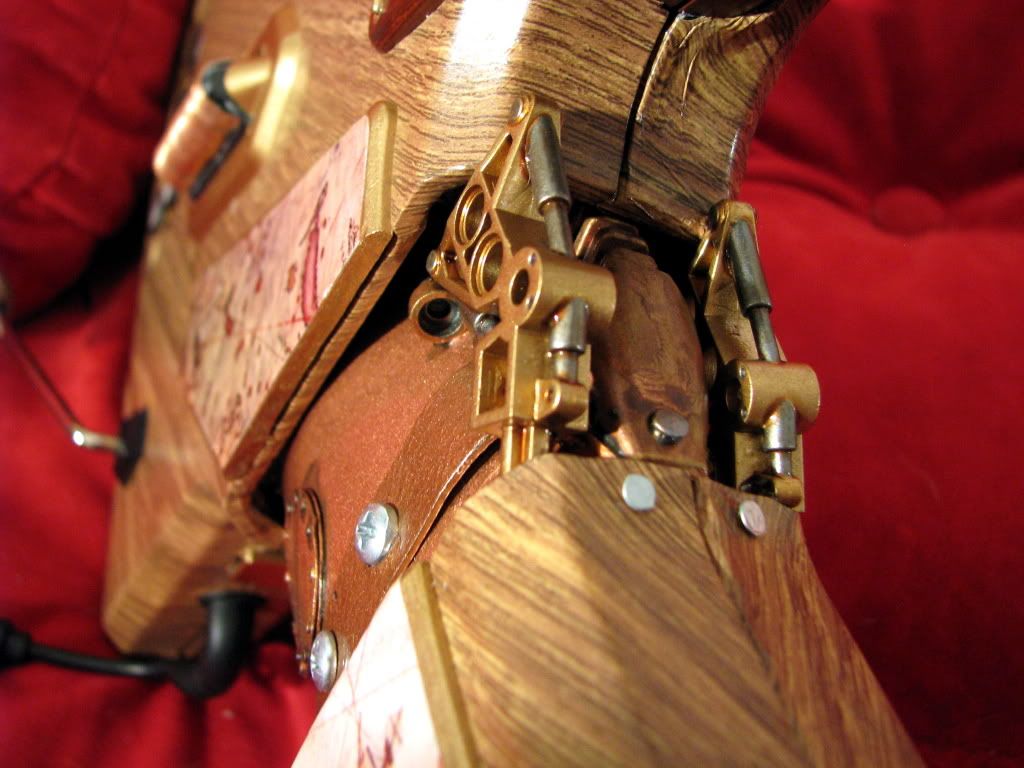
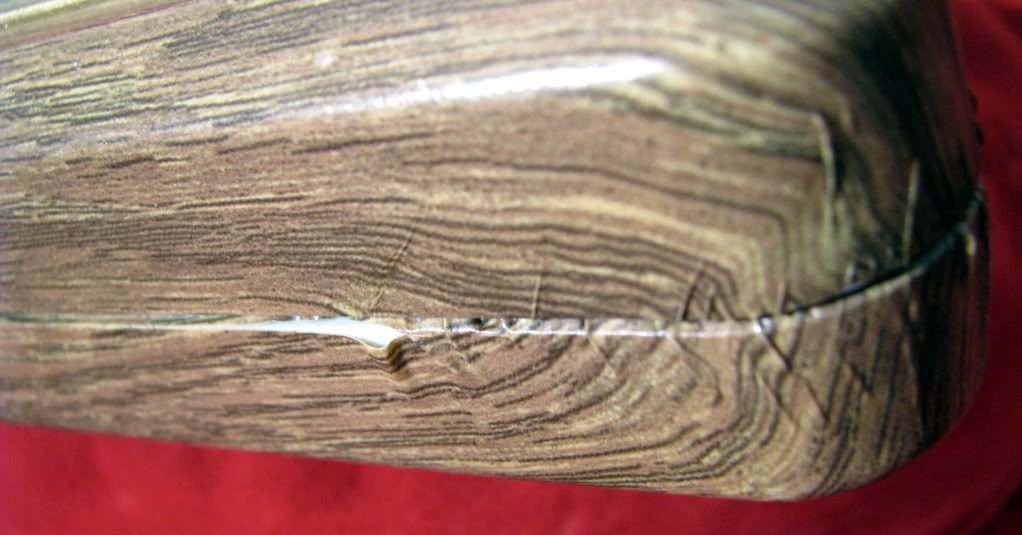
The main body and neck are both covered in the same wood grain contact paper as this ill-named blunder buss. As with the earlier project, I heat-stretched the vinyl with a Bic lighter after cutting it into very roughly the right size. All the fittings were painted brass before applying the wood grain. The hardest part was stretching it over the edges around the inside-curving flying wedges. I don’t know if that makes a damn bit of sense, but it took a lot of time to get the wood grain on there smooth. At points, well… I got it on there as smooth as I could. There’s only so much you can do once you get the stuff out to the corners.
The vinyl on the neck is the same pattern as on the body. Before applying it, I laid it out flat and stained it with a mix of brown acrylic inks, then sprayed it with a matte finish clear coat. Without the clear coat, the ink would just come off on your hands. With it, the vinyl didn’t stretch quite as well as it had before, and was more prone to breaking when stretched.
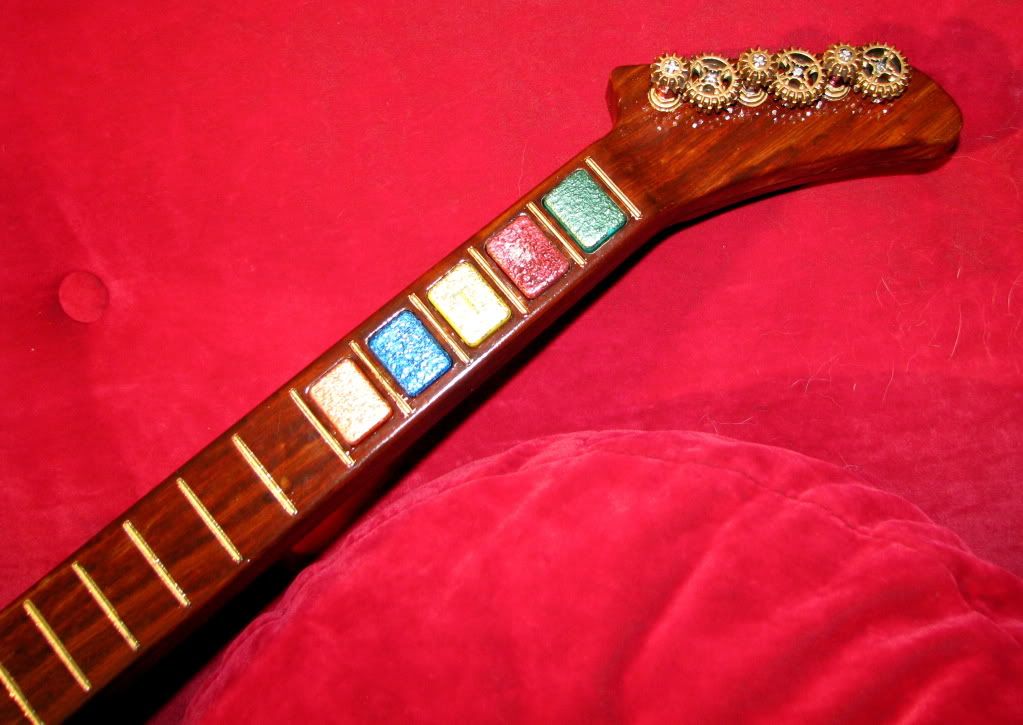
After applying the wood grain I cut slits through it to expose the brass frets, then hit the “front” face of the neck with a very thick coat of high-gloss clear coat both because it looks better glossy and to hold down the edges of the vinyl around the frets.
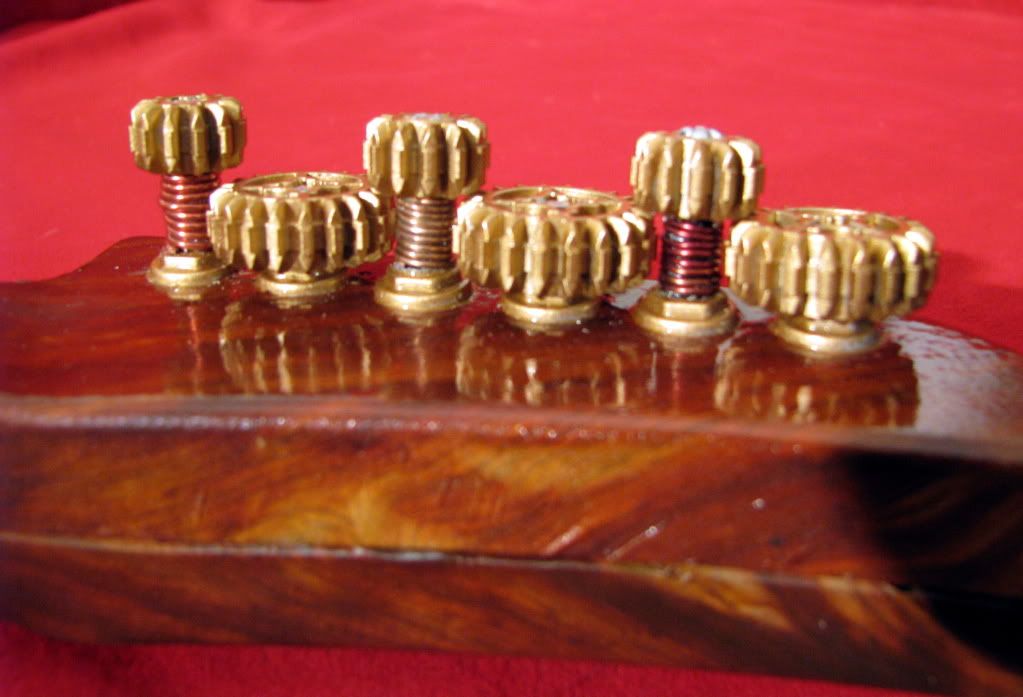
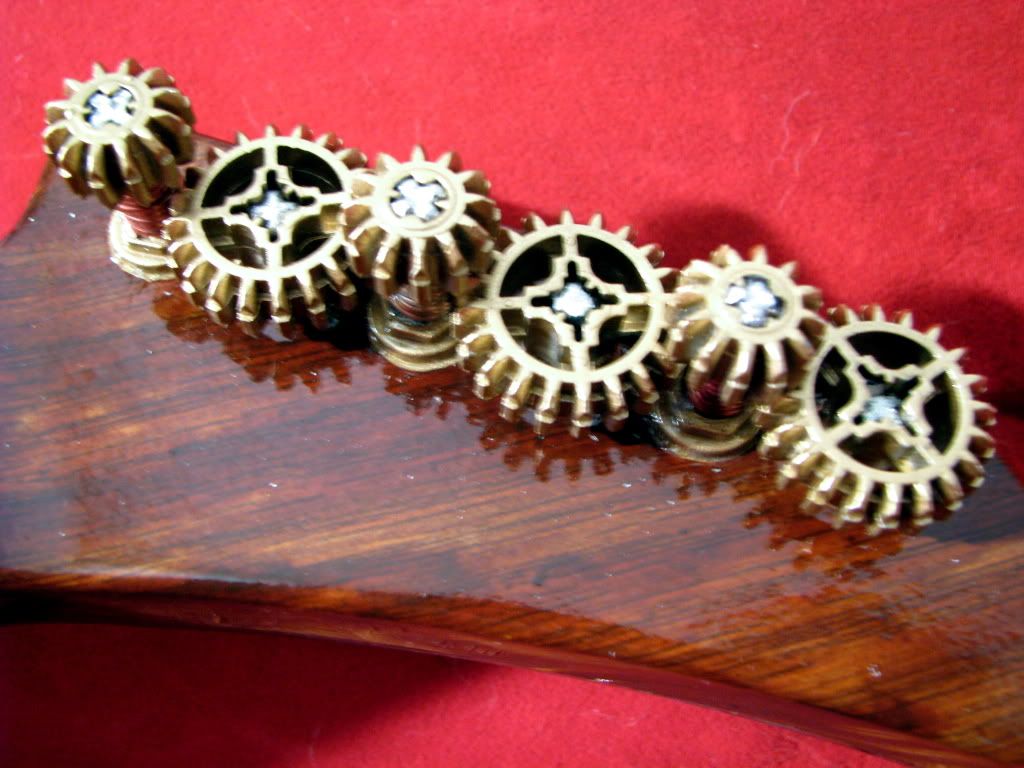
Details on the neck include faux tuning knobs made of brass-painted Lego cogs….
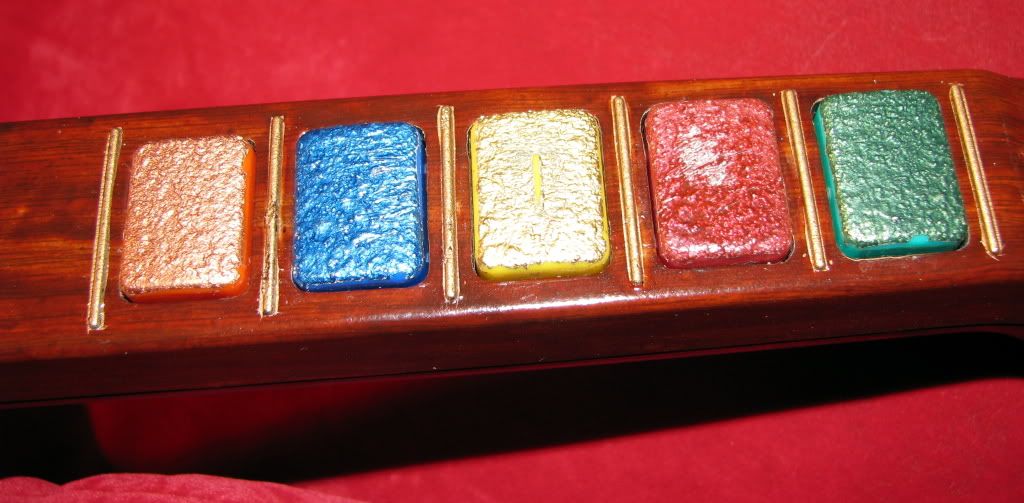
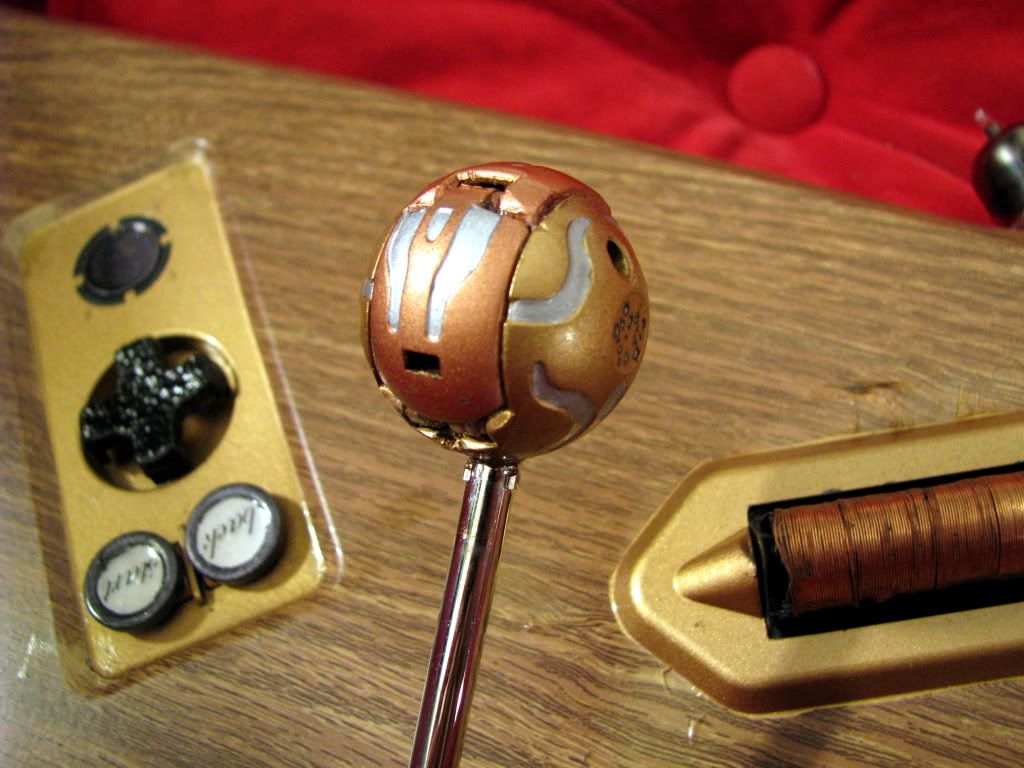
And these fancy fret buttons. I masked off the edges, both to keep their action smooth and so you could see the original button colors, then hit them with textured spray paint. When dry they got their metallic colors, brass and copper for the yellow and orange buttons, silver for the rest. The silver buttons were then touched up with colored metallic brush paints. I didn’t clear coat them, but I wish I had – after just an evening of play, paint ware is already visible on the fret buttons.
The control panel was a fun little bit, but not involved. The plate was spray painted brass before the wood grain sticker was applied then cut away. The buttons were all removed and sprayed with a metallic black (the D-pad was ground down to a cross first).
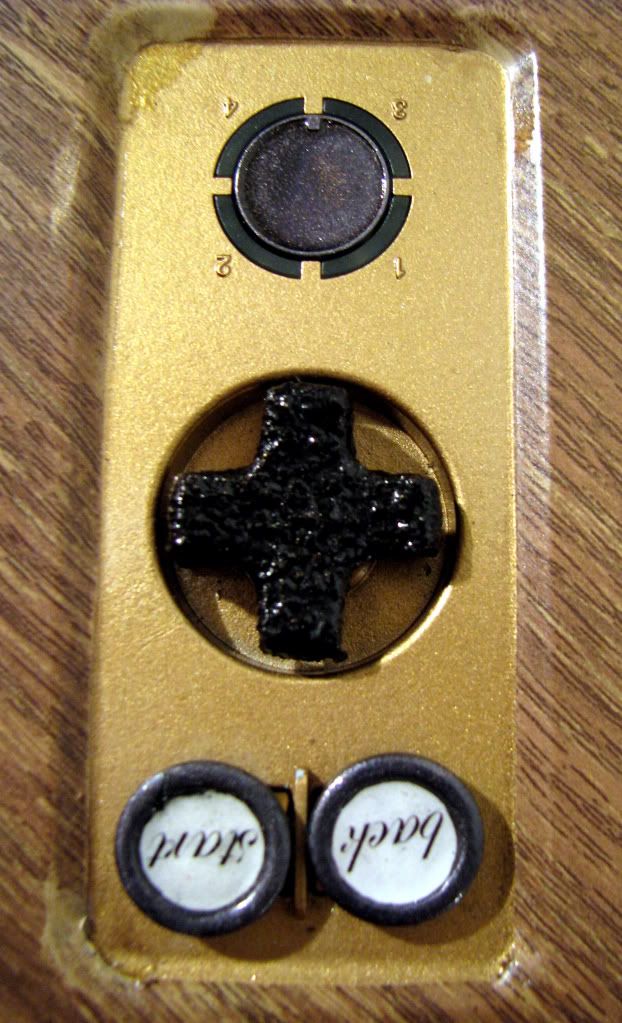
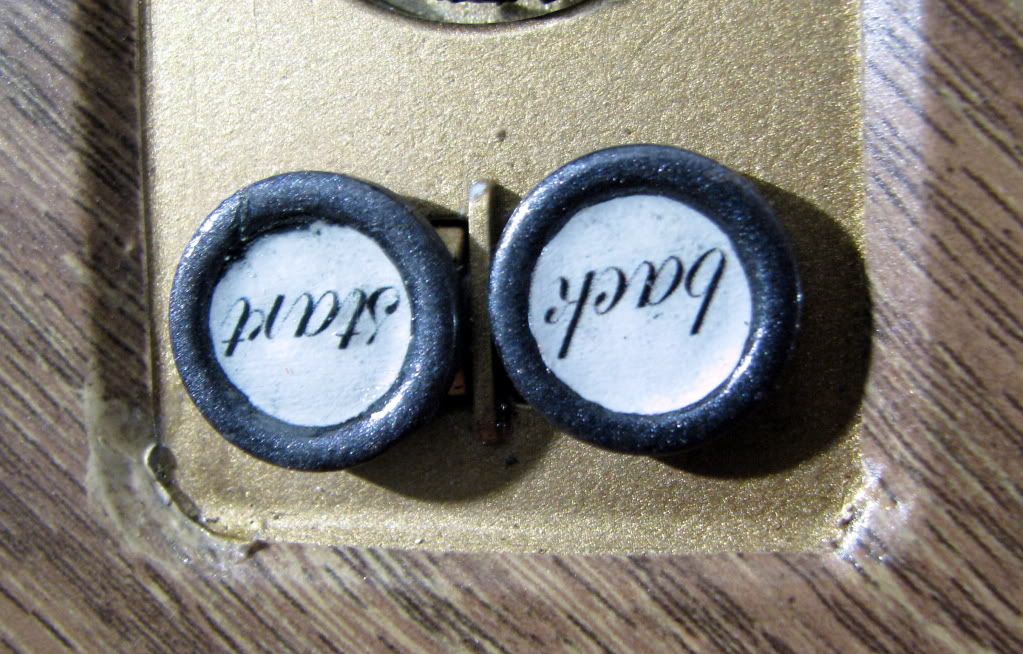
The Start and Back keys are old shirt buttons with printed labels applied, then a coat of brush-on varnish to finish the look. I keep meaning to add something cool where the X Box logo used to be, but so far nothing has jumped in front of me.
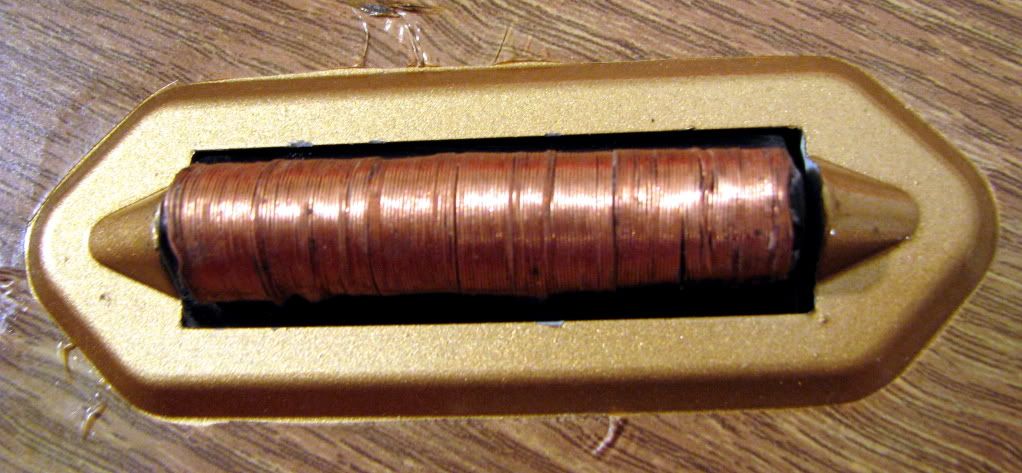
The strum bar was a total pain in the ass, and went through three versions, each one a desperate attempt to salvage the morbid failure of the previous design. I’m happy with the final version, but if I’d planned on making it like this from the start I could have gotten a much tighter coil on the copper wire. Oh, well, live and learn.
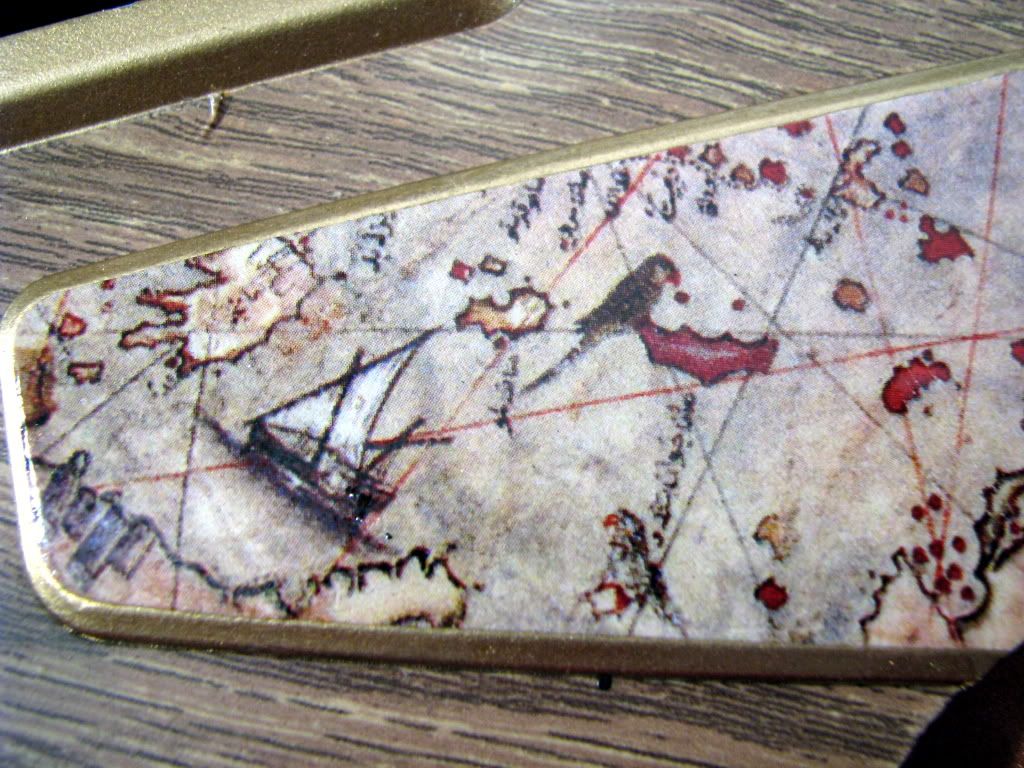
The pic guard is one of my favorite elements of this design. The old guard was removed and cut to match the line of the exposed steam tank, then both parts were spray painted brass. I picked a small section of the Perry Reese world map, printed it out, and fit an interesting bit of coastline onto the pic guard. I cut it to shape so that the beveled edges of the guard would still be exposed, then glued it down. After that was dry I gave it several coats of brush-on varnish.
The whammy bar didn’t need very much, and I didn’t want to replace the bar itself, but it definitely needed something, so it got this little Bakugan, glued into a ball and painted brass, silver, and copper.
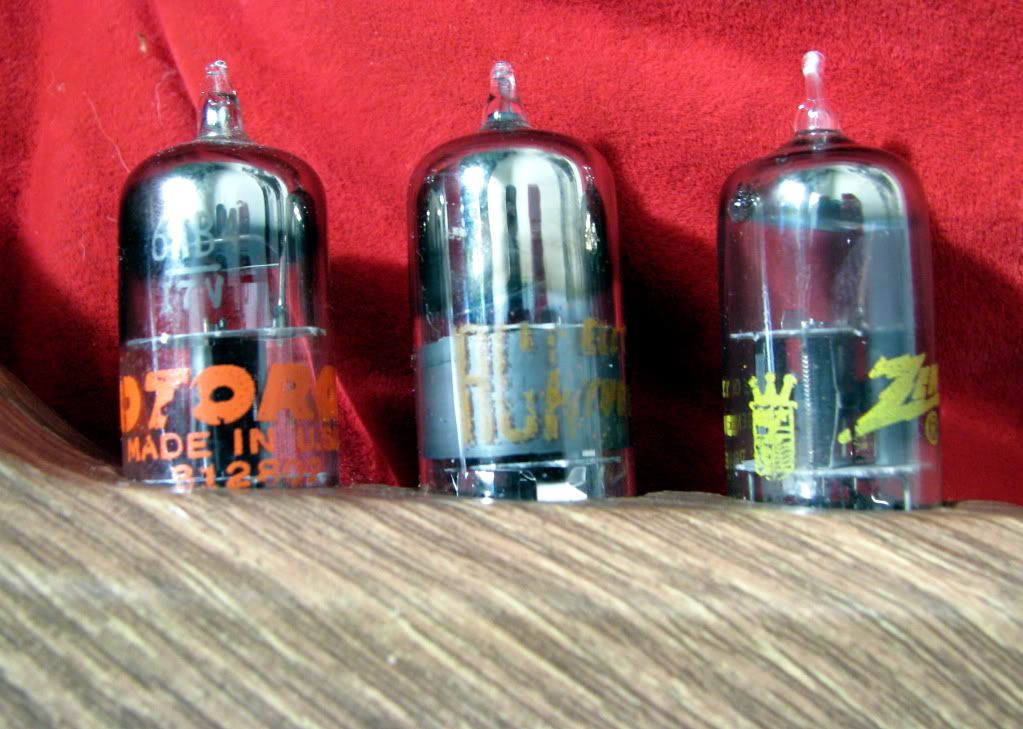
The vacuum tubes across the top don’t do anything, but they sure look sharp! I went through my box of spares and picked out pieces with different internal structures and recognizable logos (in this care Motorola, RCA, and Zenith.). I cut holes for them in both sides of the controller, and glued old pen body tubes inside to help support them. After assembling the guitar, I worked 2-part epoxy onto just one side of the holes (important to be tidy here, else you’ll glue the controller shut) and stuck them in.
So, she’s a pretty face, but can she play? Well, yes, in a loose fashion. OK, that’s not really fair. She plays just fine, in the sense that all the buttons still work and everything. And the padding on the fret buttons is an actual improvement over the original, they feel much tighter now. But… I lost a piece. Somewhere along the way, I lost a grommet that held one end of the strum bar firmly in place. The mounting rod still goes through the strum bar, and fits tightly at one end, just not at the other. It still makes the proper contacts and everything – one friend actually claims to prefer this new, looser strum bar style – but personally I don’t care for it at all. In fact, the loose strum bar is a big part of why the Xplorer is my least favorite controller for actually playing Guitar Hero. The lost grommet is something of a disappointment, as this is even worse than factory standard, but hay. Shit happens.
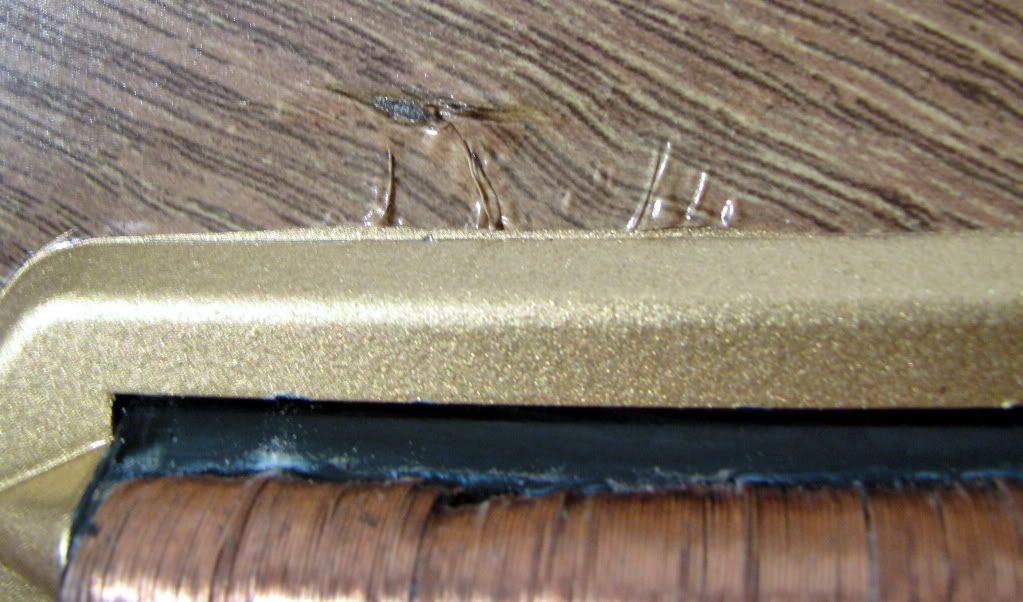
As with any project, there are things you take away from them and things you’d have done better. Not misplacing that strum bar grommet tops the list, and since I killed on Nerf gun in a similar manner I’m obviously going to need to work harder to not loose things when taking stuff apart. It would be nice if the wood grain laid down a bit flatter at the corner tips, but I’m not sure what I can do about that. Keep practicing, I guess. The strum bar and fret buttons both look good, but I feel like they could have come out better, especially the copper coil on the strum bar. If I’d intended to do it like I ended up doing it, it would have been a bit better. But that’s just art, or so my real artist friends tell me.


2 comments:
Hey I have seen that guitar before...
dear god man, I never knew you were so awesome.
(This is Eileen btw, Will H's ex?)
Post a Comment