I’ve been saving the best for last.
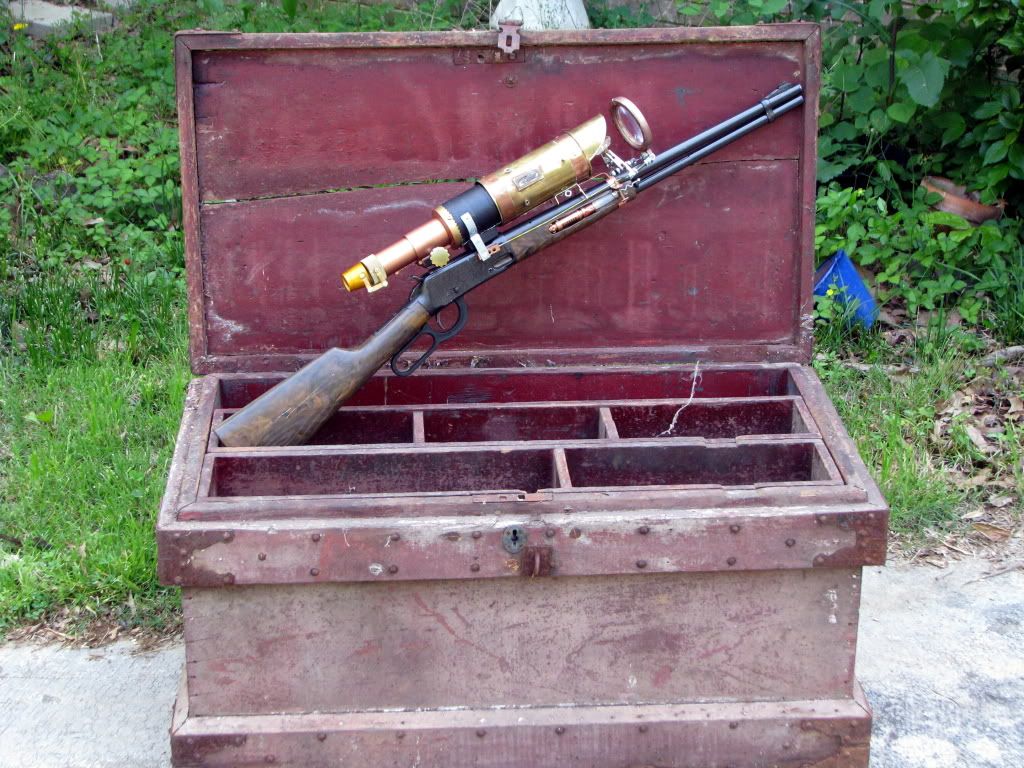
Out of this first batch of 1:1 scale releases from the workshop, I started this one first and finished it last. It was the most fun, uses the most “real stuff,” (that being actual metal and such, not plastic crap painted to look like metal), almost kinda sorta pretends to work, looks the best… I really like this one. In fact, I liked it so much that I failed to let her go… originally, like the Guitar Hero controller, my plan was to knock this out quick and give it to a friend to get him all excited about this crap. But then it grew, both on me and my work bench, until I just couldn’t give it up. So now it’s mine, all mine, precious. And I’ll have to find some other way to motivate him. Maybe I’ll let him build a forge out in my barn.
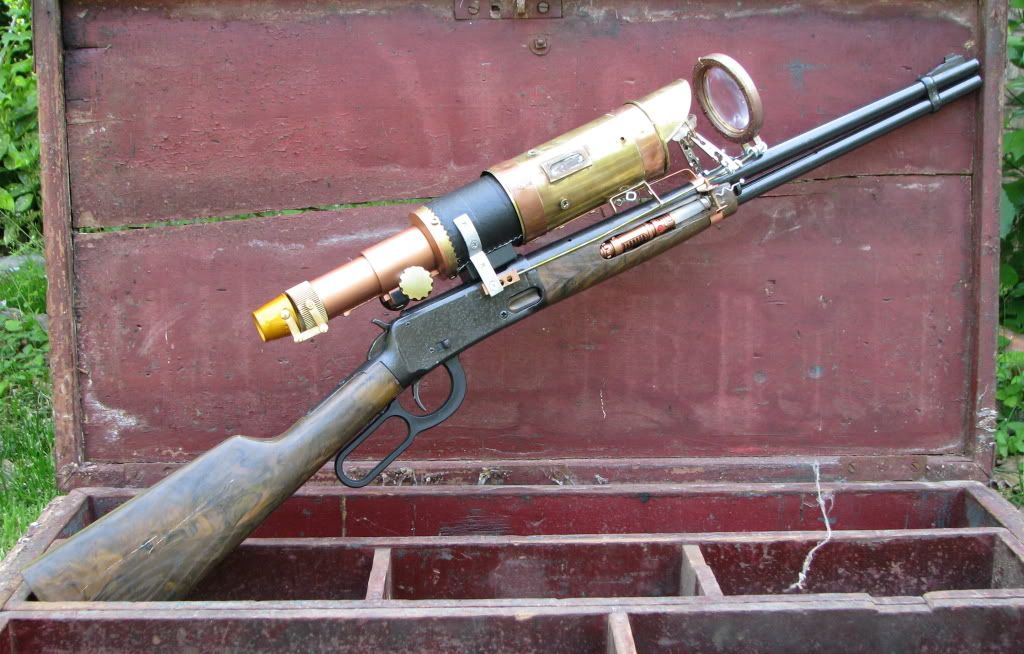
Obviously inspired by Doc Brown’s wacky rifle scope in
Back to the Future III, which I can’t actually find a picture of at the moment, the initial parts for this thing just seemed to fall together. The rifle is an old
Daisy BB gun – I don’t think they even make these things any more. This one had already stopped firing by the time it came to me. The action still works, the trigger pulls, and it feels like air is getting released somewhere, but it’s been a long, long time since anyone even had the chance to shoot their eye out with this rifle. On the off chance that I come across another one of these classic, mom-hated toys I made the scope completely removable. Since I was working on the thing, anyway, I gave the metal parts a quick paint job. Looking back, I’m not entirely happy with the paint I choose (the color is pretty close to the original, but I tried one of the “hammered texture” paints and sort of wish I hadn’t) but hay, thems the breaks.
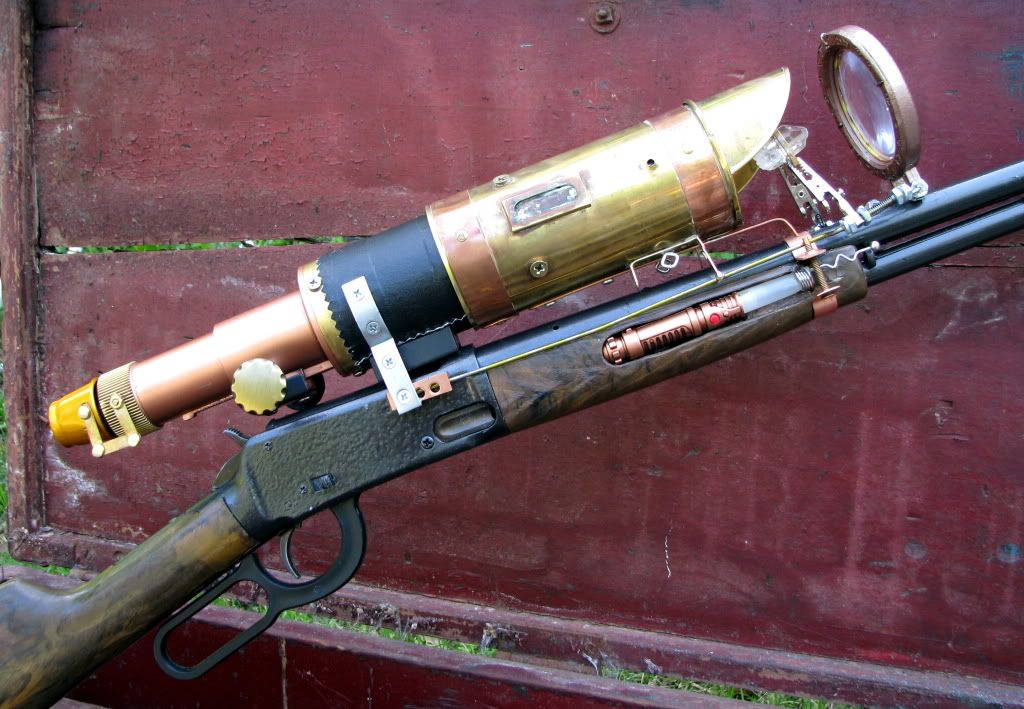
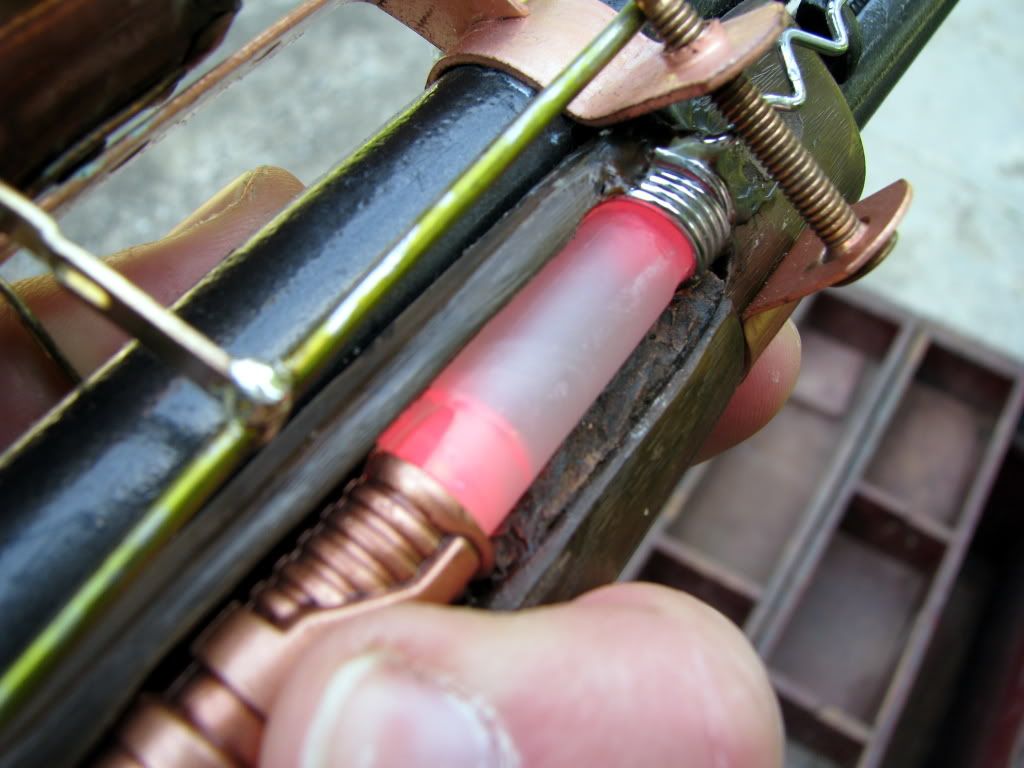
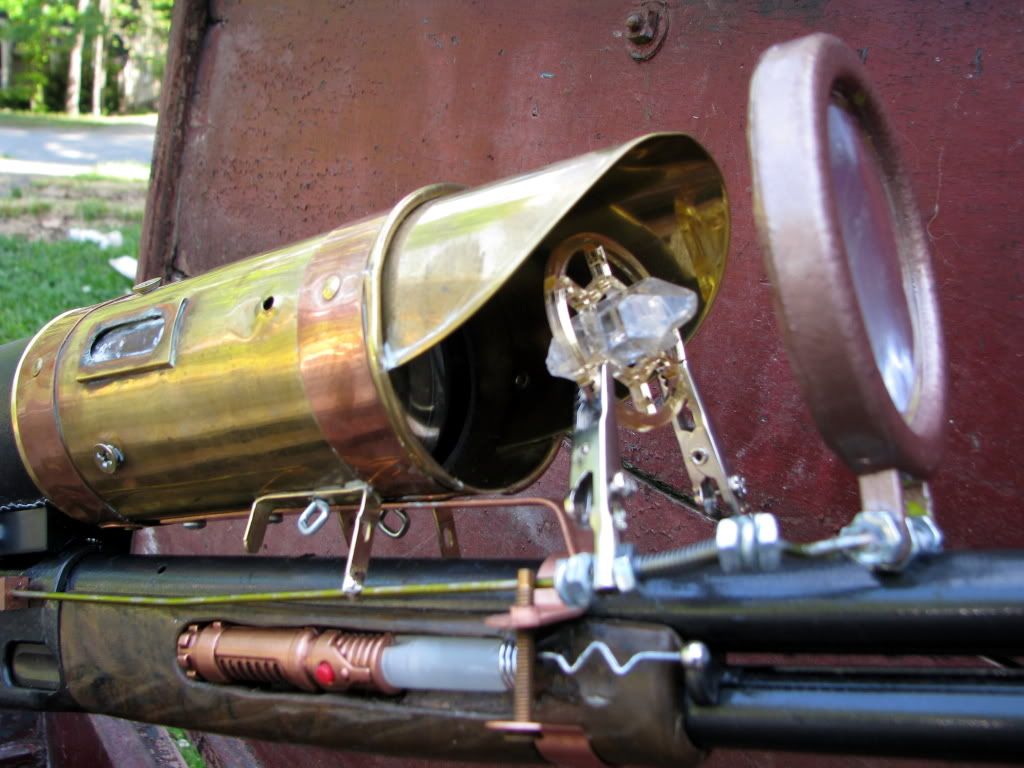
I did add one little detail to the rifle itself. Conceptually, I’ve always liked the idea of more-or-less conventional fire arms with outlandish optics and crazy specialty ammo, and that’s what I’m gunning for here. To that end, the only thing I changed in the rifle itself was to add just a dash of the anachronistic to the fore grips. This would be a reasonable place to add things on a real, working gun… and the plastic front grip was slightly cracked anyway. So I dug out an old light saber spoon included in a box of cereal at the time of Phantom Menace’s (http://www.starwars.com/movies/episode-i/ ) release. Don’t fret, collectors – I’ve got a few more spoons stashed away in mint condition. What’s this little glowing thing supposed to do, you ask? Clearly, my good reader, you’ve limited experience in hunting the less-than-visible creatures lurking between this world and the next!
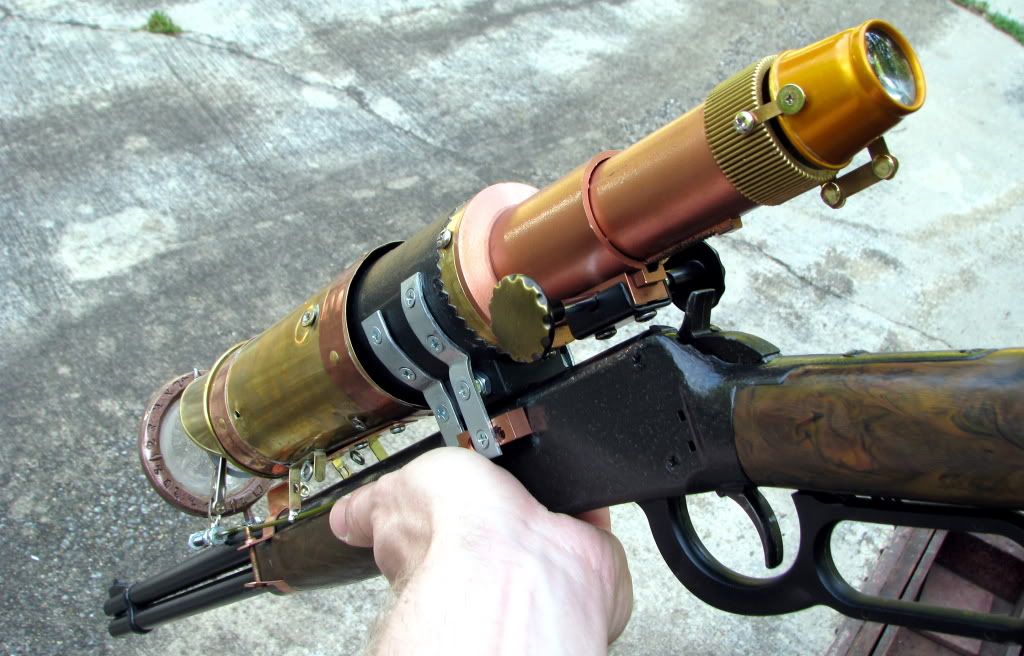
The two main parts for the scope are the rear end of an actual telescope and a brass match stick holder, both picked up at the thrift store. I was holding onto the match stick holder, just because, and saw half a telescope sitting on a shelf. When I picked it up in my other hand, it just felt right to stick the two together. The rest is really all just mounts and dressing. I painted the telescope parts brass and copper to cover the original glittery silver, and wrapped a scrap of leather around the ugly spot where the labels used to be. I wish I’d gone with brown, rather than black, but all the scraps I had on hand at the time were ugly in some way or another, so black it is.
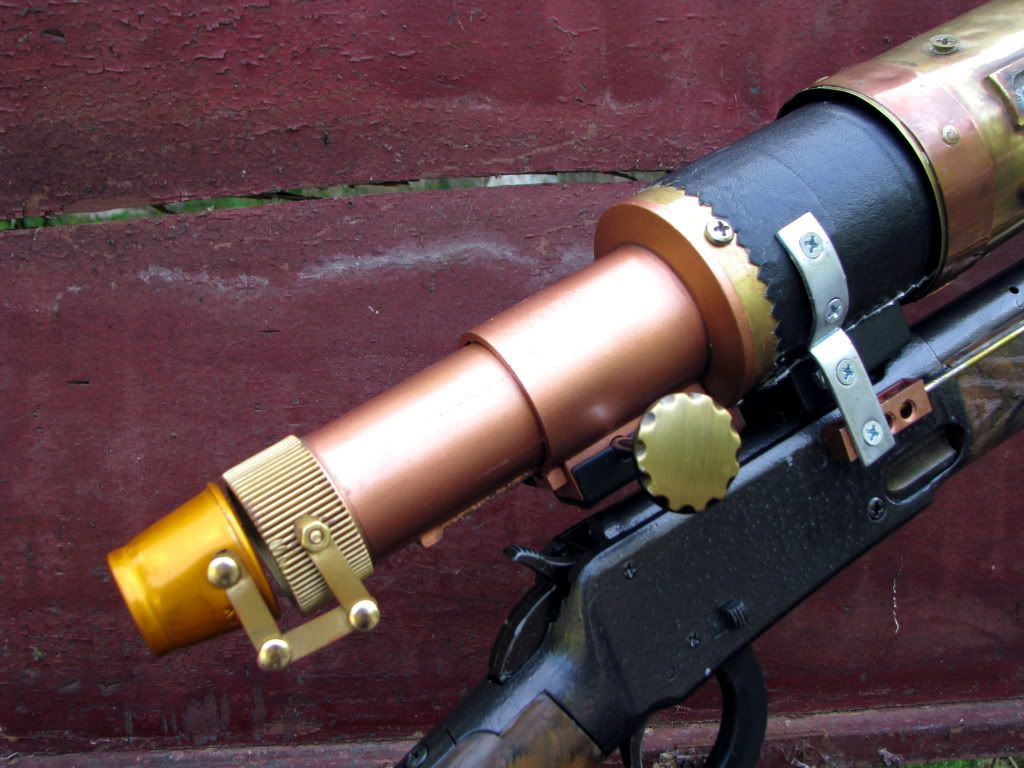
I replaced the plastic focusing knobs with brass drawer handles, but kept the working action so turning the knobs still moves the eye piece back and forth. I also added a small lense to the inner end of the rear most part of the eye piece. The telescope only had one lens left in it by the time I got it, and one lens just wasn’t gonna cut it! There is no proper optical relationship between these lenses, they don’t actually magnify anything, but you can at least tell that they are there.
Next came the big “out board” lens on the front of the scope. Its plastic, scavenged from a child’s bug keeper jar. It was also hollow on one side, so I filled it in with putty. This gave me a nice working area, and I couldn’t resist adding some characters from an old esoteric script I found in an old wicca book, along with a few spear tips taken from Lord of the Rings miniatures. Then I masked off the lens and spray painted it in a hammered finish copper. I’m reasonably happy with the way it looks (except for the bit where the lens got messed up by a bit of putty) but the optics on this thing are horrible, and rendered the scope optically non-functional. At least before you could see a small, upside down version of the world through the scope; now, nothing.
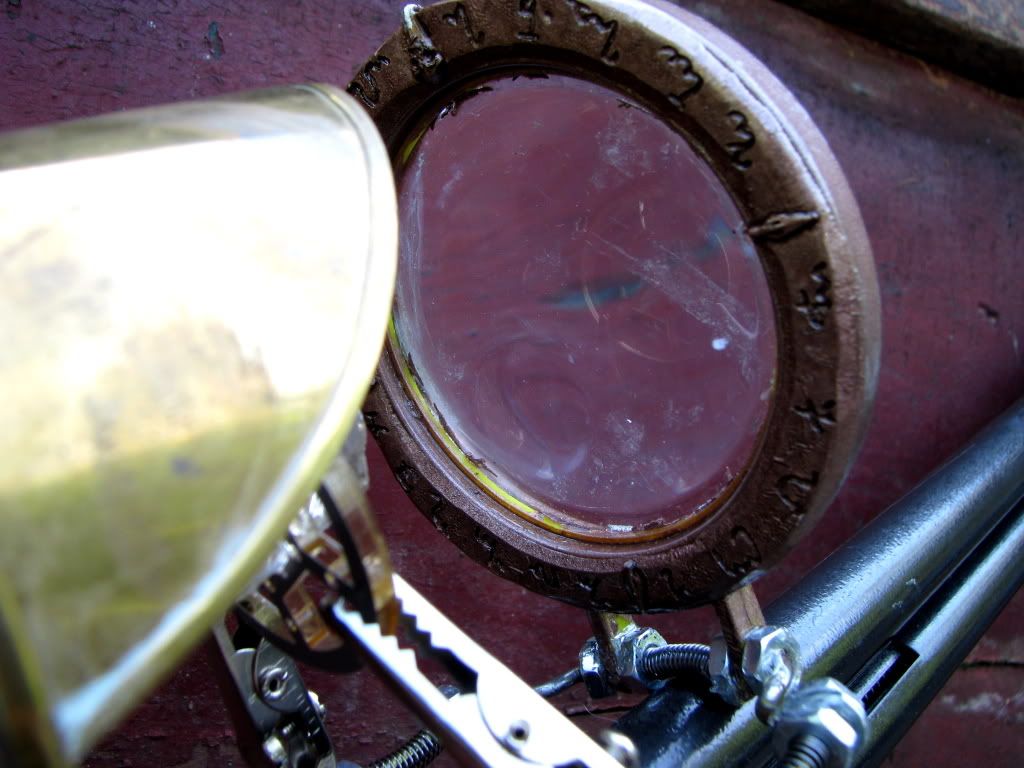
With all the major components in place, the real chore could begin – mounting the thing to the rifle. I really didn’t want to mount it in a permanent way, but I started this project before learning to solder and before I’d built up much of a collection of little metal bits. As a result, there is more steel and epoxy involved with the mounting rail than I’d really like. The rails themselves are copper wire cut from a coat hanger and bent into shape. A copper wire mount at the front and a few steel shelf brackets at the back hold the weight of the scope to the rifle, while the rails keep it all in balance and hold on the out board components, running right through the plastic around the out board lens. I used some copper-painted Legos to fix the back end of the rails to the scope, and later soldered them to the small supports in the middle. Springs and steel nuts and washers keep the alligator clips and out board lens from sliding about. At first it was just resting on the middle supports, with the copper rod under tension, but after I learned how I soldered it on at this point. The entire scope can be removed as a single assembly.
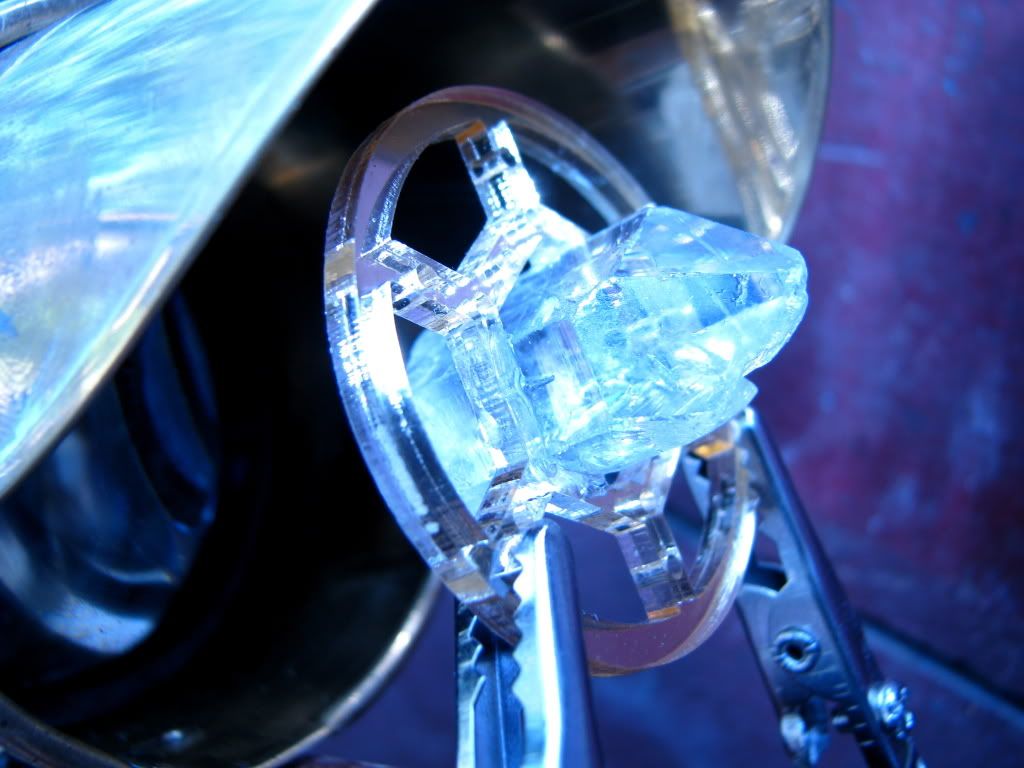
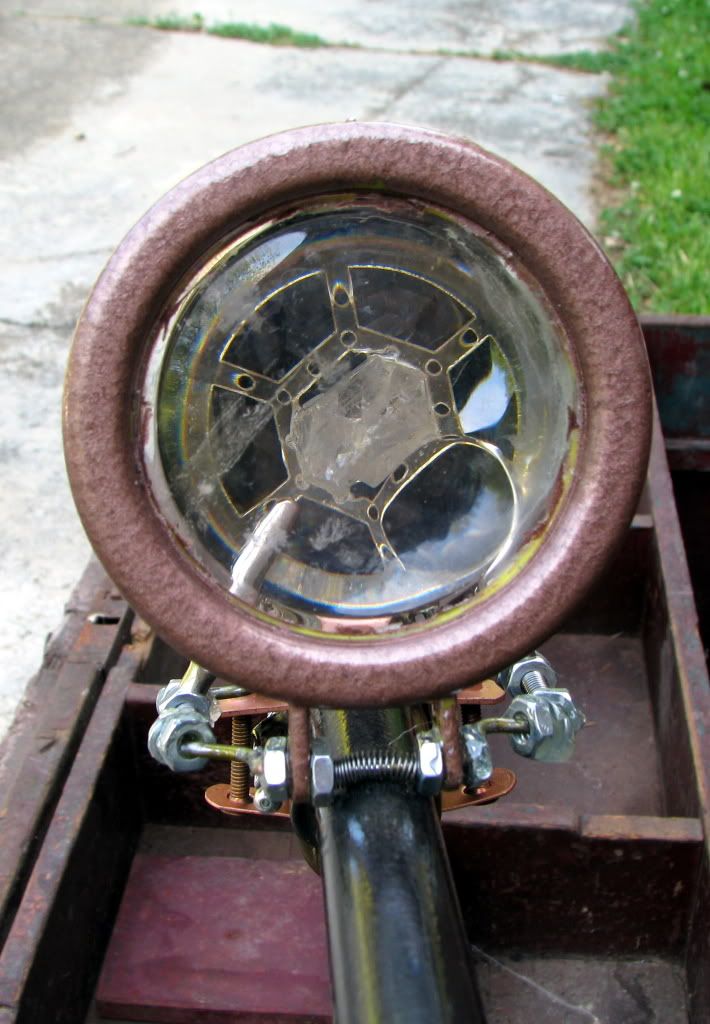
Even though the large, external crystal was part of the original concept it was one of the last details to be added. Not being one to spend a lot of time in hippy shops, it took me a while to find the right crystal. But eventually I found a few I liked at a convention and mounted them inside a part of goggle inserts. I used a Dremel tool to grind out the center of the inserts and then set the crystals in place with 2-part epoxy. The requirements for multiple focusing crystals should be obvious, considering the different etheric reflectivity properties expressed by the various eldritch horrors with which one might be forced to contend. Perhaps later I’ll make a pouch of some kind, to keep these and any other lenses handy.
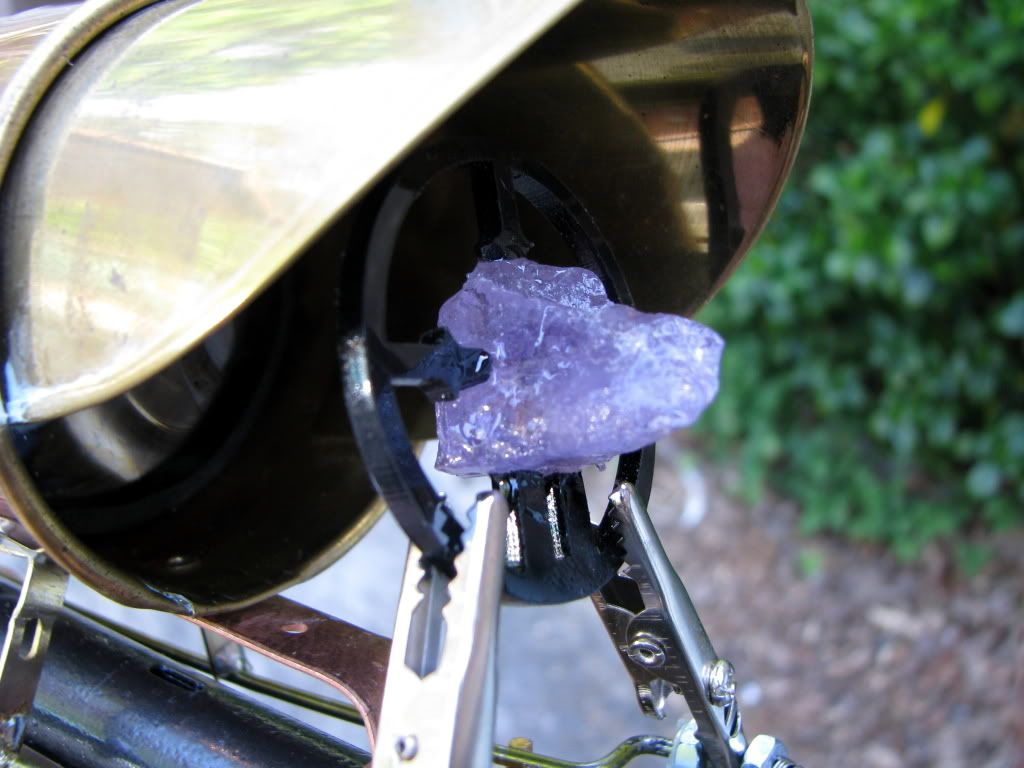
At this point I thought I was more or less done, but as I was sorting through a box of old bits I found that little brass eye piece I’d picked up and realized this was the project it had been waiting for. It seemed just the right size to stick on the back end of the scope, and its funky little mounting arm would sort of balance all the crazy out board action up front. So I put it on there, and took a look – and IT WORKED! By a serendipitous trick of the optics, that last little lens tied all the others (four lenses in total) together into something fun. No, you can’t use the scope to better view far off objects, that would be too mundane. But you can look at the pretty crystal. Hay, it’s better than the vague blur you used to see through it, and I’m sure this too has utility to the intrepid hunter of that which bumps the night. This picture is actually the view from the business end of the rifle -- the angle you really don't want to be looking from!
She still needs a decent sling to really be complete, but now that she’s done, I think I’ve found my character’s general use weapon. Anything bigger, like say a machine gun, would only be used on special occasions…